Tiling Bathroom Floor Around Toilet Flange

Related Images about Tiling Bathroom Floor Around Toilet Flange
Bathroom Remodel – Tiling Under An Exiting Toilet Flange – Remodeling – DIY Chatroom Home

Mosaic tiles add texture and color to the floor and stop slipping. Just before you even head to your area home improvement center, know the choice of ours to pick the best one for your home and the life of yours. When you are consuming bathroom vinyl, do not forget to experiment by mixing as well as matching. One of the most useful bathroom floor tiles ideas entails using concrete tiles.
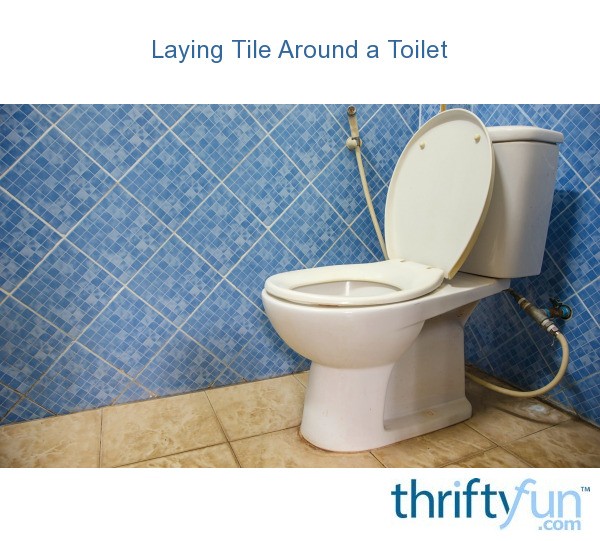
Laying Tile Around a Toilet ThriftyFun
If you are considering undertaking bathroom remodeling, make sure you choose the right contractor to encourage you about the best flooring choices for your bathroom. The bathroom is an area in which you can go to unwind, and you want it to be a comfortable and relaxing environment. Cork flooring provides the bathroom of yours an alternative texture.
How To Install A Toilet Flange On Tile – Toilet Reviewer
Nevertheless, in case you're looking to buy a complete bathroom renovation, you should give the flooring some attention, it adds much more to the actual design of your bathroom than you recognize. Most bathroom layouts are certainly not perfectly square which could lead to challenges when attempting to install the flooring yourself.
How to Install a Toilet Flange in New Construction Easy 2 Different Procedure – Shower Park
Tiling Around Toilet – Tiling, ceramics, marble – DIY Chatroom Home Improvement Forum

Toilet Flange "too Tall" – Plumbing – DIY Home Improvement DIYChatroom

Toilet Flange Tile Guide – Barracuda Brackets

How to Install a Toilet Toilet flanges, Bathroom redesign, Tile floor

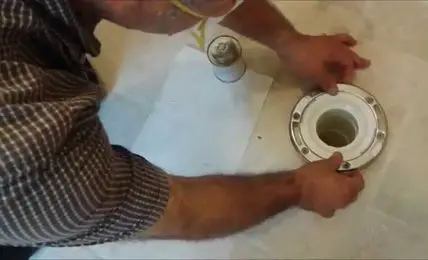
How To Install Toilet Flange On Tile Floor After Tiling Step by Step – YouTube

Pin on Bathroom

Can You Pour Concrete Under a Toilet Flange? Bathroom
How to Install Ceramic Tile Around a Toilet Flange DoItYourself.com

Bathroom remodel, unlevel toilet flange – Ceramic Tile Advice Forums – John Bridge Ceramic Tile
How to Install a Toilet in a Basement with a Rough In Pipe – Toilet Reviewer
Related Posts:
- Bathroom Floor Tiles Price
- Cement Tile For Bathroom Floor
- Bathroom Floor Sky Painting
- Caught Me On The Bathroom Floor
- Heated Tile Floor Cost Per Square Foot
- Dirty Bathroom Floor
- Replace Bathroom Floor And Subfloor
- How To Make Bathroom Floor Waterproof
- Easy Bathroom Flooring Options
- Cheap Bathroom Floor Cabinets
Tiling Bathroom Floor Around Toilet Flange: A Comprehensive Guide
Introduction:
When it comes to renovating a bathroom, one of the essential aspects is tiling the floor. However, tiling around the toilet flange can be a bit tricky and requires careful planning and execution. In this article, we will provide you with a detailed guide on how to tile the bathroom floor around the toilet flange, ensuring a seamless and professional finish.
I. Understanding the Toilet Flange:
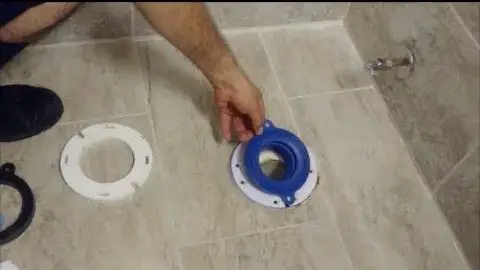
Before diving into the tiling process, it is crucial to have a clear understanding of what a toilet flange is and its purpose. The toilet flange is a pipe fitting that connects the toilet bowl to the sewer pipe and provides stability to the toilet. It is usually made of PVC or cast iron and is secured to the floor using screws or bolts.
II. Preparation:
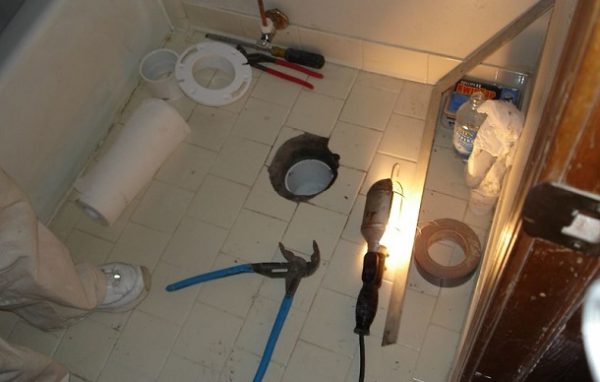
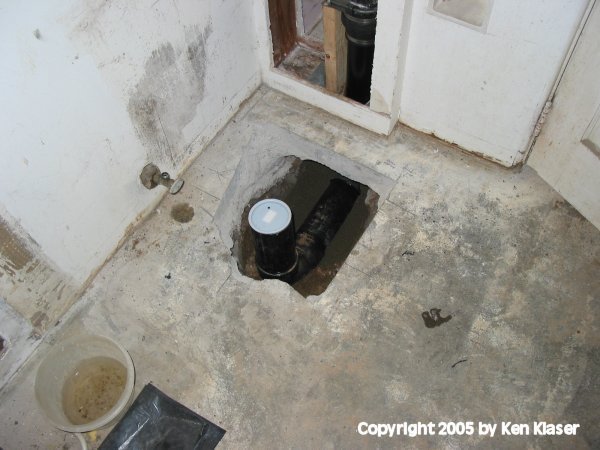
1. Remove the existing flooring: Start by removing any existing flooring material from the bathroom floor. This could be vinyl tiles, linoleum, or even old ceramic tiles. Use a scraper or chisel to carefully pry up the flooring without damaging the subfloor.
2. Inspect the subfloor: Once you have removed the old flooring, inspect the subfloor for any damage or rotting. It is crucial to have a solid and level subfloor before tiling. If you notice any issues, such as water damage or weak spots, make sure to repair them before proceeding.
3. Measure and mark: Measure the distance from the center of the toilet flange to each wall in order to determine where your tiles should start. Use a chalk line or straightedge to mark these points on the subfloor.
III. Cutting Tiles:
1. Dry fit tiles: Before cutting any tiles, dry fit them in place around the toilet flange to ensure they fit properly and there are no gaps or overlaps. This step will help you determine if any adjustments need to be made before permanently installing the tiles.
2. Cut the tiles: Using a tile cutter or wet saw, carefully cut the tiles to fit around the toilet flange. Start by making straight cuts along the marked lines, and then use tile nippers or a hole saw to create a circular cutout for the flange. Take your time and ensure that the cuts are precise for a professional finish.
3. Test the fit: After cutting the tiles, place them back in position to check their fit around the toilet flange. Make any necessary adjustments by trimming the edges or enlarging the circular cutout until they fit perfectly.
IV. Installing Tiles:
1. Apply adhesive: Begin by applying a thin layer of tile adhesive to the subfloor using a notched trowel. Work in small sections to ensure that the adhesive does not dry out before laying the tiles.
2. Lay the tiles: Start laying the tiles from one of the marked points, working your way towards the toilet flange. Press each tile firmly into the adhesive, ensuring they are level and aligned with adjacent tiles. Use tile spacers to maintain consistent spacing between tiles.
3. Cut and install edge tiles: As you approach walls or other obstacles, you will need to cut tiles to fit into smaller spaces. Measure and mark these tiles before cutting them to size using a tile cutter or wet saw. Apply adhesive and install them in place, maintaining a neat and uniform appearance.
4. Grout the tiles: Once all the tiles have been installed and adhesive has dried according to manufacturer instructions , it is time to grout the tiles. Mix the grout according to the manufacturer’s instructions and apply it to the spaces between the tiles using a grout float. Work in small sections and remove any excess grout with a damp sponge. Allow the grout to dry for the recommended amount of time before proceeding.
5. Clean and seal: After the grout has dried, clean the tiles with a damp sponge to remove any remaining residue or haze. Once the tiles are clean and dry, apply a tile sealer to protect them from stains and water damage. Follow the manufacturer’s instructions for application and drying time.
6. Reinstall toilet: Finally, reinstall the toilet by carefully aligning it with the flange and pressing it down firmly onto the wax ring. Secure the toilet in place with the bolts provided and reconnect the water supply line.
7. Finishing touches: Once the toilet is securely in place, make sure all edges and corners are clean and free of excess adhesive or grout. Use a silicone caulk to seal any gaps between the floor tiles and walls or baseboards for a finished look.
8. Enjoy your new tiled bathroom floor! Take some time to admire your hard work and enjoy your newly renovated bathroom. Congratulations on completing your tiled bathroom floor! The last step is to take some time to admire your hard work and enjoy your newly renovated bathroom. Here are a few final tips and reminders:
1. Keep the area clean: Regularly clean your tiled floor with a mild cleaner to maintain its appearance and prevent dirt or stains from settling into the grout lines.
2. Be cautious with heavy objects: Avoid dragging heavy furniture or appliances across the tiles, as this can scratch or damage them. Use furniture pads or lift and carry heavy objects instead.
3. Address any issues promptly: If you notice any loose tiles, cracked grout, or water damage, address these issues as soon as possible to prevent further damage. Replace any damaged tiles or reapply grout as needed.
4. Consider using rugs or mats: Place rugs or mats in high-traffic areas or near sinks and showers to protect the tiles from excess moisture and wear.
5. Regularly inspect the sealant: Check the sealant around the edges of the floor periodically to ensure it is intact and providing a barrier against water penetration. Reapply sealant if necessary.
6. Enjoy your new space: Take some time to relax and appreciate your newly tiled bathroom floor. It’s a beautiful addition to your home that you can enjoy for years to come.
Remember, if you have any questions or concerns during the installation process or after completion, don’t hesitate to seek professional assistance. Enjoy your new tiled bathroom floor!