Tile Around Basement Floor Drain
Related Images about Tile Around Basement Floor Drain
Basement drain tile, fabric or not? : HomeImprovement

If you are living in high humidity areas, linoleum or vinyl flooring is a great choice. Right now there are sealants on the marketplace such as PermaFlex which provide done, long lasting basement floor waterproofing. Today, you will discover even unusual basement flooring alternatives to choose from like bamboo or soundproof mats. You can get the epoxy paint in different colors.
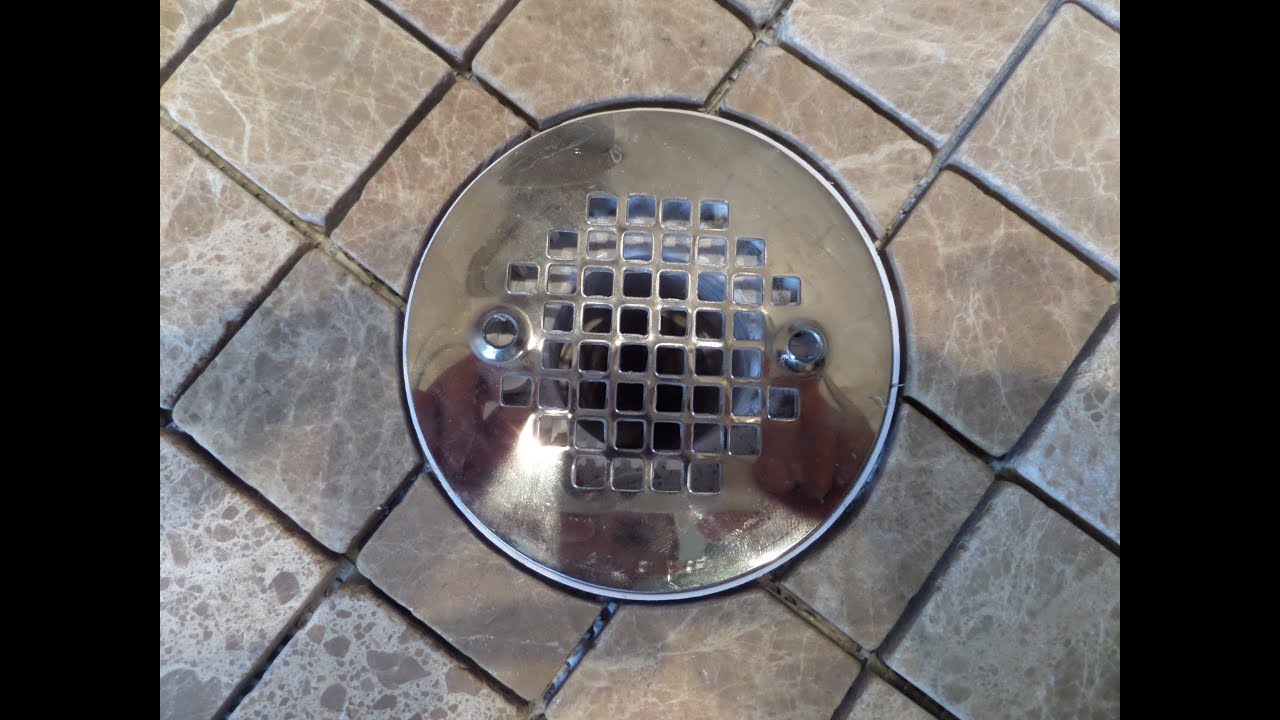
Part(1) How to measure, cut & install tile in circular shape around shower floor drain flange
Because of the different options nowadays in flooring options, just remember that the basement flooring of yours does not need to look old fashioned & uninviting. Business grade carpet tiles can be utilized to develop unique looks on a room as well as area. Precisely why have an area in your home that isn't used very much.
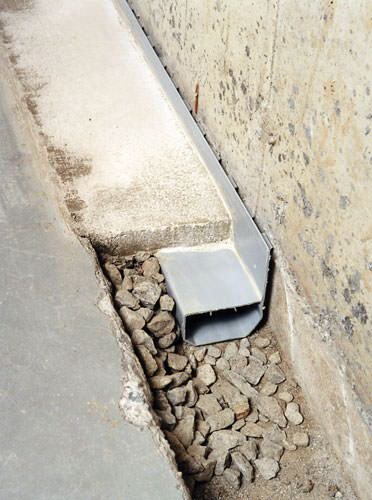
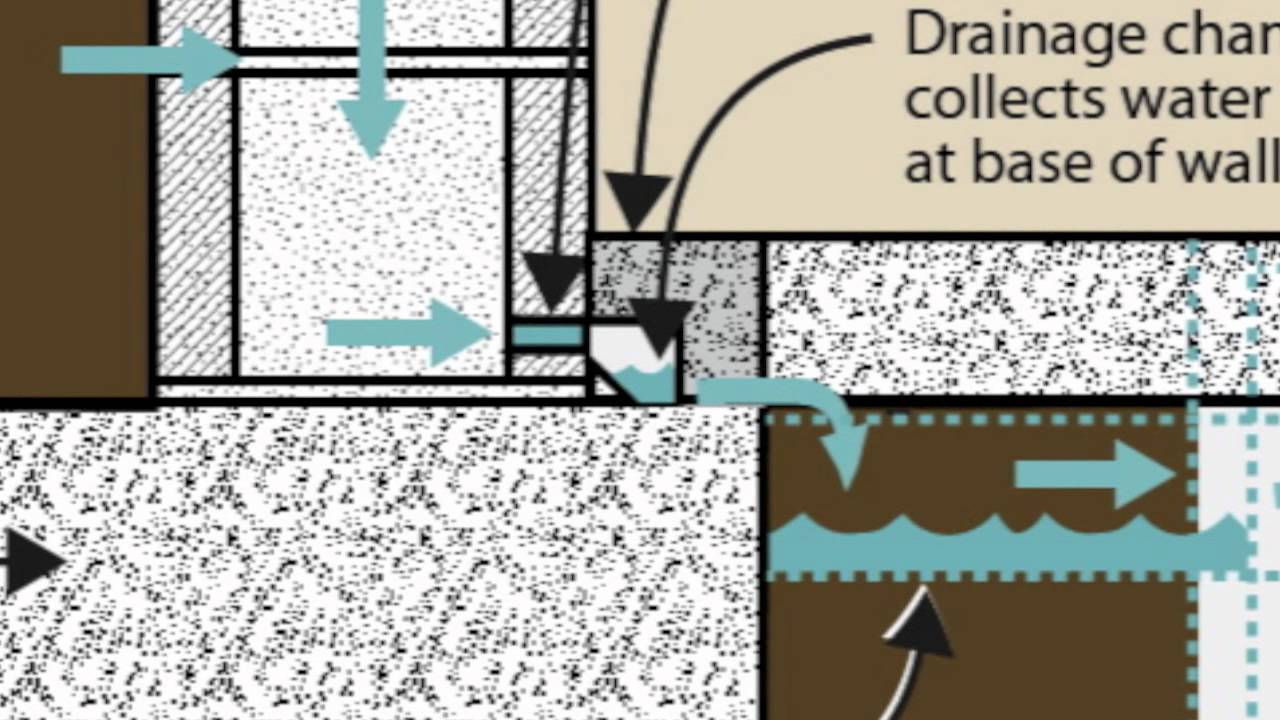
French Drain Installations in Markham, Vaughan, Mississauga WaterGuard® Sub-Floor Drain System
In a number of cases, you will also have a decision about the color of chips, and the amount of chips of the coating. It has even better compared to epoxy floor coating; It's four times stronger plus more durable. Hence, it's vital that you waterproof your home, like the basement.
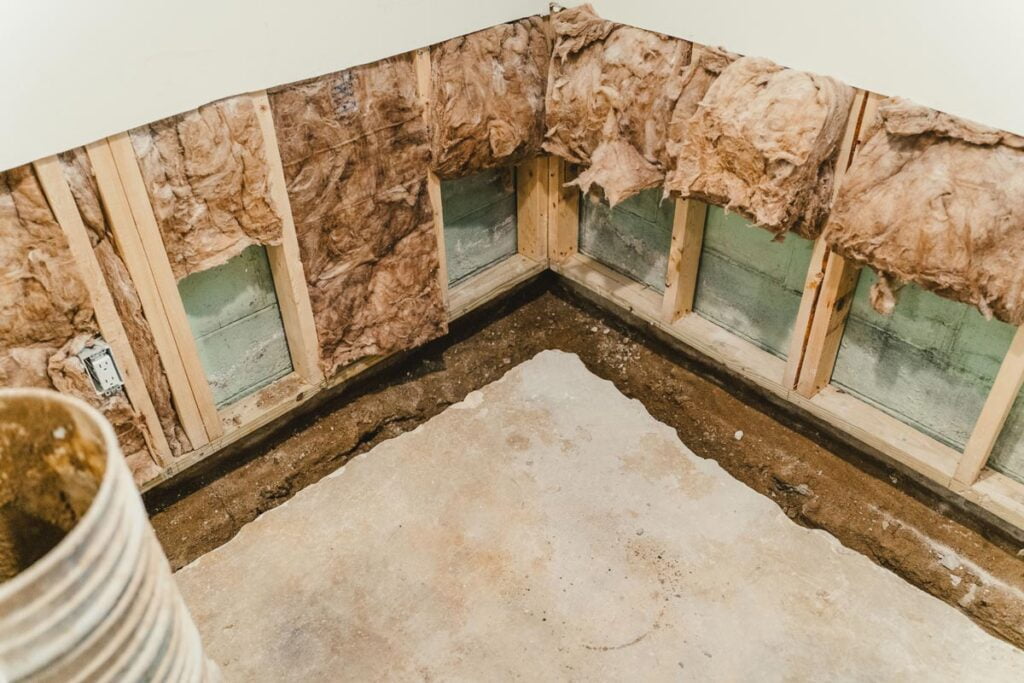
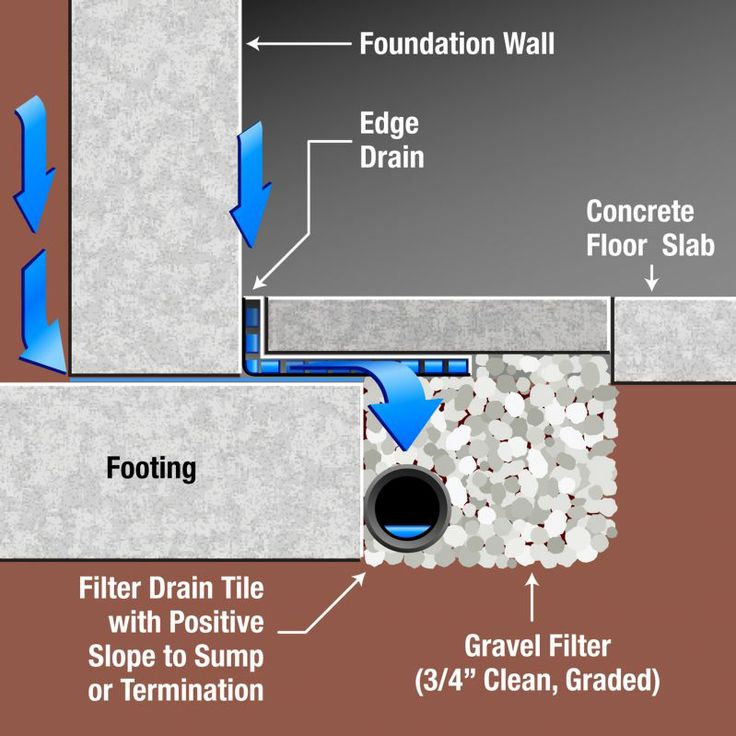
Basement Waterproofing (Drain Tile) – American Foundation Repair

All County Landscaping
Interior Weeping Tile Perimeter Drainage Systems – AquaGuard Injection & Waterproofing®

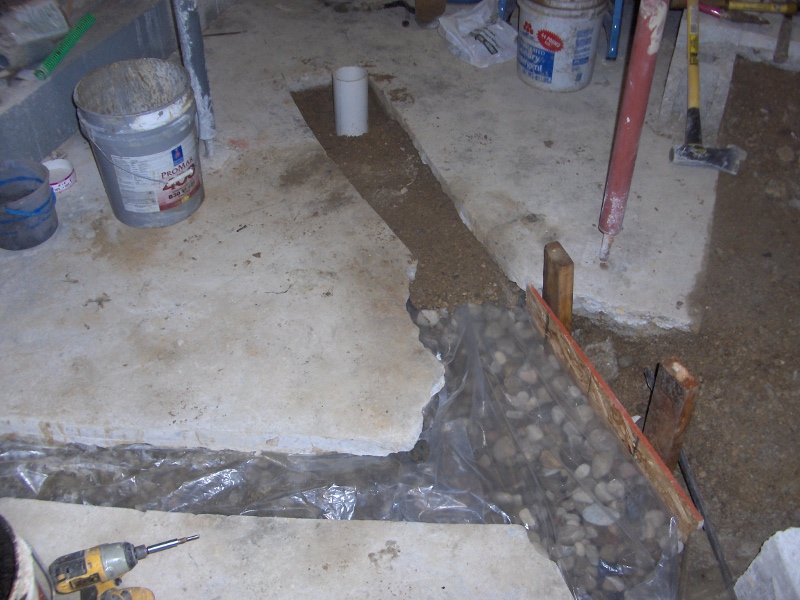
Adding interior drain tile to a basement – Page 2 – EcoRenovator
How To Finish Tile Floor Around Drain Hole – Tiling, ceramics, marble – DIY Chatroom Home

Basement Waterproofing New Lenox IL Basement Seepage Experts
Protect Your Home From Basement Flooding – Drainage/Flooding – Water and Waste – City of Winnipeg

Basement Drain Tile System – YouTube

Why Interior Drain Tile for Basement Waterproofing? Doovi
Modify a Floor Drain to Prevent Flooding
Basement Interior Drain Tile – How to Convert a Basement Homebuilding & Renovating

Related Posts:
- Lower Basement Floor With Bench Footings
- Good Paint For Basement Floor
- Ranch Floor Plans With Finished Basement
- Easy Basement Flooring Ideas
- Cracks In Concrete Basement Floor
- Concrete Floor Above Basement
- What To Put Under Laminate Flooring In Basement
- Floor Plans With Basement Finish
- Laminate Basement Flooring Options
- Drain In Basement Floor Has Water In It
Title: Tile Around Basement Floor Drain: A Comprehensive Guide to Enhancing Functionality and Aesthetics
Introduction:
The basement floor drain plays a crucial role in preventing water damage and maintaining the overall integrity of your home’s foundation. However, incorporating tiles around this drain requires careful consideration to ensure functionality and an aesthetically pleasing finish. In this article, we will delve into the process of tiling around a basement floor drain, addressing important considerations, step-by-step instructions, frequently asked questions, and expert tips.
I. Understanding the Importance of Tiling Around Basement Floor Drains
– The significance of a basement floor drain in preventing water accumulation.
– How properly tiled floors contribute to water drainage efficiency.
– The benefits of enhancing the aesthetics through tile selection.
FAQs:
Q1: Why should I consider tiling around my basement floor drain?
A1: Tiling around your basement floor drain helps in maintaining a clean and visually appealing space while ensuring efficient water drainage. It also adds value to your property.
Q2: Can I leave the area around the basement floor drain untiled?
A2: While it is possible to leave the area around the drain untiled, doing so can result in water pooling, damage to flooring materials, and a less polished appearance.
II. Preparing for Tiling
1. Clearing the area:
– Remove any obstructions or debris around the floor drain.
– Ensure that the drain is clean and functioning properly.
– Consider installing a backwater valve to prevent sewer backups.
2. Selecting suitable tiles:
– Choose tiles that are durable, water-resistant, and easy to maintain.
– Opt for non-slip tiles with adequate texture for safety purposes.
– Consider coordinating tile colors with your overall basement theme.
3. Gathering essential tools and materials:
– Tile cutter or wet saw for cutting tiles accurately.
– Notched trowel for applying mortar or adhesive.
– Grout float for filling gaps between tiles.
– Tile spacers to ensure uniform spacing.
III. Tiling Process
1. Preparing the subfloor:
– Ensure that the subfloor is clean, dry, and level.
– Repair any cracks or imperfections before tiling.
2. Applying mortar or adhesive:
– Follow the manufacturer’s instructions for mixing and applying mortar or adhesive.
– Use a notched trowel to create even ridges for better adhesion.
3. Setting the tiles:
– Start by placing full tiles along one edge of the floor, working towards the drain.
– Use tile spacers to maintain consistent spacing between tiles.
– Cut tiles as needed to fit irregular spaces using a tile cutter or wet saw.
4. Grouting:
– Once the tiles are set and the mortar has cured, remove tile spacers.
– Apply grout using a grout float, ensuring all gaps between tiles are filled.
– Wipe away excess grout with a damp sponge, being careful not to dislodge tiles.
5. Sealing the grout:
– Allow the grout to dry fully before applying a grout sealer.
– Follow the manufacturer’s instructions for sealing to protect against stains and water damage.
IV. Maintenance and Care
1. Regular cleaning:
– Sweep or vacuum regularly to remove dirt and debris.
– Mop with a mild detergent solution and warm water as necessary.
2. Inspecting for damage:
– Periodically check for loose or cracked tiles near the drain area.
– Repair any damages promptly to Maintain the integrity and appearance of the tiled floor.
3. Avoiding harsh chemicals:
– Use non-abrasive cleaners and avoid harsh chemicals that can damage the tiles or grout.
– Test any new cleaning products in a small, inconspicuous area before applying them to the entire floor.
4. Preventing water damage:
– Avoid leaving standing water on the tiled floor, especially around the drain area.
– Wipe up spills promptly to prevent water from seeping into the grout or damaging the tiles.
By following these steps, you can successfully tile an area around a floor drain and ensure its durability and longevity. Some additional tips for tiling around a floor drain:
1. Use waterproofing membrane: Before applying mortar or adhesive, consider applying a waterproofing membrane to the subfloor. This will provide an extra layer of protection against water damage.
2. Choose the right tile: Select tiles that are suitable for wet areas and have a low absorption rate. Porcelain or ceramic tiles are often good choices for bathroom floors.
3. Use a leveling system: If you want to ensure a perfectly level and flat floor, consider using a tile leveling system. These systems use clips and wedges to hold tiles in place until the mortar sets, resulting in a smooth and even surface.
4. Plan the layout carefully: Before starting the tiling process, plan out the layout of the tiles. Take into consideration any obstacles, such as the drain, and make sure the tiles will fit properly without the need for excessive cutting or awkwardly shaped pieces.
5. Allow for expansion joints: When tiling around a floor drain, it’s important to leave space for expansion joints. These gaps allow the tiles to expand and contract with temperature changes without cracking or buckling.
6. Follow safety precautions: When using a wet saw or other cutting tools, always wear safety goggles and gloves to protect yourself from flying debris. Additionally, make sure to handle any chemicals or cleaning products with caution and follow all safety instructions.
By following these additional tips, you can ensure a successful tiling project around a floor drain that will withstand daily use and moisture exposure.