Stain Garage Floor Yourself

Related Images about Stain Garage Floor Yourself
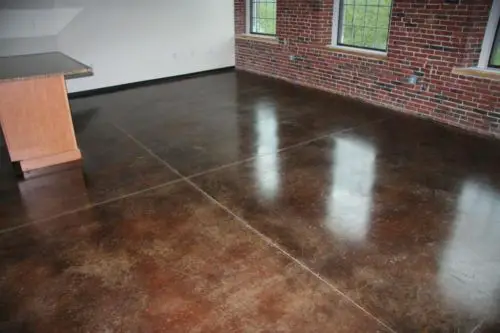
Staining Concrete Floors – 4 Steps To Stain a Concrete Floor
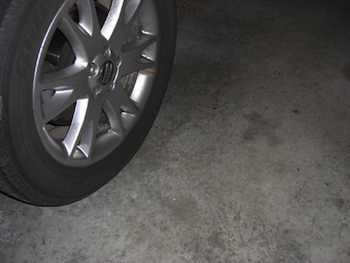
Although covering the garage floor is not a priority for a lot of, the value of it's nevertheless good. Vinyl or even concrete spots may quickly and easily fill some holes greater than ¼" in diameter. And in comparison with floor tiles, garage area mats are actually the much cheaper option. This could serve to not only keep the feet warm, but cover up some cracked flooring too.
Acid Stain Home Floor Midlothian, TX – ESR Decorative Concrete Experts
Some might cost you money, and many may not, but the majority of them most likely have a thing to do with improving the looks or usability of your house. Make sure you search around at your local home improvement centers to determine what alternatives can be found. So you've worked out what garage flooring you intend to buy, and it's now time to choose the particular tiles.
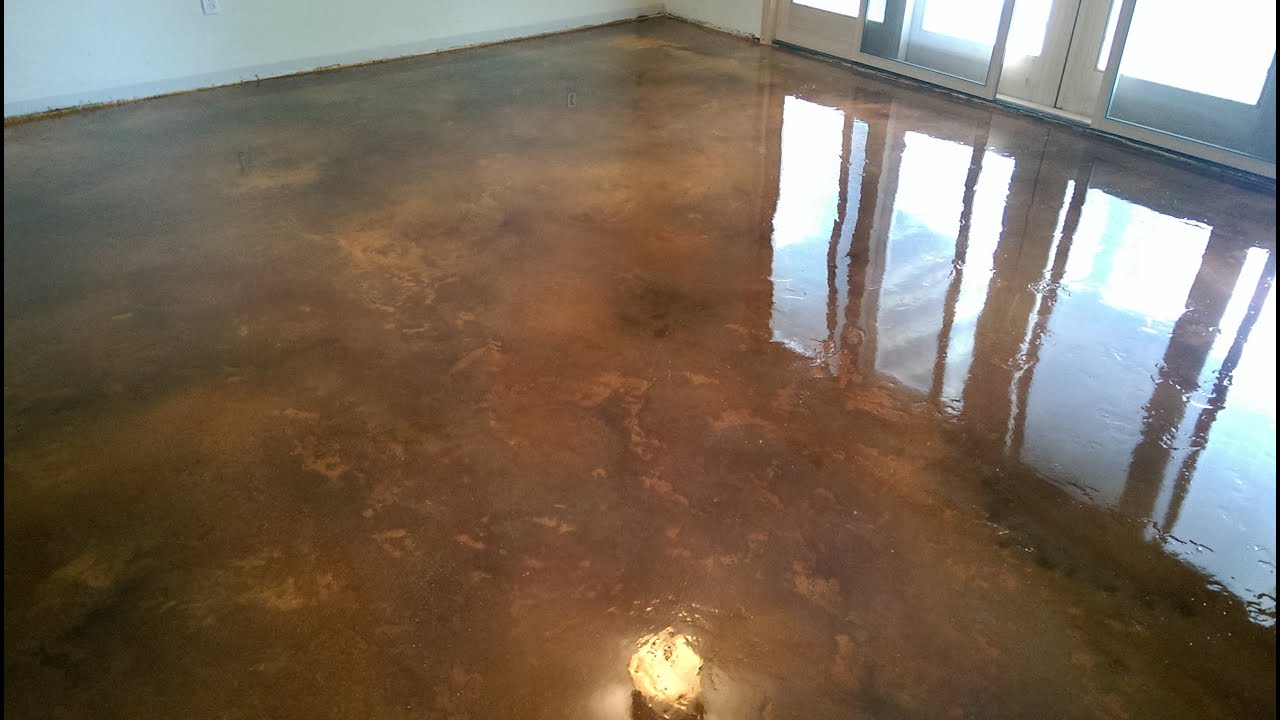
Acid Stain Concrete Basement Floor w/Epoxy Seal Coat Lake of the Ozarks MO – YouTube
Applied by a professional, the labor costs coming from $5-1dolar1 fifteen and hour on top of supplies. Of course this's simply on the list of many pattern tips you can use and integrate into your garage floor coatings tasks. You should do this before beginning any measures to using your new garage floor paint. Paints and stains are perhaps the cheapest DIY flooring alternative.
Finishing the garage floor protects it from degrading Calgary Herald

Recommendations For Finishing Garage Floor? – Flooring – DIY Chatroom Home Improvement Forum

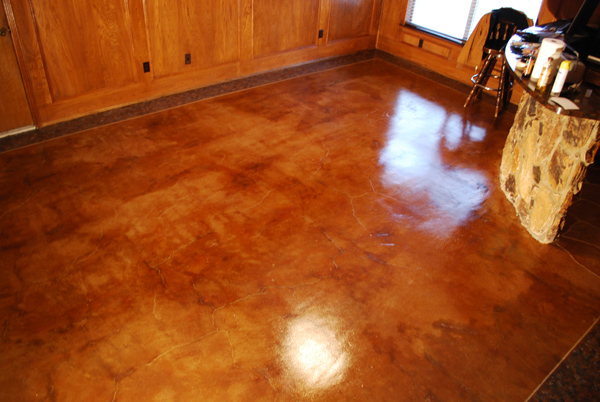
Stain – Vegas Decorative Concrete Staining concrete
How to Acid Stain Concrete Floors • The Prairie Homestead

Home Improvement – Getting the Most Out of Your Garage Flooring Garages
16 best Garage Flooring images on Pinterest Garage flooring, Epoxy floor and Flats

The 4 Best Choices for Garage Floor Finishes
/184104391-56a343d95f9b58b7d0d12c3e.jpg)
The 4 Best Choices for Garage Floor Finishes
:max_bytes(150000):strip_icc()/Wetconcrete-GettyImages-172412946-59839933c412440010979d93.jpg)
A Durable Garage Floor Finish – Fine Homebuilding

A Durable Garage Floor Finish – Fine Homebuilding
Garage Floor Epoxy DIY Blain’s Farm & Fleet Blog

Related Posts:
- Valspar Garage Floor
- Self Levelling Garage Floor Paint
- Valspar Epoxy Garage Floor Paint
- Garage Floor With Flakes
- Garage Floor Sealer Vs Epoxy
- Bondall Garage Floor Paint Review
- How To Polish Concrete Garage Floor
- Garage Floor Paint Do It Yourself
- Drymate Garage Floor Mat Review
- Modular Interlocking Garage Floor Tiles
Staining a Garage Floor: Transform Your Space with a DIY Project
Introduction:
Your garage floor can often be an overlooked part of your home, yet it plays a vital role in the overall aesthetics and functionality of your garage. If you’re tired of looking at that dull, uninspiring concrete floor, staining it yourself can be a rewarding and cost-effective way to transform your space. In this comprehensive guide, we will walk you through the step-by-step process of staining your garage floor, provide helpful tips and tricks, and answer frequently asked questions to ensure your project is a success.
I. Preparing Your Garage Floor:
Before diving into the staining process, it’s crucial to properly prepare your garage floor. This step ensures that the stain adheres well and creates a smooth, professional-looking finish.
1. Clearing the Space:
Remove all items from your garage floor, including vehicles, tools, and any other objects that may hinder your progress. Sweep away any loose debris using a broom or leaf blower to create a clean canvas for staining.
2. Cleaning the Surface:
Next, thoroughly clean the garage floor to remove any dirt, oil stains, or other substances that could interfere with the staining process. Start by scrubbing the surface with a degreaser or detergent mixed with warm water using a stiff-bristle brush or push broom. Rinse off the cleaning solution with a hose or pressure washer until the water runs clear.
FAQs:
Q1: Can I use just soap and water to clean my garage floor?
A1: While soap and water can remove some surface dirt, it’s recommended to use a degreaser specifically formulated for concrete floors to eliminate stubborn stains and oil residue effectively.
Q2: How long should I let my garage floor dry after cleaning?
A2: Allow your garage floor to dry completely before proceeding with the staining process. Depending on weather conditions and ventilation, this typically takes around 24 to 48 hours.
II. Repairing and Patching:
Once your garage floor is clean and dry, it’s time to address any cracks, pits, or other imperfections that may be present. Repairing these issues ensures a smooth, even surface for the stain to adhere to.
1. Filling Cracks and Pits:
Using a concrete patching compound or epoxy filler, carefully fill in any visible cracks or pits in your garage floor. Smooth out the mixture with a trowel or putty knife, ensuring it is level with the surrounding surface. Allow the patching compound to cure according to the manufacturer’s instructions before proceeding.
FAQs:
Q1: Can I use regular cement to fill cracks in my garage floor?
A1: Regular cement may not provide sufficient adhesion and durability when used as a crack filler. It’s recommended to use a concrete patching compound or epoxy filler specifically designed for repairing concrete surfaces.
Q2: How long does the patching compound take to cure?
A2: The curing time varies depending on the product you use. Typically, it can take anywhere from a few hours to several days. Refer to the manufacturer’s instructions for specific drying times.
III. Etching the Surface:
Etching is an essential step in the staining process as it opens up the pores of the concrete, allowing better penetration of the stain. This step is particularly crucial if you’re working with a smooth or sealed garage floor.
1. Choosing an Etching Solution:
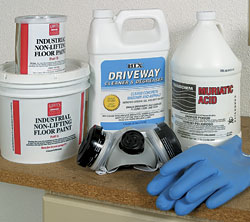
Select an appropriate etching solution based on The type of stain you’ll be using and the condition of your garage floor. There are various commercial etching solutions available, or you can make your own using a mixture of water and muriatic acid. Be sure to follow the manufacturer’s instructions or the recommended ratios for homemade solutions.
2. Applying the Etching Solution:
Wearing protective gloves, goggles, and clothing, carefully apply the etching solution to the garage floor using a sprayer or a watering can. Spread it evenly across the surface, making sure to cover all areas. Allow the solution to sit for the recommended amount of time specified by the manufacturer.
3. Scrubbing and Rinsing:
Using a stiff-bristle brush or a push broom, scrub the garage floor thoroughly to ensure even etching. Pay extra attention to any stubborn stains or areas that require more intensive cleaning. Once you’ve scrubbed the entire surface, rinse off the etching solution with a hose or pressure washer until the water runs clear.
FAQs:
Q1: Can I skip the etching step if my garage floor is already rough?
A1: Even if your garage floor has a rough texture, it’s still recommended to etch it before staining. Etching opens up the pores of the concrete, allowing better adhesion and penetration of the stain.
Q2: Is muriatic acid safe to use for etching?
A2: Muriatic acid is a strong and corrosive substance that should be handled with extreme caution. It’s important to follow safety guidelines and wear appropriate protective gear when using this acid. If you’re uncomfortable working with muriatic acid, consider using a commercial etching solution instead.