Removing Cork Floor Tiles

Related Images about Removing Cork Floor Tiles
Removing Floor Tiles Including Cork Tiles and Quarry Tiles DIY Doctor
These two cork based flooring methods are made to be fitted over a proper sub floor, while the floating flooring can go more than several existing floors such as vinyl, ceramic, hardwood, etc. These can assist you evaluate the requirements of yours and get the right sort of flooring for your office or home so that it can look good and last for decades.
How to Install Cork Floor Tiles
In case you thought we had been done with the upsides of cork flooring then you're sadly mistaken. You have to understand that APC Cork manufacture 3 specific cork solutions, two flooring along with one underlayment; they actually do have various other non-cork solutions such as trim adhesives and finishes. High-density cork is stronger than low density cork. Cork floors are good for health.
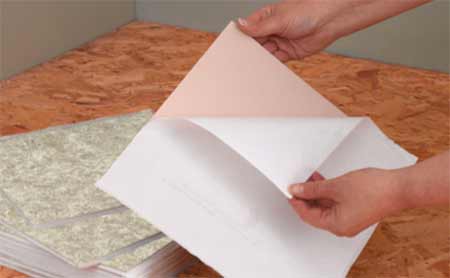
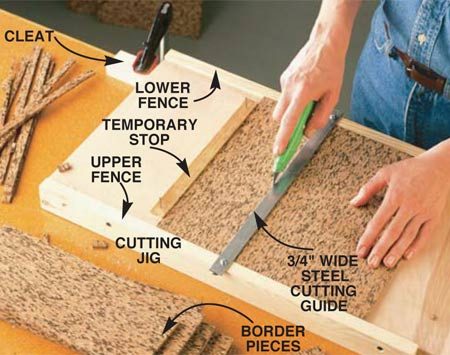
How to Install Cork Tile Flooring The Family Handyman
If you stand on a cork floors with high heels, the floor will make a dent or an impression. Cork floor surfaces are made from cork components cork. The tiny air pockets reduce heat loss as well as help retain it that is certainly a very helpful function in frigid environments. Commercial producers of cork just remove a thin level from the trunk of the tree, leaving the cork oak tree intact.
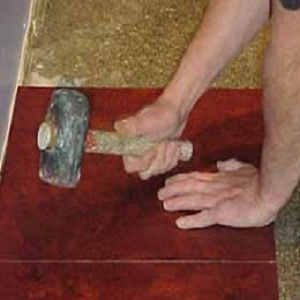
How to Install Cork Tile Flooring The Family Handyman
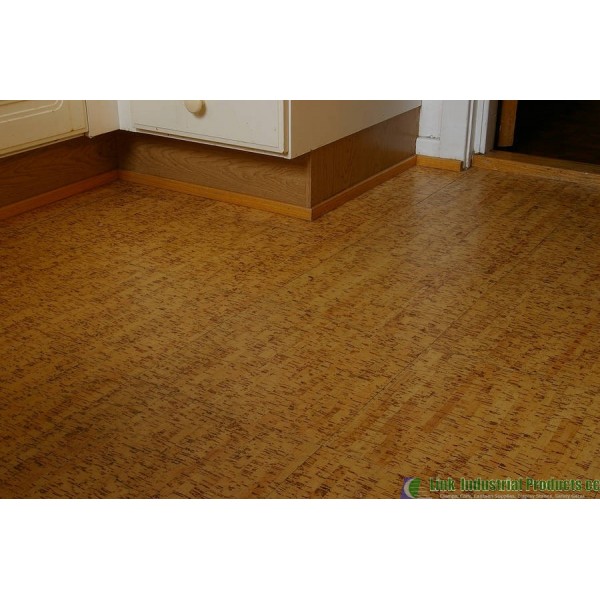
cork floor tiles – Link Industrial Products
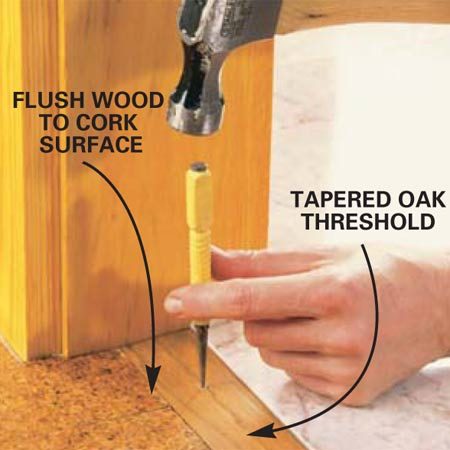
How to Install Cork Tile Flooring The Family Handyman

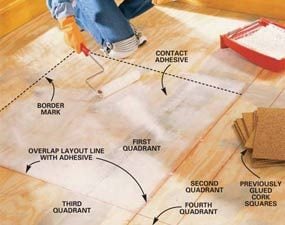
How to Install Cork Tile Flooring The Family Handyman
Removing Floor Tiles Including Cork Tiles and Quarry Tiles DIY Doctor
Why Cork Flooring is an Ideal Choice for Custom Wine Cellars

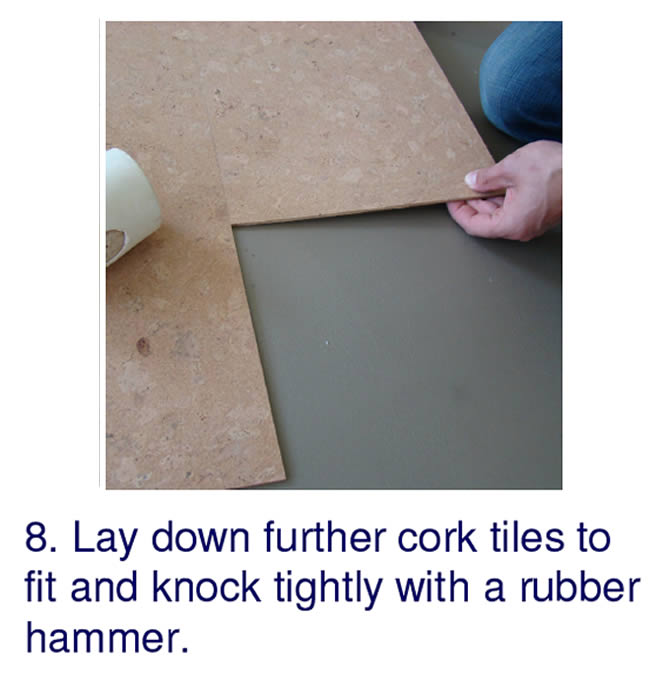
Instructions To Install Cork Tile Step 8 Cancork Floor Inc.
Removing Mortar from Concrete Slab Floor: A Practical Guide

Floor Tile Removal Hire Better Rentals Melbourne

Ceramic Tile Over Vinyl Flooring On Concrete – VINYL FLOORING ONLINE
Tips On Removing Cat Urine From Carpet Floor Central

Related Posts:
- Cork Floor Paste Wax
- Cutting Cork Flooring Planks
- Cork Flooring Cons and Pros
- Basement Flooring Ideas Cork
- Cork Floor Cost Comparison
- Can You Stain Cork Floors
- Cork Flooring Per Square Foot
- Can Cork Flooring Be Installed Over Ceramic Tile
- Refinish Cork Floor Tiles
- Cork Floor Tiles Reviews
Removing Cork Floor Tiles: A Comprehensive Guide
Introduction:
Cork flooring has gained popularity over the years due to its eco-friendly nature, durability, and natural beauty. However, there may come a time when you need to remove cork floor tiles. Whether it’s because you want to replace them with new tiles or switch to a different type of flooring altogether, knowing how to remove cork floor tiles properly is essential. In this comprehensive guide, we will take you through the step-by-step process of removing cork floor tiles, providing detailed instructions under each sub-heading.
I. Preparing for Cork Tile Removal:
Before diving into the actual removal process, it is crucial to prepare your space and gather the necessary tools and materials. Follow these steps:
1. Clear the Area:
Start by removing any furniture or obstacles from the room where the cork tiles are installed. This will provide you with ample space to work and prevent any damage to your belongings during the removal process.
2. Gather Tools and Materials:
To successfully remove cork floor tiles, you will need specific tools and materials. Here’s a list of what you’ll need:
– Pry bar or crowbar: These tools will help in lifting the tiles from the floor.
– Utility knife: A sharp utility knife is essential for cutting through adhesive or grout lines.
– Safety goggles and gloves: Protect your eyes and hands while working with sharp objects.
– Dust mask: Wearing a dust mask will prevent inhalation of dust particles.
– Drop cloth or tarp: Place a drop cloth or tarp on nearby surfaces to catch debris and protect them from damage.
– Plastic bags: Use plastic bags to dispose of the removed tiles.
II. Removing Cork Floor Tiles:
Now that you have prepared your space and gathered all the necessary tools and materials, it’s time to start removing the cork floor tiles.
1. Start at an Edge:
Begin by locating an edge of the cork floor tile. Insert the pry bar or crowbar underneath the edge and gently lift it up. Apply steady pressure to detach the tile from the floor. If necessary, use a utility knife to cut through any adhesive or grout lines holding the tile in place.
2. Work in Sections:
Once you have successfully removed the first tile, continue working in sections. Move along the edges of adjacent tiles, repeating the same lifting and cutting process until you have cleared an area large enough to work comfortably.
3. Remove Adhesive Residue:
After removing all the cork floor tiles, you may find adhesive residue still attached to the subfloor. Use a putty knife or scraper to remove as much adhesive as possible. Be cautious not to damage the subfloor while scraping.
4. Clean and Prepare Subfloor:
Once all the adhesive residue has been removed, thoroughly clean the subfloor using a vacuum cleaner and a damp cloth. Ensure that no debris or particles are left behind before proceeding with your new flooring installation.
III. Frequently Asked Questions:
1. Can I reuse cork floor tiles after removal?
While it is possible to reuse cork floor tiles after removal, it can be challenging due to potential damage during the removal process. Additionally, if the tiles were glued down with strong adhesive, it may be difficult to remove them without causing significant harm.
2. How long does it take to remove cork floor tiles?
The time required to remove cork floor tiles depends on various factors such as the size of the area being worked on, the condition of the tiles, and your experience level With tile removal. On average, it can take several hours to a full day to remove cork floor tiles from a room.
3. Do I need professional help to remove cork floor tiles?
While it is possible to remove cork floor tiles on your own, it may be beneficial to seek professional help, especially if you are inexperienced or if the tiles are difficult to remove. Professionals have the necessary tools and expertise to safely and efficiently remove the tiles without causing damage to the subfloor.
4. What should I do with the removed cork floor tiles?
If the cork floor tiles are in good condition, you can consider donating them or repurposing them for other projects. However, if they are damaged or cannot be reused, dispose of them properly by recycling them if possible or discarding them in accordance with local waste disposal guidelines.
Remember to always follow safety precautions and wear protective gear when removing cork floor tiles. If you are unsure about any step of the process, consult a professional for assistance. Removing cork floor tiles can be a tedious process, but with the right tools and techniques, it can be done efficiently. Here are some steps to follow:
1. Gather the necessary tools: Before starting the removal process, gather the following tools: a utility knife, putty knife or scraper, pry bar, safety goggles, gloves, and a dust mask.
2. Start at an edge: Begin by locating an edge of a tile and insert the pry bar underneath. Carefully lift the tile using the pry bar until it is completely removed. If necessary, use a utility knife to cut through any adhesive holding the tile in place.
3. Work in sections: Once you have successfully removed the first tile, continue working in sections. Move along the edges of adjacent tiles, repeating the same lifting and cutting process until you have cleared an area large enough to work comfortably.
4. Remove adhesive residue: After removing all the cork floor tiles, you may find adhesive residue still attached to the subfloor. Use a putty knife or scraper to remove as much adhesive as possible. Be cautious not to damage the subfloor while scraping.
5. Clean and prepare subfloor: Once all the adhesive residue has been removed, thoroughly clean the subfloor using a vacuum cleaner and a damp cloth. Ensure that no debris or particles are left behind before proceeding with your new flooring installation.
Frequently Asked Questions:
1. Can I reuse cork floor tiles after removal?
While it is possible to reuse cork floor tiles after removal, it can be challenging due to potential damage during the removal process. Additionally, if the tiles were glued down with strong adhesive, it may be difficult to remove them without causing significant harm.
2. How long does it take to remove cork floor tiles?
The time required to remove cork floor tiles depends on various factors such as the size of the area being worked on, the condition of the tiles, and your experience level with tile removal. On average, it can take several hours to a full day to remove cork floor tiles from a room.
3. Do I need professional help to remove cork floor tiles?
While it is possible to remove cork floor tiles on your own, it may be beneficial to seek professional help, especially if you are inexperienced or if the tiles are difficult to remove. Professionals have the necessary tools and expertise to safely and efficiently remove the tiles without causing damage to the subfloor.
4. What should I do with the removed cork floor tiles?
If the cork floor tiles are in good condition, you can consider donating them or repurposing them for other projects. However, if they are damaged or cannot be reused, dispose of them properly by recycling them if possible or discarding them in accordance with local waste disposal guidelines.
Remember to always follow safety precautions and wear protective gear when removing cork floor tiles. If you are unsure about any step of the process, consult a professional for assistance.