Putting Down Tile Floor

Related Images about Putting Down Tile Floor
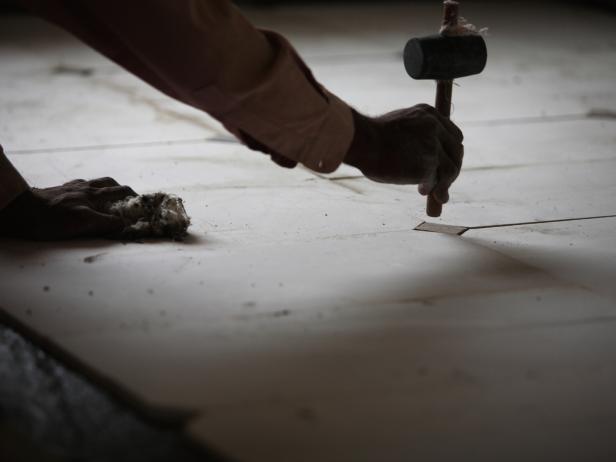
How to Fix Loose Floor Tiles – WoodsyBond

Just how tough is actually the tile to be put in? Relatively heavy quarry tiles, for instance, might be rated for a lot of manufacturing applications, nevertheless, they're oftentimes fitted in houses. When tile flooring installation is completed, the finish and design alone are worth it. There are lots of diverse types of marble tile utilized in residential and commercial applications.
What You Need to Know Before Starting a Floor Installation DIY
Ceramic tile flooring just isn't cheap! However, this shouldn't be your primary consideration when deciding to redesign the kitchen floor of yours or perhaps bathroom floor. Once you plan to install ceramic tile flooring in all the rooms of your house you're bringing a level of consistency to the house. Make sure that each floor tile is even with the next.
How to Lay Tile DoItYourself.com
Tiles however are far simpler to set up but garage tile flooring does come with the own pros of its positives and negatives as we shall see going ahead. Following that, wipe the thin excess off the tiles and wait at least 24 hours to them to set. Mosaic tile flooring is among the most adored types due to the high amount of creativity that you can utilize in having them in your house.
What are the Different Types of Floor Tiles? (with pictures)

Install Peel-And-Stick Vinyl Floor Planks in the Bathroom More to Mrs. E

Pin on Wood Floor Insets and Borders

Blog – Duo Star Why should you invest in floors and tiling works for your home?

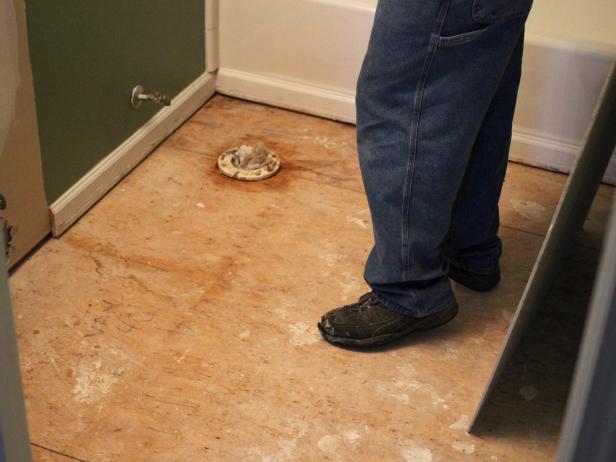
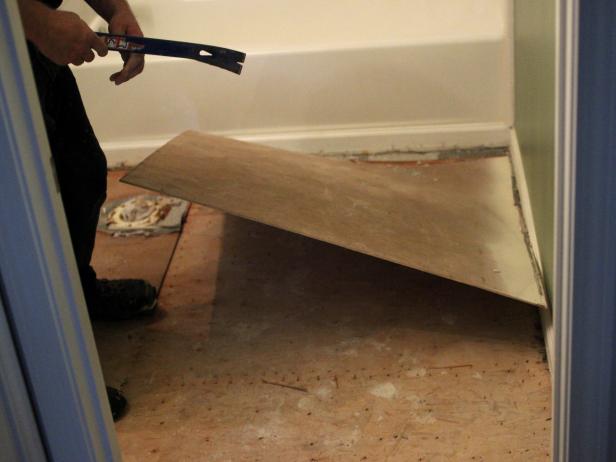
How to Remove a Tile Floor how-tos DIY
Toilet flange too high Terry Love Plumbing & Remodel DIY & Professional Forum
15 Inspiring Floor Tile Ideas For Your Living Room Home Decor

Wood Look Tile Floors – Pinterest Addict

How to Remove a Tile Floor how-tos DIY
how to floor tiles work – YouTube

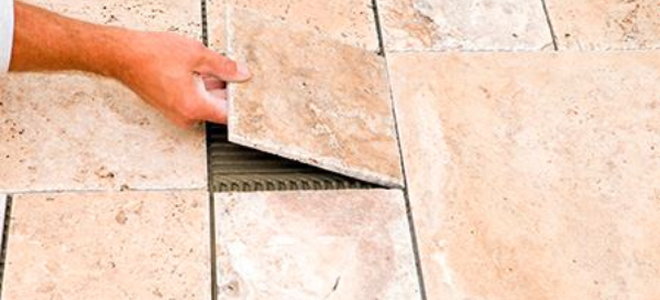
Laying Floor Tiles

Related Posts:
- Commercial Porcelain Tile Flooring
- Ideas Covering Tile Floors
- Steam Mop For Hardwood And Tile Floors
- Shaw Vinyl Tile Flooring
- Herringbone Wood Look Tile Floor
- Chair Casters For Tile Floors
- Bona Mops For Tile Floors
- How Clean Porcelain Tile Floor
- How To Install Natural Stone Tile Flooring
- How Much To Install Tile Floor Per Square Foot
Putting Down Tile Floor
Introduction:
Installing tile flooring can be a great way to enhance the aesthetics and functionality of any space. Whether you are renovating your kitchen, bathroom, or living room, tile flooring offers durability, easy maintenance, and endless design options. However, the process of putting down tile floor requires careful planning, preparation, and execution. In this article, we will guide you through each step of the process, from choosing the right tiles to grouting and sealing the finished floor.
Choosing the Right Tiles:
Before diving into the installation process, it is crucial to select the right tiles for your project. There are various factors to consider when making this decision:
1. Tile Material:
Tiles come in different materials such as ceramic, porcelain, natural stone, and glass. Each material has its own unique characteristics and suitability for different areas. For instance, ceramic and porcelain tiles are highly durable and ideal for high-traffic areas like kitchens and bathrooms. Natural stone tiles provide a luxurious appeal but may require more maintenance.
FAQ: What factors should I consider when choosing tile material?
When selecting tile material, consider durability, maintenance requirements, slip resistance (especially for wet areas), moisture resistance (for bathrooms), and overall aesthetic appeal.
2. Tile Size and Shape:
Tiles come in various sizes and shapes, ranging from small mosaics to large format tiles. The size and shape you choose will depend on your personal style preference and the size of the room. Smaller tiles can create intricate patterns while larger tiles can make a room appear more spacious.
FAQ: Are larger tiles more difficult to install?
While larger tiles may require extra care during installation to ensure they are level and properly aligned, they can actually make the installation process faster since fewer tiles need to be laid down.
Preparing the Subfloor:
Once you have selected your desired tiles, it is essential to prepare the subfloor before starting the installation process. Proper subfloor preparation is crucial for ensuring a long-lasting and stable tile floor.
1. Inspect the Subfloor:
First, thoroughly inspect the subfloor for any signs of damage, such as cracks or unevenness. If you identify any issues, address them before proceeding further. Repairing or replacing damaged subflooring will provide a solid foundation for your new tile floor.
FAQ: Can I install tile flooring over an existing floor?
In most cases, it is possible to install tile flooring over an existing floor. However, it is important to evaluate the condition and stability of the existing floor. If there are any issues, it may be necessary to remove the existing flooring before installing the new tiles.
2. Clean and Level the Subfloor:
Before installing tiles, ensure that the subfloor is clean and free from debris. Vacuum or sweep the area thoroughly, removing any dust or dirt that could interfere with adhesion. Additionally, check for any unevenness in the subfloor and use a leveling compound to eliminate any low spots.
FAQ: How do I know if my subfloor is level?
To check for levelness, use a long straight edge (such as a level) and place it across different areas of the subfloor. If you notice gaps between the straight edge and the floor surface, these areas are uneven and require leveling.
3. Apply a Primer:
Applying a primer to the subfloor can enhance adhesion between the tiles and the subfloor. Follow the manufacturer’s instructions when applying the primer, ensuring that it is evenly spread across the entire surface.
FAQ: Is a primer necessary for tile installation?
While a primer is not always required, it is recommended for certain types of subfloors, such as plywood or concrete. The primer can help improve the bond between the tiles and the subfloor, resulting in a more durable and long-lasting installation.
4. Allow Sufficient Drying Time:
After applying the primer, allow sufficient drying time before starting the tile installation. This will ensure that the primer has fully cured and will provide a strong bond between the tiles and the subfloor.
5. Choose the Right Adhesive:
Selecting the correct adhesive is crucial for a successful tile installation. The type of adhesive you choose will depend on factors such as the tile material, the size of the tiles, and the location where they will be installed. Follow the manufacturer’s instructions when applying the adhesive to ensure proper bonding.
FAQ: Can I use any type of adhesive for tile installation?
No, it is important to choose an adhesive specifically designed for tile installation. Different types of adhesives are formulated to work with specific tile materials and substrates. Using the wrong adhesive can result in poor adhesion and potential tile failure.
6. Consider Grout Options:
Grout is used to fill in the gaps between tiles, providing stability and preventing moisture penetration. When selecting grout, consider factors such as color, stain resistance, and durability. It is also important to choose between sanded or unsanded grout based on the size of your grout lines.
FAQ: What is the difference between sanded and unsanded grout?
Sanded grout is recommended for grout lines larger than 1/8 inch, as the sand particles help fill in the gaps and provide additional strength. Unsanded grout is used for smaller grout lines to prevent scratching or damaging delicate tile surfaces.
7. Properly Seal the Grout:
After the grout has fully cured, it is important to seal it to protect it from stains and moisture. Choose a high-quality grout sealer and carefully apply it according to the manufacturer’s instructions. Regularly resealing the grout will help maintain its appearance and longevity.
FAQ: How often should I reseal my grout?
The frequency of resealing will depend on factors such as foot traffic, moisture exposure, and the type of sealer used. As a general guideline, it is recommended to reseal grout every 1-3 years or as needed. Regular cleaning and maintenance can also help prolong the life of the sealer.