Laminate Flooring Installation Direction

Related Images about Laminate Flooring Installation Direction
Laminate Flooring Direction/cut – Flooring – DIY Chatroom Home Improvement Forum

The design options for laminate are endless. Laminate flooring often comes with a long guarantee, meaning that it will not need to be changed often. They will come in several various varieties such as the single strip, 2 strips or even the three strips with micro beveled edges, square edges or merely beveled edges. Costco is able to sell Harmonics laminate flooring at a significant discount, but usually the supply is limited.
Do you lay laminate flooring vertically or horizontally?

Laminate floors have become very popular within the last 4 decades, and a lot of individuals are going for newer and better laminate floors. Wear stratum is a resin based covering which allows the laminates to stand against various categories of chafes. It does not have a similar measure of hardness. Stains can be scrubbed clean by washing them with gentle soap.
How to Install Laminate Flooring

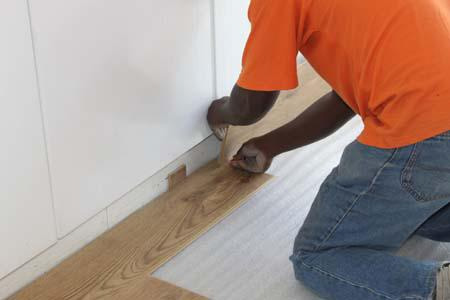
The laminate flooring in question needs to be a simple board. If this is your very first diy project or perhaps one of the many duties that you've completed in the past, installing laminate floors is an excellent way to modify the style of a space, add warmth and also help increase your home value. Cut the underlay so that it's in spite of the laminate flooring.
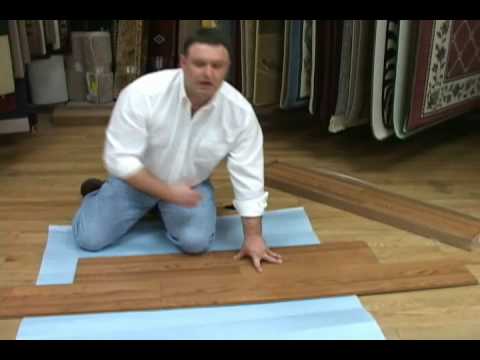
LAMINATE FLOORING INSTALLATION – YouTube
Which Direction To Lay Vinyl Plank Flooring In Small Bathroom

Guide to Laminate Flooring, Water, and Damage Repair
:max_bytes(150000):strip_icc()/wet-polyurethane-on-new-hardwood-floor-with-window-reflection-183846705-582e34da3df78c6f6a403968.jpg)
Wood flooring doesn’t all have to be laid in the same direction. We laid it one way in the hall

HOME DZINE Home Improvement How to install laminate flooring
Guide to Installing Laminate Flooring The Family Handyman
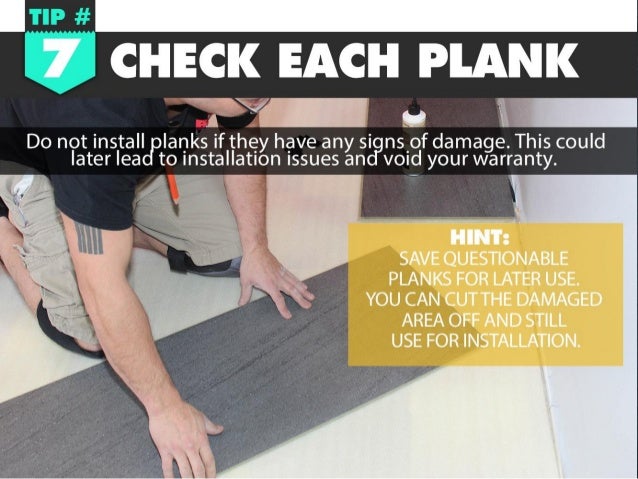
General Laminate Flooring Installation and Tips

General Laminate Flooring Installation and Tips
Installation of Laminate Flooring in the Bathroom – YouTube

How To: Install Laminate Flooring – YouTube
Lowes Mohawk Laminate Review

Related Posts:
- Select Surfaces Click Laminate Flooring Canyon Oak
- Kaindl Laminate Flooring Installation
- Curly Walnut Laminate Flooring
- Laminate Flooring Lumber Liquidators Reviews
- Laminate Flooring 8mm Sale
- Can You Have Laminate Flooring On Stairs
- Laminate Flooring On Concrete Base
- Pergo Golden Butternut Laminate Flooring
- Ceramic Tile Vs Laminate Flooring In Basement
- Laminate Flooring Shoe Molding
Introduction
Laminate flooring is becoming increasingly popular among homeowners for its attractive aesthetics and low maintenance requirements. If you’re considering installing laminate flooring in your home, it is important to familiarize yourself with the process and steps involved to ensure a successful outcome. This article outlines the essential steps of laminate flooring installation, as well as some key considerations to keep in mind before starting the project.
Types of Laminate Flooring
Before proceeding with installation, it is important to understand the different types of laminate flooring available. The most common types of laminate are:
– Engineered Wood: Engineered wood laminate flooring consists of several layers that are fused together with adhesive under pressure. This type of laminate is incredibly durable and can be installed over most existing surfaces.
– Vinyl Laminate: Vinyl laminate is composed of multiple layers of vinyl and a protective wear layer that prevents scratches and dents. It is low maintenance but should not be installed in areas prone to moisture or humidity.
– Floating Laminate: Floating laminate is constructed from multiple layers and can be installed without glue or adhesives. It is easy to install, however, it can be prone to shifting or buckling if not properly maintained.
Tools Required for Installation
Before beginning any project, it is important to have the right tools on hand to get the job done quickly and efficiently. Some essential tools for laminate flooring installation include:
– Tape Measure: A tape measure will help you measure accurately when cutting pieces of laminate.
– Saw: A saw will be necessary for cutting pieces of laminate to size.
– Hammer: A hammer will be needed for tapping pieces into place during installation.
– Pneumatic Nail Gun: A pneumatic nail gun can be used to secure pieces of laminate together more securely than a hammer and nails.
– Level and Straight Edge: A level and straight edge will help you ensure that the pieces being installed are even and level.
– Trowel/Spreader: A trowel or spreader will be needed for applying adhesive when installing certain types of laminate flooring such as engineered wood or vinyl laminate.
– Chalk Line/Laser Level: Chalk line or laser level will help you draw straight lines when laying out pieces prior to installation.
Preparation for Installation
Prior to beginning installation, there are several steps that must be taken to ensure a successful outcome. These steps include:
– Cleaning The Subfloor: It is important that any dirt, dust or debris on the subfloor is removed prior to installation for better adhesion of the new flooring material. Use a vacuum cleaner or broom to sweep away any debris on the surface before proceeding with installation.
– Checking The Subfloor For Levelness: It is essential that the subfloor is level prior to beginning installation so that the new floor lies flat without any bumps or dips in between pieces. Use a leveler or straight edge to check for levelness, making sure that no area exceeds 1/8” variation in height between two adjacent points on the subfloor surface.
– Laying Out Pieces: Once you have ensured that the subfloor is level and free of debris, you can begin laying out pieces of laminate to get an idea of the pattern you would like to use for installation. Use a chalk line or laser level to draw straight lines between the pieces to ensure that they will fit together properly.
– Applying Adhesive: For certain types of laminate flooring such as engineered wood or vinyl laminate, it may be necessary to apply adhesive prior to installation. Use a trowel or spreader to apply the adhesive evenly and carefully. Allow the adhesive to dry before proceeding with the installation.
Installation Process
Once you have prepared the subfloor and laid out the pieces of laminate, you can begin the installation process. The steps for installation are as follows:
– Install The First Piece: Begin installing the first piece, making sure that it is aligned with the chalk line or laser level. Secure it in place using a hammer and nails or a pneumatic nail gun.
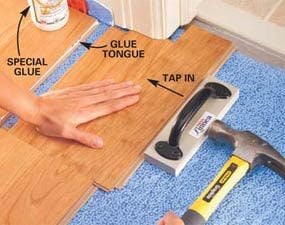
– Connect The Next Piece: Connect the next piece to the one already installed, making sure that the tongue and groove edges are lined up correctly. Tap it into place with a hammer or use a pneumatic nail gun for added security.
– Continue Laying Pieces: Continue laying pieces until you have completed one row. Make sure that each piece is lined up correctly before securing them in place.
– Cut Pieces As Needed: If there are any areas where pieces cannot fit perfectly due to an irregular shape, use a saw to cut them to size.
– Repeat Process: Repeat this process until all of the pieces have been installed. Make sure that each row is even and level before moving on to the next one.
Conclusion
Laminate flooring is a great choice for homes because of its durability and affordability. Installing laminate flooring requires preparation and precision but can be done with a few simple tools and some patience. With proper preparation and installation, your laminate floor should last for years to come!