Laminate Flooring In Kitchen And Living Room

Related Images about Laminate Flooring In Kitchen And Living Room
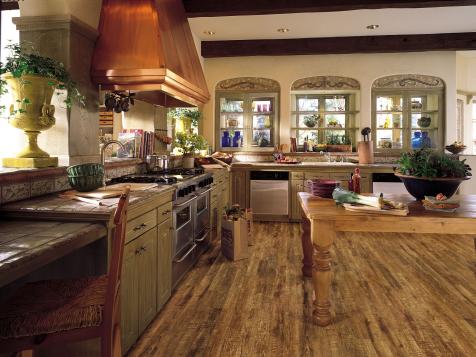
Laminate Flooring Ideas & Designs HGTV
The floor surfaces in your kitchen is by far the greatest feature in your kitchen that can really make your kitchen stand out and as such when designing a brand new kitchen or perhaps remodeling a current one, you need to devote some time to researching the proper kitchen flooring so you can pick the best one for your home.
Can You Install Laminate Flooring In The Kitchen?
:max_bytes(150000):strip_icc()/interior-of-living-room-564769619-588be1305f9b5874eec8b816.jpg)
Laminate features a thick plastic coating to make it easy to clean up and maintain. One of the main appeals of laminate is the reality that it can mimic many other kitchen flooring alternative with ease and at a substantially lower cost. You should additionally avoid using household cleaners on the bamboo kitchen floor of yours. You'll want to make an actual layout to finalize the kitchen area flooring structure of yours before completely attaching them on the floor.
LVP stair installation. Waterproof / Lifeproof Laminate stairs, Waterproof laminate flooring

Ceramic flooring is widely used in homes as well as kitchens. These locations need flooring that's difficult, simple to clean, and passes the test of your time. However when you are taking up a home remodeling project, you quickly learn the amount of thought as well as care has going towards making choices regarding this essential element of the cooking space of yours.
23 Awesome Cost Of Laminate Flooring Vs Hardwood Unique Flooring Ideas

Laminate Flooring Ideas To Have Better Interior In Rooms Домашний декор кухни, Современная

27 best Laminate images on Pinterest

Wood Feature Accent Wall Ideas Using Flooring Dining room accents, Laminate flooring on walls

25 Elegant Grey Hardwood Floor Color Combinations Unique Flooring Ideas

17 Best images about Laminate on Pinterest Laminate floor tiles, Discount laminate flooring

Naperville Signature Hardwoods Dark wood trim, Hardwood floors dark, Hardwood floor colors

35+ Amazing Gray Vinyl Plank Flooring Ideas – Decornish [dot] com Grey vinyl plank flooring

Laminate Oak, Wide Plank, 194x1285mm, Acacia Grey Wood 3 Strip » ESB Flooring

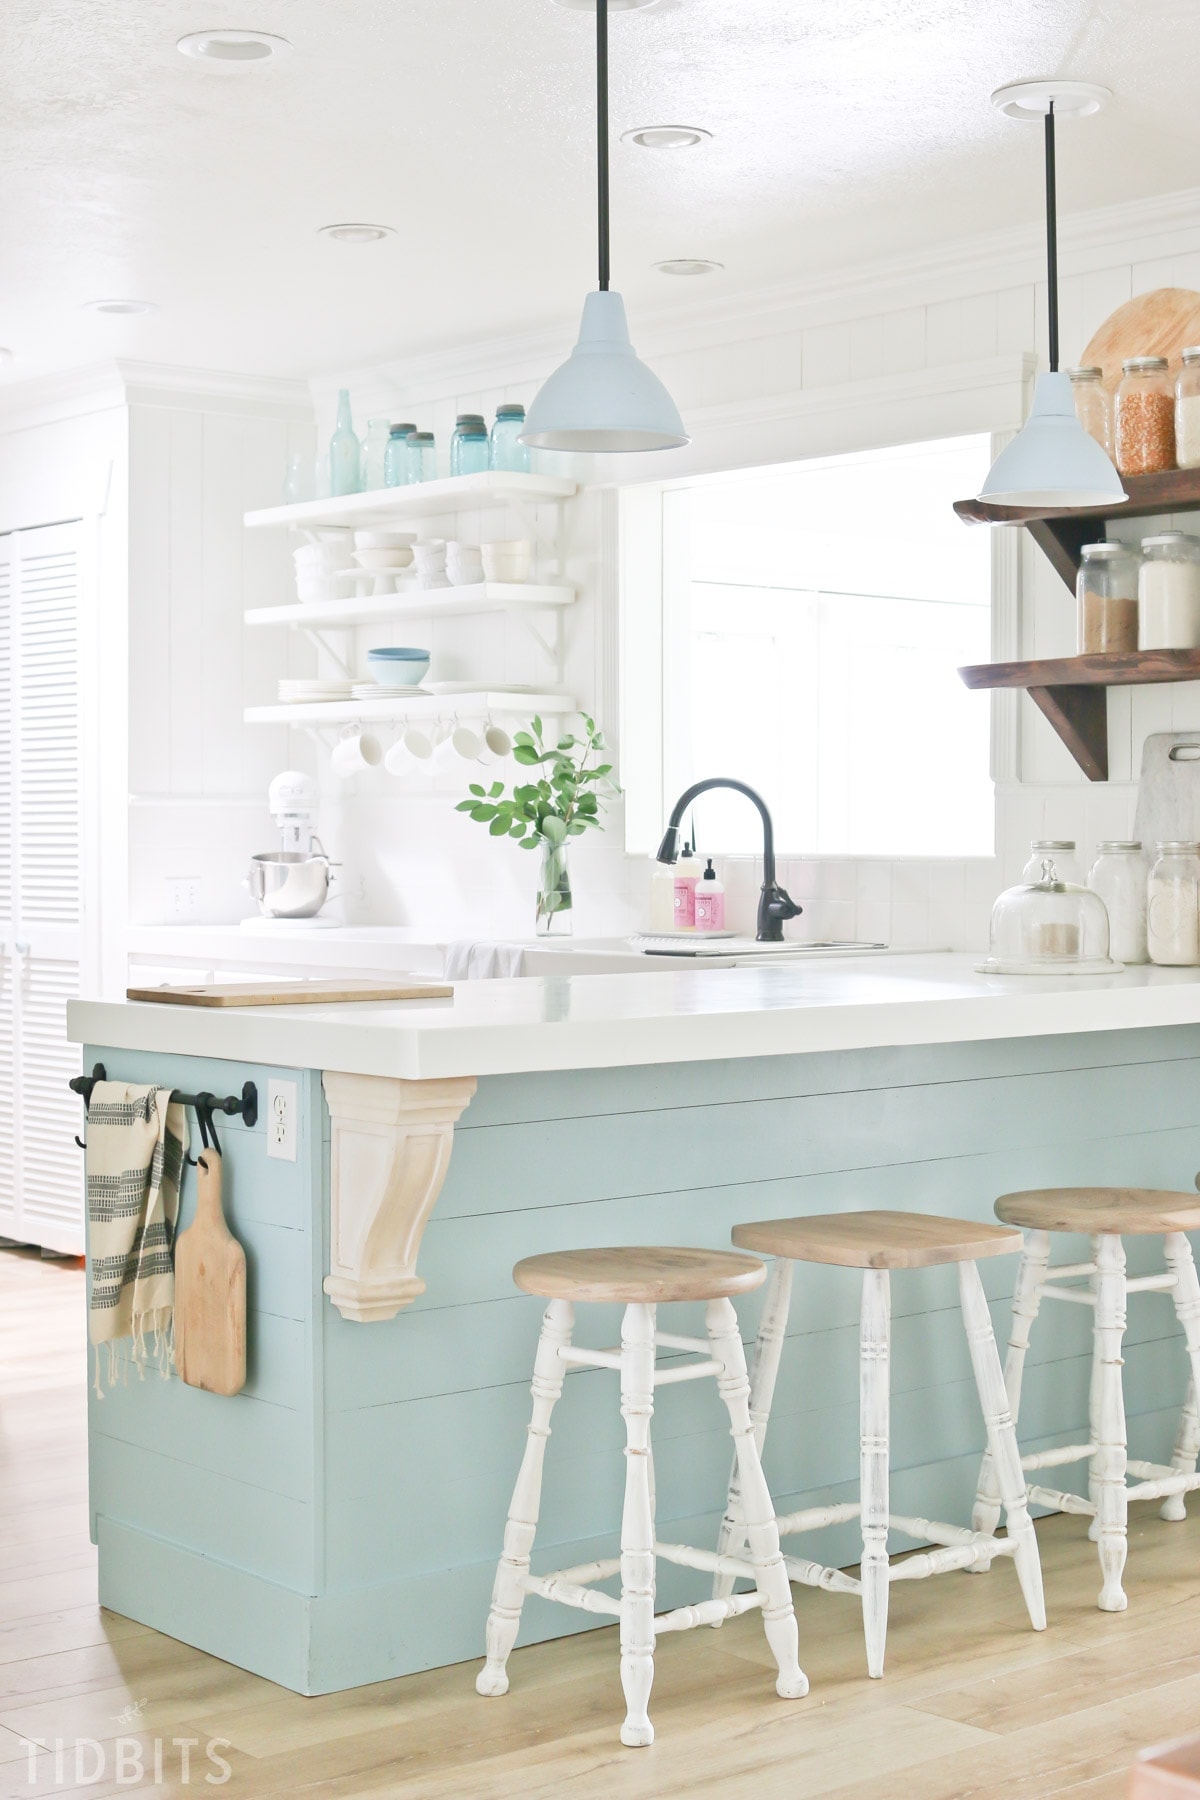
Our New Laminate Flooring Reveal – Tidbits
Wood Look Laminate Flooring – Kitchen Remodel Photos Apartment Therapy
Related Posts:
- What Is The Most Desirable Kitchen Floor Plan
- How To Lay Out A Kitchen Floor Plan
- Best Hardwood Floor Finish For Kitchen
- Wickes Kitchen Floor Tiles
- Kitchen Floor Replacement Options
- 20 X 10 Kitchen Floor Plans
- Kitchen Floor Plans By Size
- Kitchen Floor Storage Cabinets
- Kitchen Cabinets Flooring And Countertops
- Bamboo Kitchen Flooring Ideas
Laminate Flooring In Kitchen And Living Room: A Perfect Blend of Style and Practicality
When it comes to flooring options for the kitchen and living room, homeowners are often faced with a dilemma. They want a flooring solution that is not only aesthetically pleasing but also durable and easy to maintain. Laminate flooring emerges as the perfect choice, offering an ideal blend of style and practicality. In this article, we will delve into the various aspects of laminate flooring in the kitchen and living room, exploring its benefits, installation process, maintenance requirements, and frequently asked questions.
I. Benefits of Laminate Flooring in the Kitchen and Living Room
1. Durability: Laminate flooring is known for its exceptional durability, making it an ideal choice for high-traffic areas like the kitchen and living room. Its strong wear layer protects against scratches, stains, and fading, ensuring that your floors retain their beauty even after years of use.
2. Versatility: Laminate flooring comes in a wide range of styles, colors, and textures, allowing homeowners to find the perfect fit for their kitchen and living room decor. Whether you prefer the rustic charm of hardwood or the sleek elegance of stone, there is a laminate option to suit every taste.
3. Easy Installation: Installing laminate flooring is a relatively simple process that can be completed by homeowners with basic DIY skills. The planks are designed to interlock easily, eliminating the need for messy glue or nails. This not only saves time but also reduces installation costs.
4. Cost-Effective: Compared to other flooring options like hardwood or tile, laminate flooring offers excellent value for money. It provides the look of expensive materials at a fraction of the cost, making it a budget-friendly option for homeowners looking to enhance their kitchen and living room without breaking the bank.
5. Low Maintenance: Laminate flooring requires minimal upkeep compared to its counterparts. Regular sweeping or vacuuming combined with occasional damp mopping is usually sufficient to keep the floors clean and looking their best. Additionally, laminate flooring is resistant to stains, making it an excellent choice for households with children or pets.
II. Installation Process of Laminate Flooring
Installing laminate flooring in the kitchen and living room is a straightforward process that can be completed in a few simple steps:
1. Prepare the Subfloor: Before installing laminate flooring, ensure that the subfloor is clean, dry, and level. Remove any existing flooring and repair any imperfections in the subfloor to ensure a smooth installation.
2. Acclimate the Flooring: Laminate flooring needs to acclimate to the room’s temperature and humidity levels before installation. Leave the planks in the room for at least 48 hours to allow them to adjust.
3. Install Underlayment: Lay down a thin foam underlayment over the subfloor to provide cushioning and reduce noise. The underlayment also acts as a moisture barrier, protecting the laminate flooring from potential damage.
4. Begin Installation: Start by laying out the first row of planks along a wall, leaving a 1/4-inch gap between the planks and the wall for expansion. Use spacers to maintain consistent spacing between planks.
5. Interlock Planks: Connect each plank by inserting its tongue into the groove of the previous plank at an angle. Gently tap them together using a rubber mallet or tapping block until they lock into place.
6. Cut Planks as Needed: Measure and cut planks to fit around Obstacles such as doorways, cabinets, or corners using a saw or laminate cutter. Be sure to leave a 1/4-inch gap between the planks and any fixed structures to allow for expansion.
7. Continue Installation: Repeat the process of interlocking and cutting planks until the entire floor is covered. Use spacers to maintain consistent spacing between planks and walls.
8. Install Molding: Once the laminate flooring is installed, install molding around the perimeter of the room to cover the gaps and provide a finished look. Trim the molding as needed to fit corners or doorways.
9. Clean and Maintain: After installation, clean the laminate flooring with a damp mop or microfiber cloth. Avoid using harsh chemicals or abrasive cleaners that can damage the surface. Regularly sweep or vacuum to remove dirt and debris.
10. Enjoy Your New Floor: Once the installation process is complete, you can enjoy your newly transformed kitchen and living room with beautiful laminate flooring. Laminate flooring is a popular choice for many households due to its durability and easy maintenance. It is also a great option for those with children or pets, as it is resistant to stains.
The installation process of laminate flooring in the kitchen and living room is relatively simple and can be completed in a few steps:
1. Prepare the Subfloor: Before installing laminate flooring, it is important to ensure that the subfloor is clean, dry, and level. Remove any existing flooring and repair any imperfections in the subfloor to ensure a smooth installation.
2. Acclimate the Flooring: Laminate flooring needs to acclimate to the room’s temperature and humidity levels before installation. Leave the planks in the room for at least 48 hours to allow them to adjust.
3. Install Underlayment: Lay down a thin foam underlayment over the subfloor to provide cushioning and reduce noise. The underlayment also acts as a moisture barrier, protecting the laminate flooring from potential damage.
4. Begin Installation: Start by laying out the first row of planks along a wall, leaving a 1/4-inch gap between the planks and the wall for expansion. Use spacers to maintain consistent spacing between planks.
5. Interlock Planks: Connect each plank by inserting its tongue into the groove of the previous plank at an angle. Gently tap them together using a rubber mallet or tapping block until they lock into place.
6. Cut Planks as Needed: Measure and cut planks to fit around obstacles such as doorways, cabinets, or corners using a saw or laminate cutter. Be sure to leave a 1/4-inch gap between the planks and any fixed structures to allow for expansion.
7. Continue Installation: Repeat the process of interlocking and cutting planks until the entire floor is covered. Use spacers to maintain consistent spacing between planks and walls.
8. Install Molding: Once the laminate flooring is installed, install molding around the perimeter of the room to cover the gaps and provide a finished look. Trim the molding as needed to fit corners or doorways.
9. Clean and Maintain: After installation, clean the laminate flooring with a damp mop or microfiber cloth. Avoid using harsh chemicals or abrasive cleaners that can damage the surface. Regularly sweep or vacuum to remove dirt and debris.
10. Enjoy Your New Floor: Once the installation process is complete, you can enjoy your newly transformed kitchen and living room with beautiful laminate flooring.
Overall, laminate flooring offers a durable, stain-resistant option for households with children or pets. The installation process is straightforward and can be completed with a few simple steps. With proper care and maintenance, laminate flooring can last for many years to come.