Installing Vinyl Plank Flooring In Kitchen

Related Images about Installing Vinyl Plank Flooring In Kitchen
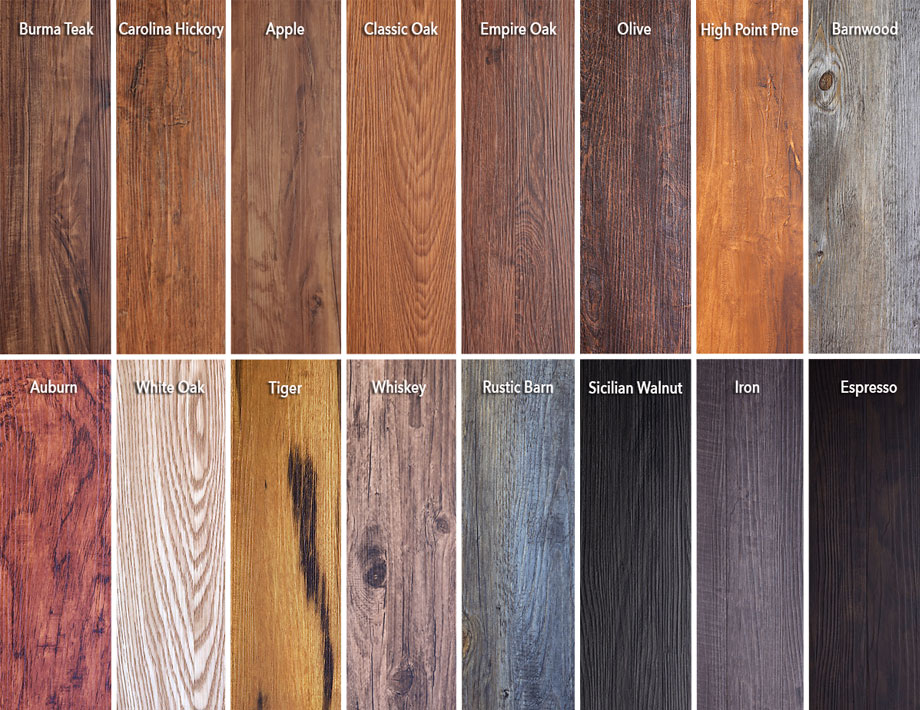
Wood Grain Vinyl Flooring Planks Featured on New Trident Luxury Vinyl Flooring Website
Online shopping permits you to access some of the most incredible bamboo kitchen area flooring for the best price. While it may seem hard to strike the balance between all these different factors the excellent choices available nowadays means that you will be able to find the best kitchen flooring. If you’re a cook, you won’t like the idea of tiles and flooring in the kitchen that affects your back and legs.
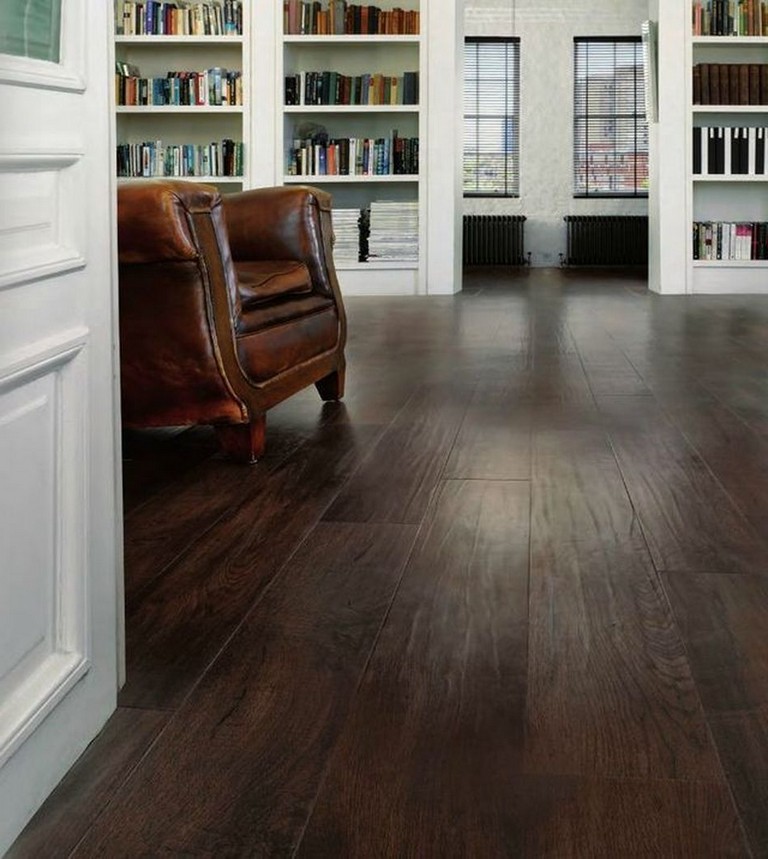
48+ Opulence Vinyl Plank Flooring to Make Your House Look Fabulous – Page 47 of 50
The kind of stone you select will affect the size, cost and shape of the stones. If the preference of yours is toward the less familiar options, there is stone, wood and cork. You might be wondering about the type of flooring to put in position for your kitchen, to make the home you’ve always dreamt of. It is quite durable as well as easy to maintain on top of clean.
Which Direction Do I Install Vinyl Plank Flooring? – TwentyOak Vinyl plank flooring, Plank

On the other hand, laminate floors are ideal for those trying to find cheaper alternatives since it is able to showcase the attractiveness of fire wood, marble or stone at a lesser cost. The kitchen area flooring is the foundation which your kitchen actually rests. Modern vinyl flooring is durable and water resistant and can even mimic more expensive flooring options like hardwood and all-natural stone.
What Color Vinyl Plank Flooring Matches Light Maple Wood Cabinets – how to paint on vinyl floor

How to Install Vinyl Plank Flooring as a Beginner Chronicinthekitchen Vinyl plank flooring

Laying Tile Over Vinyl: Should You Do It? BuildDirectLearning Center

Brazilian Cherry Bronson Luxury Vinyl 3.2mm Bamboo flooring, Flooring, Vinyl plank flooring

Related Posts:
- What Is The Most Desirable Kitchen Floor Plan
- How To Lay Out A Kitchen Floor Plan
- Best Hardwood Floor Finish For Kitchen
- Wickes Kitchen Floor Tiles
- Kitchen Floor Replacement Options
- 20 X 10 Kitchen Floor Plans
- Kitchen Floor Plans By Size
- Kitchen Floor Storage Cabinets
- Kitchen Cabinets Flooring And Countertops
- Bamboo Kitchen Flooring Ideas
Vinyl plank flooring has become a popular choice for many homeowners looking to update their kitchen floors. Not only is it durable and easy to clean, but it also comes in a variety of styles and colors to match any design aesthetic. If you’re considering installing vinyl plank flooring in your kitchen, here is a comprehensive guide to help you through the process.
Choosing the Right Vinyl Plank Flooring
Before you start the installation process, it’s important to choose the right vinyl plank flooring for your kitchen. Consider factors such as thickness, wear layer, and installation method. Thicker planks are more durable and provide better sound insulation, while a thicker wear layer will offer more protection against scratches and stains. Additionally, there are different installation methods available, including click-lock, glue-down, and loose lay. Choose the option that best suits your needs and skill level.
Preparing Your Kitchen
Once you have selected your vinyl plank flooring, it’s time to prepare your kitchen for installation. Start by removing any existing flooring and thoroughly cleaning the subfloor. Make sure the subfloor is level and free of any debris or imperfections that could affect the installation of the vinyl planks. If necessary, use a self-leveling compound to even out any uneven areas. Allow the subfloor to dry completely before proceeding with the installation.
Installing the Vinyl Plank Flooring
When you’re ready to begin installation, start by laying out the vinyl planks in the room to acclimate them to the temperature and humidity of the space. This will prevent any buckling or warping of the planks once they are installed. Begin in a corner of the room and work your way towards the opposite wall, leaving a small gap around the perimeter of the room to allow for expansion. Use spacers to maintain an even gap between planks.
Finishing Touches
Once all of the vinyl planks are installed, it’s time to add finishing touches to complete the look of your new kitchen floor. Install transition strips where the vinyl plank flooring meets other types of flooring or surfaces, such as carpet or tile. Use molding or baseboards to cover any gaps along walls or cabinets. Finally, give your new floor a thorough cleaning to remove any dust or debris from the installation process.
Common Mistakes to Avoid:
1. Not acclimating the vinyl planks before installation.
2. Failing to properly prepare the subfloor.
3. Overlooking expansion gaps around the perimeter of the room.
4. Neglecting to add transition strips or molding for a finished look.
FAQs:
1. Can I install vinyl plank flooring over my existing tile floor?
Yes, you can install vinyl plank flooring over most existing floors as long as they are clean, flat, and in good condition.
2. How long does it take to install vinyl plank flooring in a kitchen?
The time it takes to install vinyl plank flooring will depend on the size of your kitchen and your level of experience with DIY projects. On average, it can take anywhere from a day to a weekend.
3. Is underlayment necessary for vinyl plank flooring?
While underlayment is not always necessary for vinyl plank flooring, it can help improve sound insulation and provide extra cushioning underfoot.
4. Can I install vinyl plank flooring myself?
Yes, many homeowners choose to install vinyl plank flooring themselves as it is a relatively straightforward DIY project with proper preparation and tools.
5. How do I clean and maintain my new vinyl plank flooring?
To Clean and maintain your new vinyl plank flooring, regularly sweep or vacuum to remove dirt and debris. You can also mop with a damp cloth or mop using a mild detergent and water solution. Avoid using harsh chemicals or abrasive cleaners, as they can damage the finish of the vinyl planks. Additionally, consider using felt pads on furniture legs to prevent scratching and rotating area rugs periodically to prevent discoloration from sunlight exposure. 6. Can vinyl plank flooring be installed in a bathroom or other high-moisture areas?
Yes, vinyl plank flooring is a popular choice for bathrooms and other high-moisture areas due to its water-resistant properties. However, it is important to properly seal the edges and seams of the flooring to prevent water damage.
7. What should I do if my vinyl plank flooring gets damaged?
If your vinyl plank flooring gets damaged, you may be able to replace individual planks rather than having to replace the entire floor. Simply remove the damaged plank and install a new one in its place. If the damage is extensive, you may need to consult a professional for repair or replacement.
8. Can vinyl plank flooring be refinished?
Vinyl plank flooring is not designed to be refinished like hardwood floors. However, some manufacturers offer products that can help restore the finish of the flooring if it becomes worn or dull over time.
9. How long does vinyl plank flooring last?
With proper care and maintenance, vinyl plank flooring can last for 10-20 years or more. Regular cleaning, avoiding harsh chemicals, and using furniture pads can help prolong the life of your vinyl plank flooring.
10. Is vinyl plank flooring a good choice for homes with pets?
Vinyl plank flooring is a great option for homes with pets due to its durability and scratch resistance. However, it is still important to trim your pet’s nails regularly and use rugs or mats in high-traffic areas to protect the floor from scratches and wear.
Overall, vinyl plank flooring is a versatile and practical option for many homes. It is easy to install, durable, water-resistant, and relatively low-maintenance. With proper care and maintenance, vinyl plank flooring can last for many years, making it a great choice for homeowners looking for a cost-effective and stylish flooring option.