How To Put In A Heated Tile Floor

Related Images about How To Put In A Heated Tile Floor
How to install a heated tile floor. and also how NOT to install a heated tile floor The
Linoleum tile floors seldom scratch and this could be an enormous plus. Mix the solution properly and for this remedy, soak a piece of cloth inside it. Run your damp mop of the floor when a week and you are going to have a clean floor. Users have to be equipped with the very best hard tile floor cleaners. You are able to select these tiles both for your bedroom or perhaps the living rooms of yours, kitchen area as well as bathroom.
installation of under floor heating for tile finishing floor – YouTube

As said before, you are able to typically find a big choice of tile flooring choices close to home. Now and then, a mild detergent option might be implemented on your tiled flooring – and a little bit of scrubbing should help take out the odd stain. However, you can now purchase especially molded and sanded stones to stay away from these kinds of issues.
How to install heated tile floors in your home! Learn how to avoid all the little mishaps that

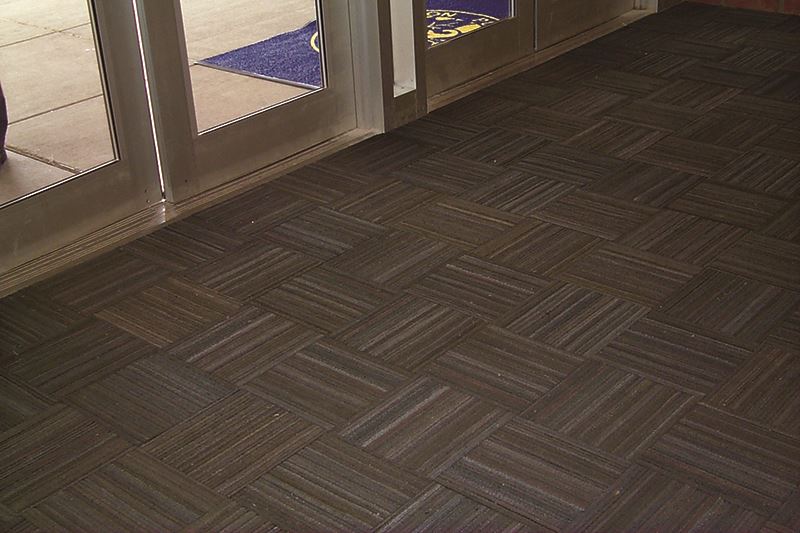
Lastly, you have got glass tiles. The component of the ceramic tile installation process has cutting the tiles to earn tips of the appliances as well as walls fit. You will find it glossy or dull depending on the look you are after. This way you are able to cut down on the upkeep of this tile floors. Often found in bathrooms and kitchens, tile flooring can hold up very well to spills and is extremely durable.
McBrides on the Go: Downstairs Progress Report #3

Heated Floors in the Master Bathroom – thewhitebuffalostylingco.com
Project Showcase – Tile Right
How to repair tile with floor heat – YouTube

DIY Herringbone Tile Floor Herringbone tile floors, Herringbone tile, Tile floor

Tiling over different substrates – Fine Homebuilding
Fake wood floor – AKA – Wood looking tile (Page 2): Lavender Room: Slowtwitch Forums

Hardwood floors for Kitchens

Novatek N100 NovaStrip Infrared Heat Floor Tile Removal Machine

Dura-Tile Recycled Tire Tiles Recycled Rubber Floor Tile
Related Posts:
- Commercial Porcelain Tile Flooring
- Ideas Covering Tile Floors
- Steam Mop For Hardwood And Tile Floors
- Shaw Vinyl Tile Flooring
- Herringbone Wood Look Tile Floor
- Chair Casters For Tile Floors
- Bona Mops For Tile Floors
- How Clean Porcelain Tile Floor
- How To Install Natural Stone Tile Flooring
- How Much To Install Tile Floor Per Square Foot
Title: How to Install Heated Tile Floors: A Comprehensive Guide
Introduction:
Heated tile floors are a luxurious addition to any home, providing warmth and comfort during the cold winter months. Installing this type of flooring may seem like a daunting task, but with the right guidance and tools, it can be accomplished by even the most novice DIY enthusiasts. In this article, we will walk you through the step-by-step process of putting in a heated tile floor, ensuring a successful and efficient installation.
I. Planning and Preparation:
Before diving into the installation process, proper planning and preparation are crucial to ensure a smooth workflow and satisfactory results.
1. Assessing the Floor Space:
Begin by measuring the area where you wish to install the heated tile floor. Ensure accurate measurements are taken, accounting for any nooks or irregularities within the space. This will help determine the quantity of materials needed for your project.
FAQ: How do I calculate the wattage required for my heated tile floor?
To calculate the wattage required for your heated tile floor, multiply the square footage of your space by 10-15 watts (considering a well-insulated room). For example, if your room is 100 square feet, you would need 1,000-1,500 watts of heating power.
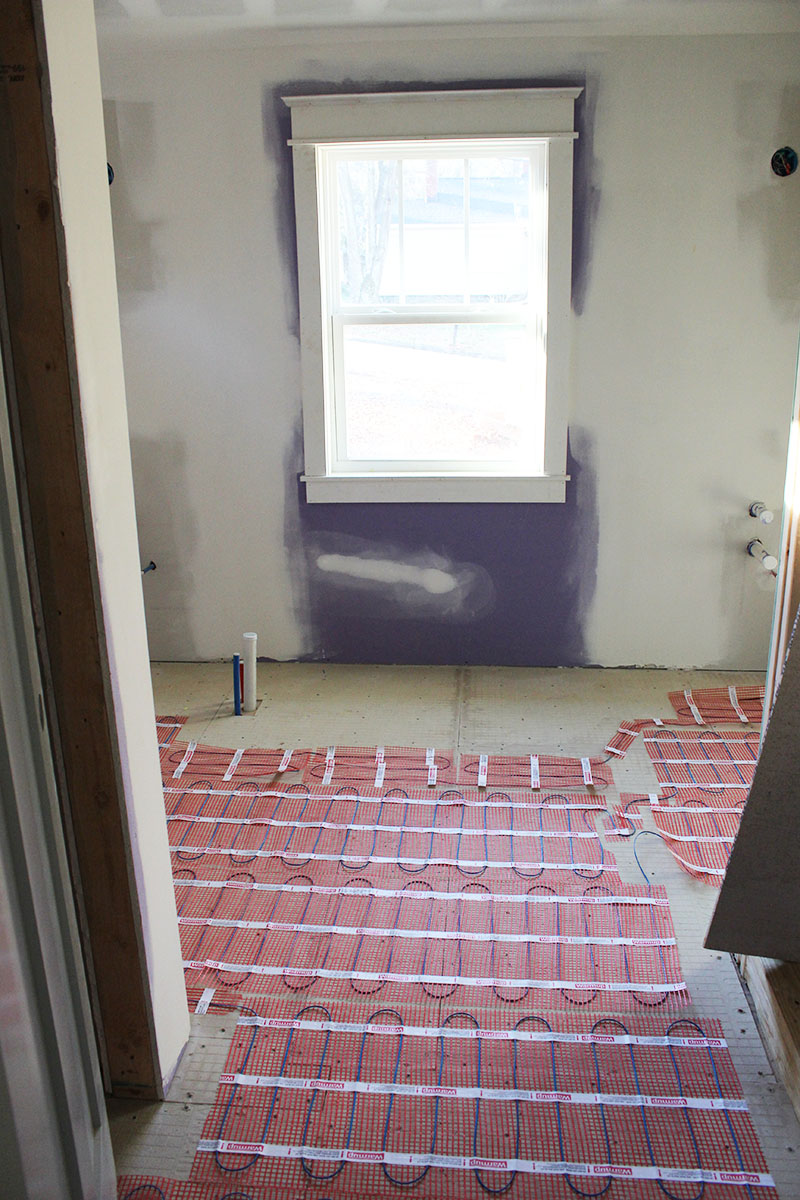
2. Choosing the Right Heating System:
Selecting an appropriate heating system is vital to achieve optimal comfort and efficiency. There are two main types of electric heating systems for tile floors: electric cable systems and electric mat systems. Electric cables are more flexible and suitable for custom layouts, while electric mats offer ease of installation due to their pre-spaced design.
FAQ: Can I install heated tile floors in all areas of my home?
While heated tile floors can be installed in most areas, it’s important to consider factors such as moisture levels and subfloor material. They are not recommended for wet areas like showers or outdoor spaces.
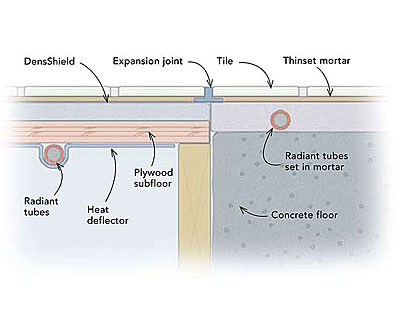
3. Preparing the Subfloor:
Ensure that the subfloor is clean, dry, and level before proceeding with the installation. Remove any loose debris, adhesive residues, or protruding nails. If necessary, use a self-leveling compound to create a smooth and even surface for the tile installation.
FAQ: Can I install heated tile floors over existing flooring?
Yes, you can install heated tile floors over existing flooring as long as it is stable and in good condition. However, it’s crucial to consider the additional height that will be added to the floor level and ensure proper clearance for doors.
II. Installing the Heated Tile Floor:
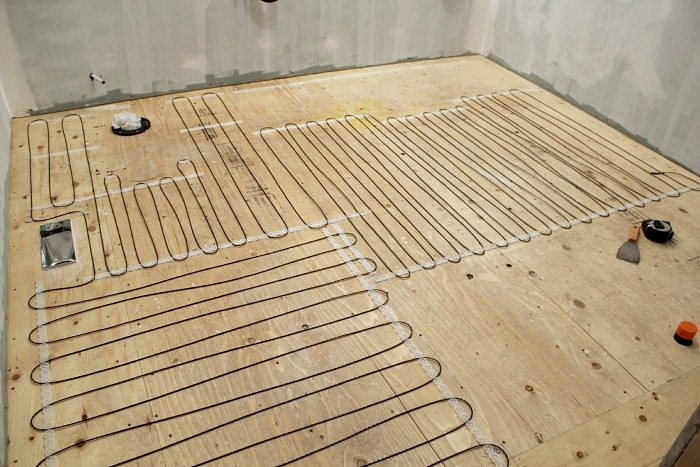
1. Laying Down Insulation Boards:
Insulation boards are essential for maximizing heat retention and preventing heat loss through the subfloor. Lay down the insulation boards according to the manufacturer’s instructions, ensuring they fit snugly against each other.
2. Positioning the Heating System:
Begin by unrolling or positioning the electric heating system on top of the insulation boards. Follow the manufacturer’s guidelines to ensure correct spacing and coverage across the entire floor area.
3. Securing the Heating System:
Use adhesive or tape recommended by the heating system manufacturer to secure it in place. Pay attention to any specific requirements regarding connections or overlaps between heating elements.
4. Wiring and Thermostat Installation:
Consult an electrician to wire your heating system properly according to local electrical codes and regulations. Install a thermostat at a convenient location on an interior wall, away from drafts or direct sunlight.
FAQ: Can I connect multiple heated tile floors to one thermostat? Yes, you can connect multiple heated tile floors to one thermostat as long as the total wattage of the heating systems does not exceed the capacity of the thermostat. Additionally, it’s important to ensure that the thermostat is compatible with multiple heating zones and has the necessary controls for each area. Consult with a professional electrician or heating system specialist for proper installation and configuration. 5. Installing the Tile:
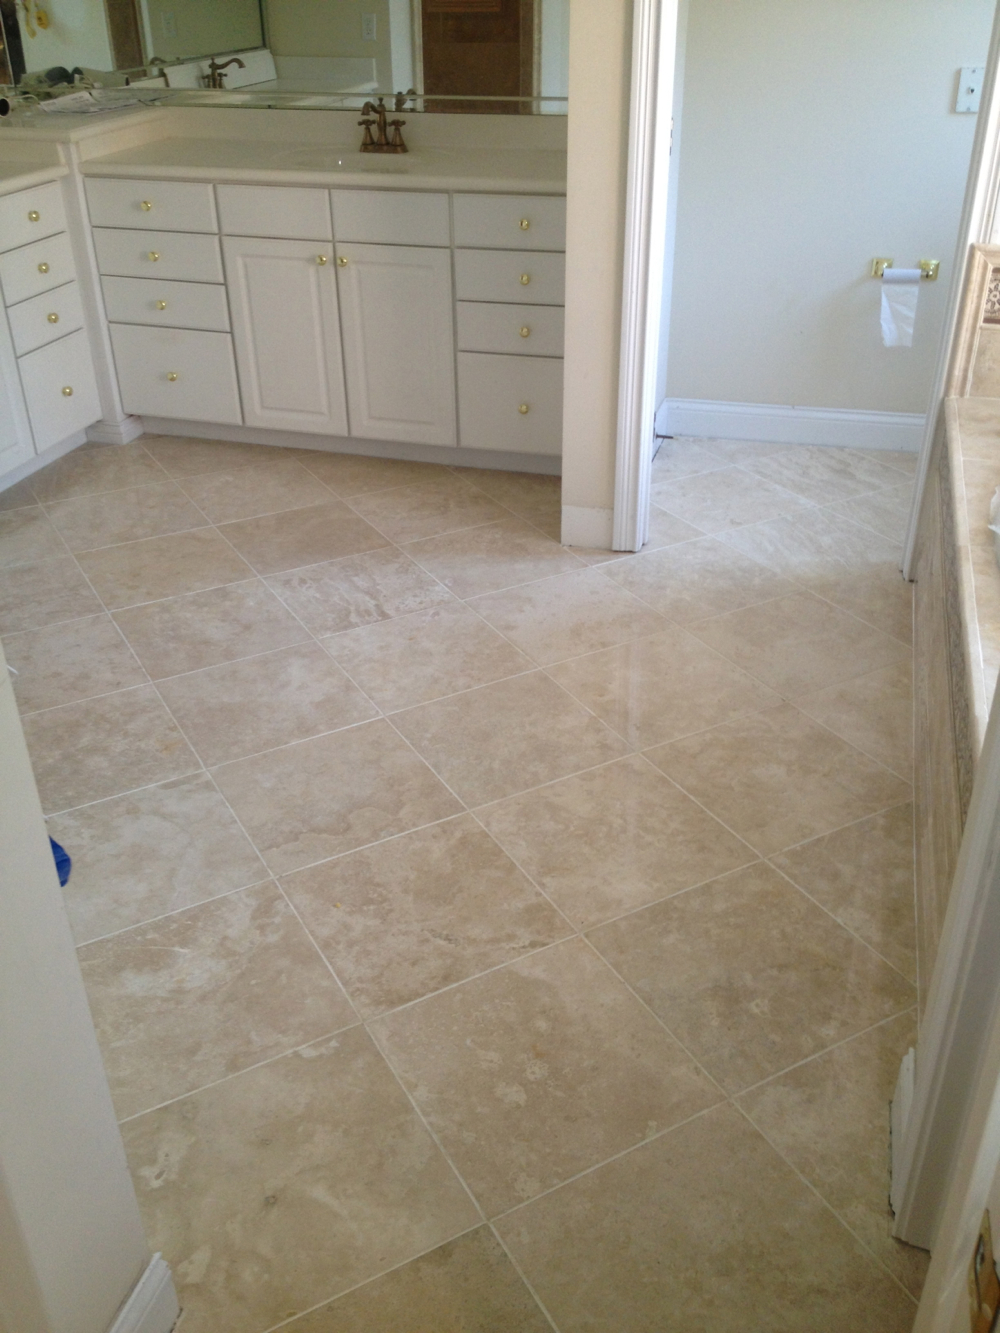
After the heating system is secured and wired, you can proceed with installing the tile. Apply thin-set mortar to the subfloor, following the manufacturer’s instructions. Place the tiles on top of the mortar, using spacers to ensure even spacing between tiles. Allow the mortar to dry completely before proceeding.
6. Grouting and Finishing:
Once the mortar is dry, remove the spacers and apply grout between the tiles using a grout float. Wipe away any excess grout with a damp sponge. Allow the grout to cure before walking on or applying any weight to the tiled floor.
7. Final Steps:
After the grout has cured, you can install any necessary trim or baseboards around the perimeter of the heated tile floor. Test the heating system and thermostat to ensure they are functioning properly before regular use.
FAQ: How long does it take for heated tile floors to warm up?
The time it takes for heated tile floors to warm up can vary depending on factors such as insulation, subfloor material, and individual heating system specifications. However, most systems typically reach their desired temperature within 30 minutes to an hour.
Remember to always follow manufacturer instructions and consult with professionals when necessary to ensure a safe and successful installation of heated tile floors in your home.