How To Level A Concrete Bathroom Floor
Related Images about How To Level A Concrete Bathroom Floor
A room ready to be transformed into a stunning Bathroom. Concrete flooring poured & levelled

Utilize bathroom tile suggestions to help you've that unique bath room you can enjoy daily. These are merely some good bath room floor tiles suggestions. While laminate has lots of the choices folks are looking for, such as durability, ease of set up and cost, it's not immune for clean water damage.
Sunken bath which is also a shower! Brilliant Sunken bathtub, Sunken bath, Sunken tub

A wood floors needs to be impeccably installed in order to stand a chance in the bathroom, in which moisture and standing water can kill it quickly flat. The correct choices be an investment which will enhance the price tag of the when, if, and house you opt to sell the house of yours. Here once again, you've a few options.
The 19 Best Cement Bathroom Floor – Homes Decor

Laminates are able to turn slippery when there's water and also you need to have anti skid flooring for your bathrooms, that is a basic requirement. This will give your bathroom a dash of color. Tiles with glossy finish provide a touch of elegance to the bathroom while mosaic with matte finish gives the bathroom a spacious and warm feel. Stone flooring may be more expensive but they keep going long.
Concrete Bathroom Floor Remodel – YouTube
My unbiased product reviews: Bathroom Construction – Some Useful Tips
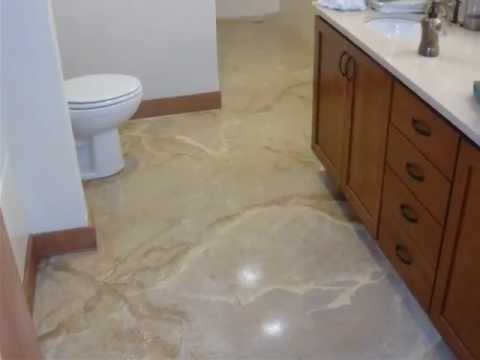
A Look at the Use of Concrete Floors in Bathrooms
![]()
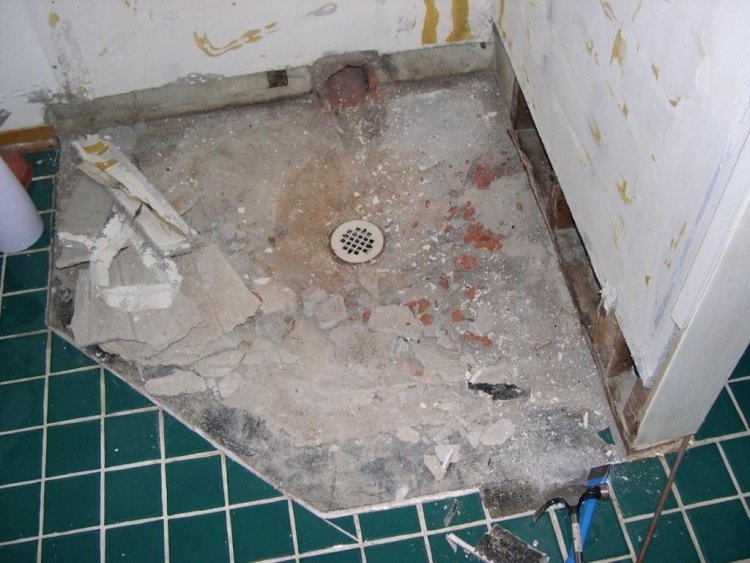
How to Make a Level Floor Slope for a Shower Bathroom
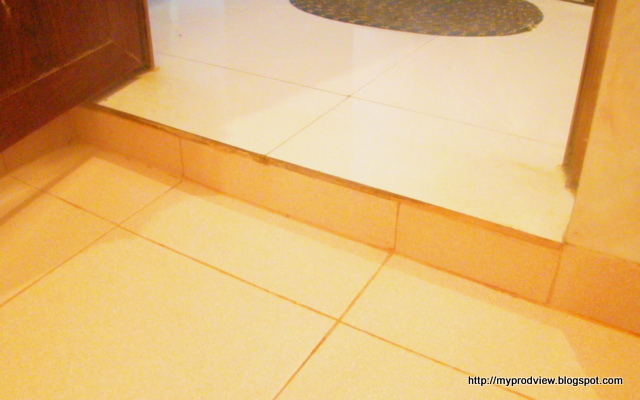
Whats the right way to build up a section of bathroom floor? – DoItYourself.com Community Forums

Tile Trends 2021 – Latest Trends & Styles Kitchen, Bath, Pool Tiles Tile America

MODE CONCRETE: Modern Open Concept Bathroom – featuring a concrete floor, a curbless shower and

How to Level a Slanted, Sloping Floor
/OldSlopingFloor-200378187-001-570d37d25f9b581408747176.jpg)
Whats the right way to build up a section of bathroom floor? – DoItYourself.com Community Forums

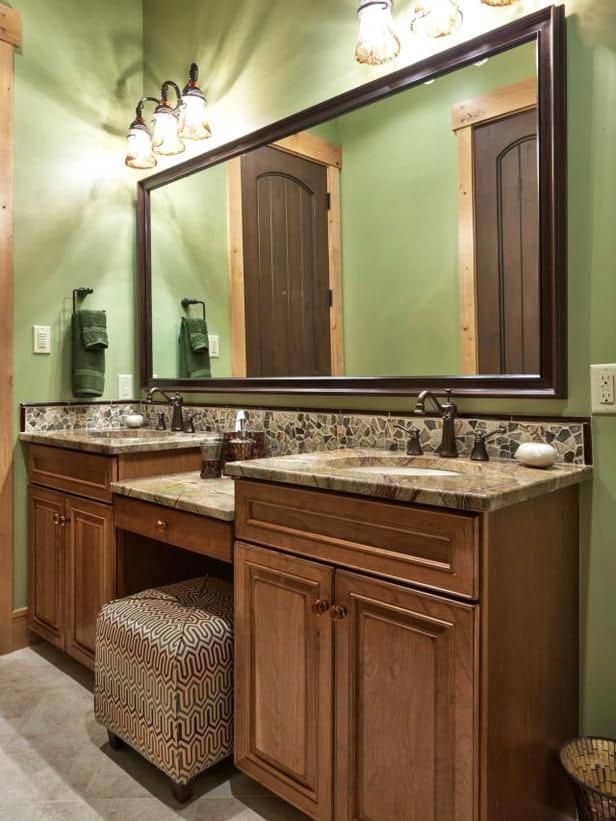
30+ Rustic Bathroom Vanity Ideas That Are on Another Level
Bathroom construction cost calculator. Estimate the cost of a new bathroom or bathroom renovation.

Related Posts:
- Bathroom Floor Tiles Price
- Cement Tile For Bathroom Floor
- Bathroom Floor Sky Painting
- Caught Me On The Bathroom Floor
- Heated Tile Floor Cost Per Square Foot
- Dirty Bathroom Floor
- Replace Bathroom Floor And Subfloor
- How To Make Bathroom Floor Waterproof
- Easy Bathroom Flooring Options
- Cheap Bathroom Floor Cabinets
How to Level a Concrete Bathroom Floor
A level bathroom floor is essential for the proper installation of tiles, linoleum, or any other type of flooring material. If your concrete bathroom floor is uneven, it can result in a variety of problems, such as cracked tiles, water pooling in certain areas, and an overall unappealing appearance. In this article, we will guide you through the process of leveling your concrete bathroom floor, ensuring a smooth and even surface for your chosen flooring material.
Before You Begin: Assessing the Floor
The first step in leveling a concrete bathroom floor is to thoroughly assess the current condition of the floor. Start by removing any existing flooring material and thoroughly cleaning the surface. Inspect the floor for any cracks or major imperfections that may require repair before leveling.
Repairing Cracks and Imperfections
Once you have identified any cracks or imperfections in the concrete floor, it is crucial to repair them before proceeding with the leveling process. Use a concrete patching compound to fill in any cracks or holes. Follow the manufacturer’s instructions for mixing and applying the compound and allow it to dry completely before moving on to the next step.
Leveling Compound Preparation
To level your concrete bathroom floor, you will need a self-leveling compound. Before applying the compound, it is important to prepare the surface properly. Start by vacuuming or sweeping away any dust or debris that may be present on the floor. Next, thoroughly clean the surface using a mild detergent and warm water to remove any dirt or grease.
Priming the Floor
Before applying the leveling compound, it is recommended to prime the floor with a bonding agent. This will help ensure better adhesion between the existing concrete and the leveling compound. Apply a thin layer of bonding agent using a brush or roller, following the manufacturer’s instructions. Allow it to dry completely before proceeding.
Mixing and Applying the Leveling Compound
Now that the surface is prepared, it is time to mix and apply the leveling compound. Read the manufacturer’s instructions carefully for the specific product you have chosen, as mixing ratios and application techniques may vary. Generally, the process involves mixing the compound with water to achieve a smooth consistency.
Start by pouring the required amount of clean water into a clean bucket. Slowly add the leveling compound powder while stirring continuously. Use a drill with a mixing paddle attachment for easier and faster mixing. Once the mixture is well blended, allow it to sit for a few minutes to activate.
Pouring and Spreading the Compound
With the leveling compound mixed and ready, pour it onto the prepared bathroom floor in small sections. Start at one corner of the room and work your way towards the exit. Use a gauge rake or a notched trowel to spread and level the compound evenly.
Work quickly but be careful not to pour too much compound at once, as it may become difficult to control and spread. Aim for a thickness of about 1/4 inch for best results. Continue pouring and spreading until you have covered the entire floor area.
Smoothing Out Imperfections
Once you have spread the leveling compound over the entire floor, use a long-handled smoothing tool or a straight-edged board to further level out any imperfections. Move the smoothing tool back and forth across the surface in long, sweeping motions, ensuring that no high spots or low spots are left behind.
Allowing for Drying Time
After leveling and smoothing out the floor, it is crucial to allow sufficient Drying time for the leveling compound. The drying time can vary depending on the specific product used, so it is important to refer to the manufacturer’s instructions for guidance.
Typically, the leveling compound will need at least 24 hours to dry completely. During this time, it is important to avoid walking on or placing any heavy objects on the floor to prevent any damage or unevenness.
Once the drying time is complete, you can proceed with further flooring installations or finishings on top of the leveled surface. It is important to ensure that the surface is fully dry before moving forward to prevent any complications or issues with the final result.
Overall, properly preparing and applying a leveling compound is crucial for achieving a smooth and even concrete bathroom floor. By following these steps and taking the necessary precautions, you can successfully level your floor and create a solid foundation for your desired flooring materials. Remember to always follow the manufacturer’s instructions for the specific leveling compound you are using. The specific product mentioned in the response is a leveling compound for concrete bathroom floors. The mixing ratio and application techniques may vary depending on the specific product chosen. It is important to refer to the manufacturer’s instructions for guidance.