How To Lay Self Adhesive Floor Tiles In Bathroom

Related Images about How To Lay Self Adhesive Floor Tiles In Bathroom
Floor Tiles Adhesive Bathroom / Marvelous self adhesive wall tiles in Powder Room / Tile

They come in shapes that are different, colors and sizes. Protection is additionally an additional aspect to check out. Another type of vinyl come about with felt backing. Tiles in sole strong colors impose a few limitations on imagination. Vinyl flooring isn't the main choice for a bathroom simply because they are considered unfashionable.
Laying Peel And Stick Tile In Bathroom – Bathroom Poster
Bathroom tiles are more hygienic than other types of flooring as they are really easy to clean. As a situation of fact, vinyl last for years on end. Above all, do not compromise on the look that you want. In case you'd like the look of wood for a substance which can withstand the perils of the bathroom, laminate flooring could be for you.
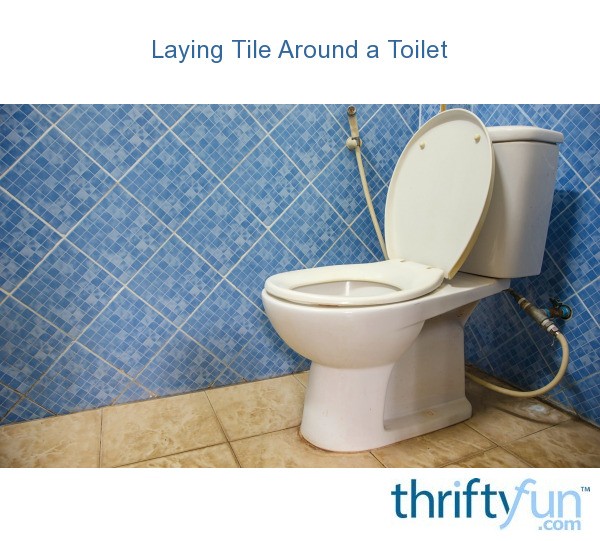
Laying Tile Around a Toilet ThriftyFun
You are able to refurbish as well as replace these tiles without lots of hassle. Choose from different options as marble, limestone, and travertine. In the event that get cork, a flooring content overloaded with great qualities, as it is sound insulation and hot underfoot, as well as being rot-proof and non-slip even when damp. For starters, none of these flooring options are tough enough, barring hardwood.
31 great ideas and pictures of self adhesive vinyl floor tiles for bathroom 2020
Here’s How to Transform Your Bathroom With Self Adhesive Floor Tiles Adhesive floor tiles

homebase vinyl flooring – bathroom vinyl flooring – living room vinyl flooring

Bathroom Progress…And Five Reasons I Love Groutable Self Adhesive Vinyl Floor Tiles
How to Install Self-Stick Floor Tiles how-tos DIY

Vinyl Floor TIles Sienna Vinyl Design Zazous Online UK

Waterproof anti slip bathroom pvc flooring tiles – TopJoyFlooring

Installing peel-and-stick vinyl tile in bathroom – Here Goes Things

Bathroom Linoleum Floor Covering Commercial Wood Grain Vinyl Flooring

How to Install an Adhesive Vinyl Bathroom Tile Floor merrypad

How to remove vinyl floor and tile a small bathroom – DIY Tile – YouTube

Related Posts:
- Bathroom Floor Tiles Price
- Cement Tile For Bathroom Floor
- Bathroom Floor Sky Painting
- Caught Me On The Bathroom Floor
- Heated Tile Floor Cost Per Square Foot
- Dirty Bathroom Floor
- Replace Bathroom Floor And Subfloor
- How To Make Bathroom Floor Waterproof
- Easy Bathroom Flooring Options
- Cheap Bathroom Floor Cabinets
Title: How To Lay Self-Adhesive Floor Tiles in the Bathroom: A Comprehensive Guide
Introduction:
Installing self-adhesive floor tiles in your bathroom is an excellent DIY project that can instantly upgrade the look and feel of the space. With their ease of installation and affordability, these tiles are a popular choice among homeowners. In this comprehensive guide, we will walk you through the step-by-step process of laying self-adhesive floor tiles in your bathroom, ensuring a professional-looking finish that will withstand moisture and daily use.
I. Preparing for Installation:
Before diving into the installation process, it’s crucial to prepare your bathroom properly. This step ensures a clean, even surface for the self-adhesive tiles to adhere to.
1. Clearing the Space:
Start by removing all objects from the bathroom, including rugs, towels, and toiletries. Emptying the room will make your job easier and prevent any potential damage to these items during installation.
2. Cleaning:
Thoroughly clean the bathroom floor using a mild detergent or cleaner suitable for your flooring material. Remove any dirt, dust, or debris that may hinder proper adhesion.
FAQs:
Q1: Do I need to remove my existing flooring before installing self-adhesive tiles?
A1: It depends on the condition of your current flooring. If there are no major issues like loose or damaged tiles, you can install self-adhesive tiles directly over them. However, it’s essential to ensure that the existing flooring is clean and level.
Q2: Can I install self-adhesive floor tiles on top of carpet?
A2: No, self-adhesive floor tiles should not be installed over carpet. Carpet fibers prevent proper adhesion and may compromise the longevity of your new flooring.
II. Planning and Measuring:
Proper planning and accurate measurements are vital for a successful installation process. Take your time with this step to ensure an aesthetically pleasing outcome.
1. Choosing the Right Tiles:
Consider the size, color, and design of the self-adhesive floor tiles you want to install. Opt for tiles that complement your bathroom’s overall aesthetic and personal style.
2. Measuring the Floor:
Measure the length and width of your bathroom floor using a tape measure. Multiply these two values to determine the square footage of your space. It is advisable to purchase an extra 5-10% of tiles to account for any cutting mistakes or future repairs.
FAQs:
Q1: Can I install self-adhesive tiles over uneven flooring?
A1: While self-adhesive tiles can be slightly forgiving on minor imperfections, it’s best to ensure a smooth and level surface. If your existing floor has significant irregularities, consider using a leveling compound or consult a professional for advice.
Q2: How do I calculate the number of tiles needed for my bathroom?
A2: To determine the number of self-adhesive tiles required, divide the square footage of your bathroom floor by the coverage area of one tile. Always round up to account for cut tiles along edges and corners.
III. Installation Process:
Now that you have properly prepared and planned for your installation, it’s time to proceed with laying self-adhesive floor tiles in your bathroom.
1. Starting Point:
Identify the center point of your bathroom by drawing intersecting lines from opposite corners. This will serve as your starting point for laying the self-adhesive tiles.
2. Dry Fitting:
Before peeling off the backing paper, dry-fit your tiles To ensure they fit properly and align with your desired pattern. Make any necessary adjustments before proceeding to the next step.
3. Peel and Stick:
Starting from the center point, peel off the backing paper of one tile and carefully place it on the floor. Press down firmly to ensure proper adhesion. Continue this process, working your way outwards in a grid-like pattern.
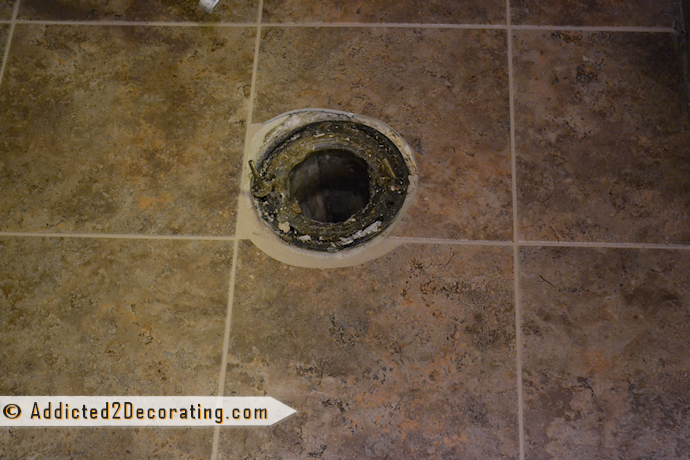
4. Cutting Tiles:
As you reach the edges or encounter obstacles like pipes or cabinets, you may need to cut tiles to fit. Use a sharp utility knife or tile cutter to make precise cuts. Remember to wear protective gloves and goggles while cutting.
5. Finishing Touches:
After all the tiles are installed, use a floor roller or a clean towel to press down firmly on the entire floor surface. This will ensure proper bonding and eliminate any air pockets. Remove any adhesive residue or smudges with a damp cloth.
FAQs:
Q1: How long should I wait before using my bathroom after installing self-adhesive floor tiles?
A1: It is recommended to wait at least 24-48 hours before walking on or placing heavy objects on your newly installed self-adhesive floor tiles. This allows time for proper adhesion and curing.
Q2: Can I apply grout or sealant over self-adhesive floor tiles?
A2: No, self-adhesive floor tiles do not require grout or sealant as they are designed to be installed without them. Adding grout or sealant may interfere with the adhesive properties of the tiles.
IV. Maintenance and Care:
Proper maintenance and care will help prolong the life and appearance of your self-adhesive floor tiles in the bathroom.
1. Regular Cleaning:
Sweep or vacuum your self-adhesive floor tiles regularly to remove any loose dirt or debris. For deeper cleaning, use a mild detergent diluted in warm water. Avoid using abrasive cleaners or tools that may scratch or damage the tiles.
2. Preventive Measures:
Place doormats at entryways to minimize the amount of dirt and moisture tracked onto the floor. Use felt pads on furniture legs to prevent scratches and scuffs. Avoid dragging heavy objects across the floor.
3. Prompt Repairs:
If any tiles become loose or damaged, promptly replace them to maintain the integrity of your floor. Keep some spare tiles from your initial installation for this purpose.
FAQs:
Q1: Can I use a steam mop to clean my self-adhesive floor tiles?
A1: It is not recommended to use a steam mop on self-adhesive floor tiles as excessive heat and moisture may weaken the adhesive bond.
Q2: How often should I deep clean my self-adhesive floor tiles?
A2: The frequency of deep cleaning will depend on the amount of foot traffic and level of dirt in your bathroom. Generally, deep cleaning once every 1-3 months is sufficient for maintaining a clean and presentable floor surface.