How To Install Wood Floor Tiles

Related Images about How To Install Wood Floor Tiles
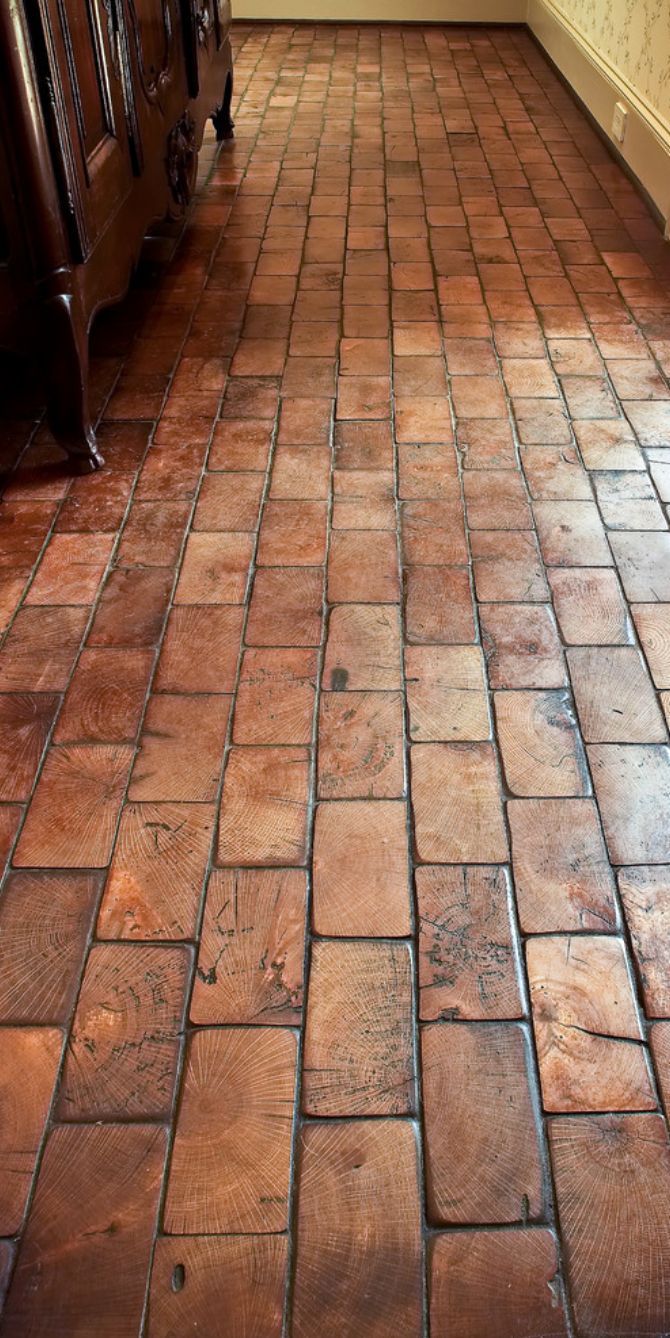
Can’t remember where I found this (probably Google) but I love it! Tiles, Flooring, Tile floor

The wood floor care specialist will evaluate the floors of yours to figure out exactly what's required subsequently completely clean and wax the floors restoration them directlyto the beauty, shine and all-natural warmth associated with wood floors. This particular collaboration gives us a sturdy floor material that is able to withstand particularly heavy human traffic. For starters you have to choose which approach you would like.
Oak parquet flooring Step Flooring Ltd.

The most essential detail to remember is, the time that you saved and are able to doing something fun with all the friends and family that are crucial to you. As period wore on, many other flooring was created and slowly started to diminish the frequency of traditional wood flooring. Some say renewable flooring actually helps create a safer and healthier building. In comparison to engineered flooring,typically the setting up of solid wood floors certainly shouldn't be attempted by non-professionals.
Pin on Custom Floors and More – Misc.

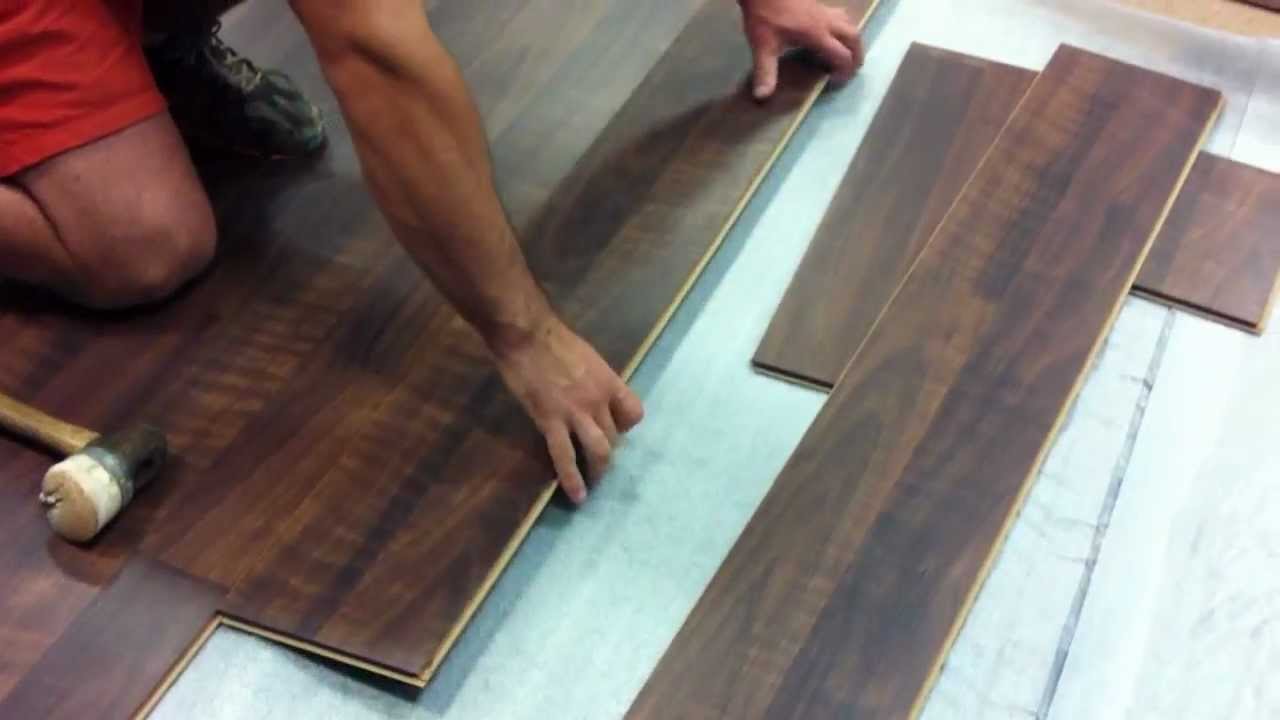
This is like 2 shorter planks so it looks a lot more like solid wood flooring. To sand it off implies that the wear covering needs to be thicker compared to the height of the nails and in addition have space to sand from the micro bevel between boards; that amounts to a lot of sanding. Specialized wooden floor restoration companies will have invested in the right machinery for the job and in addition in the correct training.
What are the best removable wood floor tiles? Trade show flooring, Wood tile floors, Foam tiles

Best Basement Flooring Options DIY

29 Stylish How to Install Floating Hardwood Floors On Concrete Unique Flooring Ideas

Remodelaholic Friday Favorites: Wood Block Floor and a Beautiful Dog Kennel (yes, I said dog
Tile Flooring: Youtube How To Install Tile Flooring
Could Stone Paver Decks Compete With Wood and Composites? Remodeling

Installing Wood Floors Over Ceramic Tile: Software Free Download – towerbackuper

How to install flooring tiles – YouTube

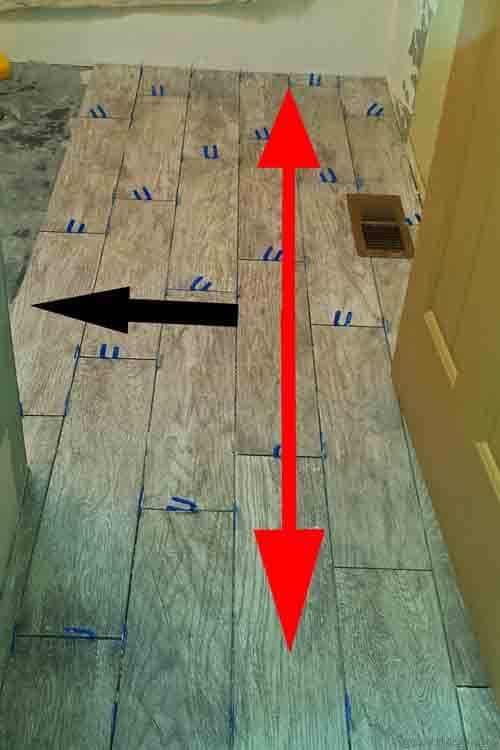
More tips for installing wood look tile flooring DIYTileGuy
How to make built in LED floor lights in bathroom tiles

Contractor Talk – Professional Construction and Remodeling Forum – removal of tile to install

Related Posts:
- Wood Floor Modern Kitchen
- Wood Floor Garage Plans
- Real Wood Flooring In Kitchen
- Wood Floor Cork Underlayment
- Streak Free Wood Floor Cleaning
- Solid Wood Flooring White Washed Oak
- Engineered Wood Flooring Durability
- Wood Flooring Types Hardness
- Engineered Wood Flooring Formaldehyde Emission
- Wood Floors For Beach House
How To Install Wood Floor Tiles
Wood floor tiles can give a warm and inviting atmosphere to any room in your home. Whether you’re installing wood floor tiles in a bedroom, living room, or kitchen, the process is very similar. Installing wood floor tiles requires careful planning, preparation, and execution to ensure that the job is done correctly and to ensure that your new floors last for years to come. This guide will help you through the steps of installing wood floor tiles so that you can get the perfect look for your home.
Gather Materials Needed for Installation
Before beginning to install wood floor tiles, it is important to gather all of the materials needed for the job. You will need the following items: wood floor tiles, adhesive, tile spacers, grout, sealant, a putty knife or trowel, a wet saw or tile cutter with a carbide blade, a flat-edged trowel, gloves and safety glasses. Once you have gathered all of these materials, you are ready to begin installation.
Prepare the Subfloor
The next step in installing wood floor tiles is to prepare the subfloor. The subfloor should be clean and free of debris and dust before you begin installation. It is also important to make sure that the subfloor is level and free of any dips or high spots. If there are any imperfections in the subfloor, they should be filled with an appropriate patching material before beginning installation.
Lay Out the Tiles
Once the subfloor has been prepared, it is time to lay out the tiles. Start by marking a line on the wall where you want your first row of tiles to begin. Then take one tile and place it on top of this line. Work your way down from this starting point by laying out each tile until you reach the end of your wall or room. As you work your way down, use tile spacers between each tile to ensure that they are spaced evenly apart from each other. This will make sure that your finished product looks professional and even when completed.
Apply Adhesive and Secure Tiles
When you have finished laying out your tiles, it’s time to apply adhesive. Apply enough adhesive to cover half of each tile using a notched trowel or putty knife in an up-and-down motion. Then press each tile firmly into place on top of the adhesive ensuring that there are no air bubbles between them. Use a rubber mallet or tapping block if necessary to make sure that each tile is securely in place on top of the adhesive.
Grout & Seal Tiles
Once all of your tiles are securely in place on top of the adhesive it is time to grout them together. Take some grout and mix it according to package instructions then apply it with a rubber float over all of your tiles in an up-and-down motion making sure that all gaps between each tile are filled with grout completely. Allow this grout to dry for at least 24 hours before applying sealant over top for added protection against staining and moisture damage over time.
FAQs About Installing Wood Floor Tiles
Q: What tools do I need for installing wood floor tiles?
A : You will need a wet saw or tile cutter with a carbide blade, adhesive, tile spacers, grout, sealant, a putty knife or trowel, a flat-edged trowel, gloves and safety glasses.
Q: How do I make sure all of the tiles are securely in place on top of the adhesive?
A: Use a rubber mallet or tapping block if necessary to make sure that each tile is securely in place on top of the adhesive.
What are the necessary tools needed to install wood floor tiles?
1. Tape measure2. Chalk line
3. Hammer
4. Nail gun or Mallet/Rubber mallet
5. Pry bar
6. Safety goggles
7. Knee pads
8. Utility knife
9. Notched trowel
10. Spacers
11. Wood glue
12. Foam underlayment
13. Wood flooring adhesive
14. Sandpaper/sander
15. Finish (stain, sealer, or wax)
16. Grout