How To Install Vinyl Flooring In Kitchen

Related Images about How To Install Vinyl Flooring In Kitchen
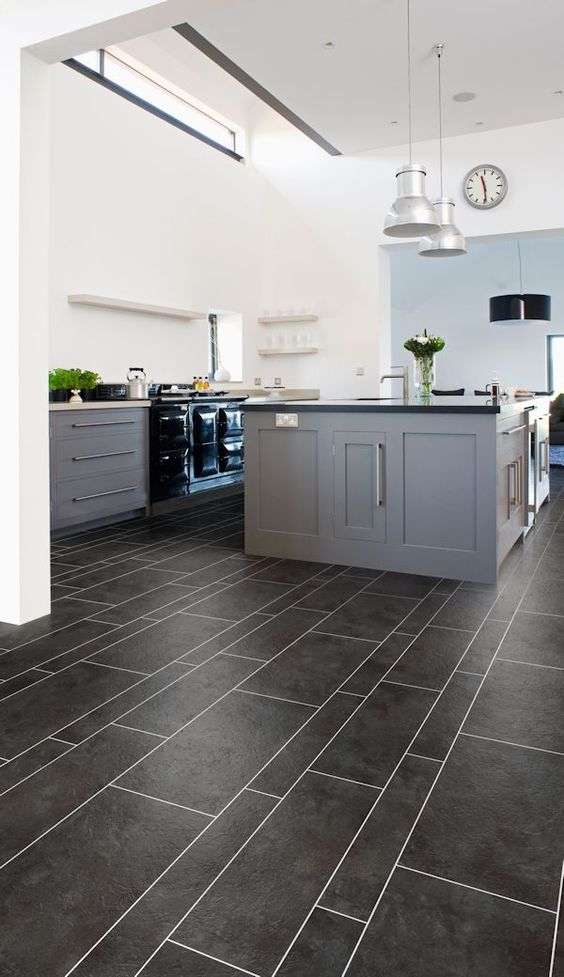
How to Install Vinyl Kitchen Flooring BuildDirect Learning CenterLearning Center

Kitchen flooring can set the mood for the whole room. Cork flooring does not result in rotting even in case it continues to be damp for a long time and it additionally has an all natural resistance to flame thus, it will not burn easily. In mind, you are able to get the very best type of kitchen floor tiles installed in your house that not only looks fabulous but is a fantastic complement to the lifestyle of yours.
How to Install Vinyl Kitchen Flooring BuildDirect Learning CenterLearning Center

The initial basis for kitchen tiles layout is color. If perhaps the floor of yours is level with the floors in the adjacent areas, you can make old linoleum, sheet vinyl and cracked tiles disappear by installing laminate flooring right over them. They flawlessly display the remarkable wood grain which completes that traditional kitchen appear. Ask for the measurement needed for your kitchen and make the decision of yours about the product to use.
What Do You Use Under Vinyl Flooring – install laminate over vinyl flooring

There are lots of points you need to contemplate during the shopping process. Nevertheless, damp tiles are very slippery, and if you have little kids this can be a problem; also, keep in your head that in case you drop an item on a ceramic tile, the shoe is will break. There are not many low-cost kitchen flooring choices as popular as laminate.
Lifeproof Semi-Sweet Oak 8.7 in. W x 47.6 in. L Luxury Vinyl Plank Flooring (20.06 sq. ft

SMARTCORE Ultra Savannah Oak 5.91-in x 48.03-in Waterproof Interlocking Luxury Vinyl Plank

Which Direction Do I Install Vinyl Plank Flooring? – TwentyOak Vinyl plank flooring, Plank

6 Kitchen Flooring Options The Home Depot Community

Three Crucial Questions When Choosing Your Flooring – IB Flooring

The Pros and Cons of Cork Flooring that You Should Know – HomesFeed

Vinyl Flooring For Kitchens – Choosing the right floor for your kitchen – Part 5: Performance

Kitchen Vinyl Flooring Ideas and Inspiration Hunker

Vinyl Floor For Kitchen – 75 Beautiful Vinyl Floor Kitchen Pictures Ideas June 2021 Houzz / If

Vinyl Floor For Kitchen : Kitchen Luxury Vinyl Flooring Horitahomes Com / For inspiration, free
RV Flooring & Finishes Dave & LJ’s RV Furniture & Interiors

Related Posts:
- What Is The Most Desirable Kitchen Floor Plan
- How To Lay Out A Kitchen Floor Plan
- Best Hardwood Floor Finish For Kitchen
- Wickes Kitchen Floor Tiles
- Kitchen Floor Replacement Options
- 20 X 10 Kitchen Floor Plans
- Kitchen Floor Plans By Size
- Kitchen Floor Storage Cabinets
- Kitchen Cabinets Flooring And Countertops
- Bamboo Kitchen Flooring Ideas
How To Install Vinyl Flooring In Kitchen
Installing vinyl flooring in your kitchen is a great way to give your cooking space a fresh, new look. Not only is it an economical choice for kitchen flooring, but it’s also extremely durable and easy to clean. While the installation process can seem a bit daunting, with the right tools and techniques, you’ll be able to complete this project with ease. In this article, we’ll provide you with all the information you need to successfully install vinyl flooring in your kitchen.
Materials Needed For Vinyl Floor Installation
Before you begin the installation process, it’s important to make sure that you have all of the necessary materials on hand. You’ll need:
• Vinyl flooring
• Underlayment
• Foam tape
• Tape measure
• Utility knife
• Chalk line
• Adhesive or nails
• Hammer or nail gun
• Trowel
• Plywood screws
Once you’ve gathered all of your supplies, you can move on to the next step.
Preparing The Subfloor For Vinyl Floor Installation
The first step in installing vinyl flooring is preparing the subfloor. Any existing flooring needs to be removed prior to installation, and any debris should be cleared away. Additionally, make sure that the subfloor is clean and level. If there are any uneven spots, use a self-leveling compound to even them out before moving forward with installation. Once the subfloor is prepped and ready to go, you can start laying down the underlayment.
Laying The Underlayment For Vinyl Floor Installation
Underlayment provides cushion and insulation beneath your vinyl flooring, so it’s an essential part of the installation process. Make sure that your underlayment is laid down evenly across the entire space, trimming off any excess material if necessary. Once it’s in place, attach it to the subfloor using foam tape or plywood screws. This will help ensure that your underlayment stays securely in place during installation.
Cutting And Fitting The Vinyl Floor Planks Or Tiles
Once you’ve got your underlayment laid down and secured in place, you can move on to cutting and fitting your vinyl planks or tiles. Measure each section of the room carefully before beginning to cut your pieces down to size. Use a chalk line or utility knife to cut each piece as precisely as possible for a seamless fit once they’re installed. Once all of your pieces are cut and fit into place, you can begin attaching them to the subfloor.
Attaching The Vinyl Floor To The Subfloor
The method used for attaching vinyl floor planks or tiles will depend on which type of adhesive or nails that you choose for this project. If you opt for an adhesive-backed product, apply it directly onto each plank before installing it onto the subfloor; if you choose nails or screws instead, use a hammer or nail gun to secure each Piece in place. In either case, be sure to follow the manufacturer’s directions for proper installation.
Once your vinyl floor is installed, you can enjoy your new space!
“What tools are needed to install vinyl flooring in a kitchen?”
1. Tape Measure2. Utility Knife
3. Chalk Line
4. Hammer
5. Floor Roller
6. Vinyl Flooring Adhesive
7. Notched Trowel
8. Spacers
9. Wall Trim
10. Plywood Screws
What adhesive should be used to install vinyl flooring in a kitchen?
The best adhesive for installing vinyl flooring in a kitchen is a waterproof pressure-sensitive adhesive. This type of adhesive is designed to hold vinyl flooring in place and protect it from moisture damage. It can be applied to the back of the vinyl flooring planks or tiles before installation, and it will dry quickly and firmly bond them to the subfloor. Always be sure to read the manufacturer’s instructions for proper use and application of the adhesive.What tools are needed for installing vinyl flooring in a kitchen?
1. Tape measure2. Utility knife
3. Straight edge
4. Hammer
5. Chalk line
6. Vinyl flooring adhesive
7. Roller or brush to apply adhesive
8. Vinyl flooring seaming tape
9. Seam roller
10. A soft rubber mallet for tapping pieces into place
11. Wall trim or baseboard molding
12. Plywood screws or nails For fastening the vinyl flooring to the subfloor .