How To Install Floating Cork Floor

Related Images about How To Install Floating Cork Floor
Using Vinyl Flooring Adhesive with Sheet Vinyl – Easy : Renovate
Cork is the main component in this flooring item, along with a few other items based on the manufacture. If you have older, heavy framed a bed, armoires, or dressers, you might want to get hardwood flooring or perhaps bamboo floors instead. The last profit we need to note is actually excellent for you homeowners with allergen hypersensitivity since cork is really hypoallergenic.
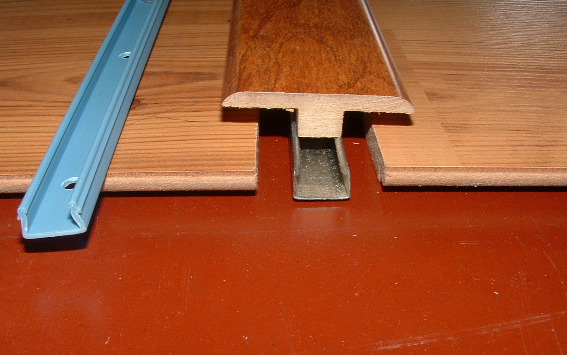
Installing Laminate Transitions, Step by Step Instructions
There are a number of ideas we can provide you with roughly cork flooring. Cork flooring is not a new flooring product, in fact it has been implemented for a huge number of years. Cork's natural color and shade variation enables it to rival every other wood flooring product. Flooring is often a nightmare in case you get it done yourself or just not turn out the way you intended.
Can You Heat And Bend Vinyl Plank Locking Floor Vinyl Plank Flooring

Not only does it have the beauty as well as durability of regular wood flooring products and solutions though it is also an eco-friendly floor solutions. You are going to want to avoid installing cork as the flooring of yours of choice in areas which are prone to flood or drainage issues. These proof properties make cork utilizable in virtually every area of the household of yours.
Reducer Flush Mount Unique Wood Floors

Goodfellow Dubai Collection SPC – PALM BEACH – Hardwood Flooring in Toronto – Laminate

Valinge Oak Nature Misty White

HVAC Vibration Isolators Spring Vibration Isolators, Rubber Hanger & Rubber Mounts Seismic

Related Posts:
- Cork Floor Paste Wax
- Cutting Cork Flooring Planks
- Cork Flooring Cons and Pros
- Basement Flooring Ideas Cork
- Cork Floor Cost Comparison
- Can You Stain Cork Floors
- Cork Flooring Per Square Foot
- Can Cork Flooring Be Installed Over Ceramic Tile
- Refinish Cork Floor Tiles
- Cork Floor Tiles Reviews
How to Install Floating Cork Floor
Installing a floating cork floor is a great way to add comfort and beauty to your home. Floating cork floors are easy to install and have a low maintenance cost, making them an attractive option for any homeowner. In this article, we will discuss the steps needed to properly install a floating cork floor.
Preparation
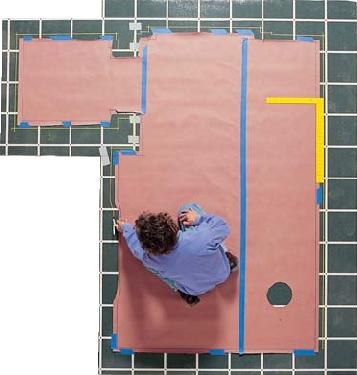
Before installing your floating cork floor, it is important to make sure that the surface you are working on is clean and free of debris. Cleaning the area with a vacuum cleaner or broom can help you ensure that the surface is ready for installation. It is also important to check that the subfloor is even and level so that there are no bumps or dips that may cause problems during installation. Once you have prepared the area, it is time to start installing your floating cork floor.
Layout
The next step in installing your floating cork floor is to lay out the planks according to their size and shape. When laying out the planks, make sure that they are staggered in order to allow for proper expansion and contraction of the material. If you are using adhesive strips, make sure they are placed between each plank in order to keep them secured together. Once you have laid out all of the planks, it is time to start installing them onto your subfloor.
Installation
When installing your floating cork floor, it is important to start in one corner of the room and work your way outwards in a straight line. Begin by securing each plank with an adhesive strip or nail if necessary, then pushing it into place with a rubber mallet or hammer. Once all of the planks have been installed, use a jigsaw or handsaw to cut away any excess material around doorways or other corners. After the installation is complete, be sure to check all of the seams between planks for any gaps or unevenness. If any gaps exist, fill them with cork putty before finishing up the installation process.
Finishing Touches
Once your floating cork floor has been properly installed, you can begin adding any finishing touches that you would like. For example, you may choose to add a protective sealant over the surface in order to protect it from water damage and wear-and-tear over time. You may also want to add a border around the perimeter of the room in order to give it an extra polished look. Adding these finishing touches can really elevate the look of your newly installed floating cork floor and will help keep it looking great for years to come!
FAQs About Installing Floating Cork Floor
Q: What tools do I need for installing my floating cork floor?
A: You will need some basic tools such as a rubber mallet or hammer for securing each plank into place, as well as a jigsaw or handsaw for cutting away any excess material around doorways or other corners. Additionally, if you are using adhesive strips you will need some glue or nails in order to keep them secured together.
Q: How much maintenance does my floating cork floor need?
A: The beauty of cork floors is that they require very little maintenance once they have been installed correctly! To keep your floor looking Its best, simply sweep or vacuum regularly and mop with a damp cloth when needed. You may also want to apply a protective sealant over the surface every few years in order to protect it from water damage and wear-and-tear over time.
Q: What tools do I need to install a floating cork floor?
You will need a saw, a jigsaw, a hammer, a measuring tape, a level, a chisel, underlayment, spacers, adhesive, and cork tiles. Additionally, you may need a rubber mallet or a hammer to secure the plank into place, and a putty knife to fill in any gaps between planks.Q: How do I install a floating cork floor?
A: Installing a floating cork floor is relatively easy. The first step is to prepare the subfloor, which should be level and clean. Next, place the first piece of cork flooring in the corner of the room, making sure it is parallel to the walls. Place plastic spacers between each piece to ensure proper expansion. Once all the pieces are laid out, use a tapping block and mallet to secure them together. Finally, use a foam underlayment to absorb sound and provide extra cushioning.Q: What tools do I need to install a floating cork floor?
To install a floating cork floor, you will need a saw (circular or jigsaw), tape measure, level, chalk line, utility knife (or scoring tool), adhesive, trowel, mallet, and a pull bar. Additionally, you may want to have a vacuum cleaner on hand for clean-up.Q: How do I install a floating cork floor?
A: Floating cork floors are a stylish and easy-to-install flooring option. To install a floating cork floor, you will need to prepare the subfloor and purchase the necessary materials.1. Start by preparing the subfloor. Make sure it is level, clean, dry, and free of any debris.
2. Measure the room to determine how much cork flooring you will need.
3. Purchase the necessary materials, including underlayment, cork planks, adhesive tape, and transition strips (if needed).
4. Lay down the underlayment in strips. Make sure the edges are flush with each other and that there are no gaps or overlaps.
5. Begin laying down the planks of cork flooring in rows, starting from one corner of the room and working your way out to the other side. Make sure to stagger each row for a more aesthetically pleasing look.
6. Secure each row with adhesive tape to ensure it is firmly in place and that there are no gaps between planks.
7. Install any transition strips around doorways or other areas where two different types of flooring meet (e.g., carpet and cork).
8. Once all pieces have been laid down, use a rolling pin or heavy object to press down on each plank firmly to ensure it is secure in place.
9. Let the adhesive dry overnight before walking on your new cork floor!