How To Apply Epoxy Flooring In Garage

Related Images about How To Apply Epoxy Flooring In Garage
Pin by Garage Experts on Garage Epoxy Flooring Garage epoxy, Epoxy floor coating, Epoxy floor

Epoxy floor surfaces are not difficult to clean and are shockingly reluctant to bacteria. In past days, epoxies floor coatings were limited to merchandise stores, but with the advent of technology, they’ve grown to be a pattern for flooring should have in industries, showrooms, factories, warehouses, garages, hospitals, as well as government facilities brightening up the floors.
Epoxy Garage Flooring: Professional Installation vs. DIY – Garage Vision Company

The solution is simple and quick to use and can treat faster than elastomeric coatings. In order to enhance the resilience of its, this particular covering is made with an aspect of both base and curative elements combined at a suitable ratio resulting to an exothermic reaction that hardens the coat giving it a hard plastic quality. This could destroy the overall attractiveness of the floor.
Modular Vs. Epoxy: Which Type of Garage Flooring is Easier to Maintain?

Epoxy flooring is not low-cost and also the cost of a floor depends on the size of the surface area to be covered, obviously. Epoxy is resilient adequate to resist many stains & still maintain an attractive floor. Along with deciding on a floor color, buyers also have an opportunity to improve their floor’s uniqueness with anti-slip flecks. Epoxy flooring is usually utilized in an industrial setting.
Epoxy Flooring Professional Garage Floors Process Garage Floor Epoxy Epoxy Garage Floors
Garage Floor Epoxy: Tips, Tricks, Hacks-sunlitspaces.com Best garage floor epoxy, Garage epoxy

Garage Epoxy Flooring Reviews: Benefits, Pro & Cons Floor Techie advantages, disadvantages
Epoxy Flooring for my Garage – YouTube

REFLECTOR ENHANCER – Metallic Epoxy Floor Over Concrete. Victoria B.C – South Island Surfaces
Why You Should Have an Epoxy Floor in Your Garage – Epoxy Floor Supply

Easy Do-It-Yourself Epoxy Flooring Installation Guide We Are Extreme

Epoxy Flooring Contractors Tallahassee Epoxy Flooring Company
FulBest Epoxy Floor Coating In Lino Lakes, MN Minneapolis Epoxy Flooring

How To Apply Garage Floor Epoxy Like a Pro
/Car-garage-GettyImages-528098460-58a1fba93df78c475869ff29.jpg)
Related Posts:
- Epoxy Resin Floor Finish
- Commercial Grade Floor Epoxy
- Clear Self Leveling Floor Epoxy
- Epoxy Over Laminate Flooring
- Quikrete Floor Epoxy Reviews
- Outdoor Epoxy Resin Flooring
- Epoxy Floor Decals
- Epoxy Terrazzo Flooring Installation
- How To Remove Epoxy Paint From Concrete Garage Floor
- Epoxy Flooring Baton Rouge
A Comprehensive Guide on How to Apply Epoxy Flooring in Your Garage
Introduction:
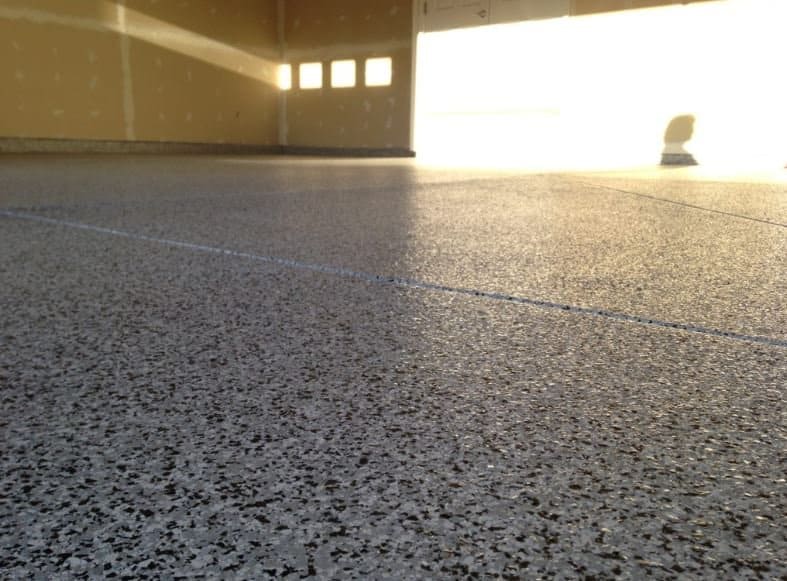
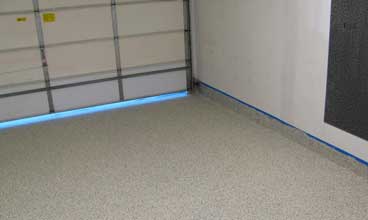
Epoxy flooring has gained immense popularity in recent years, especially in garage spaces. Not only does it provide a durable and long-lasting surface, but it also enhances the overall aesthetics of your garage. If you’re considering installing epoxy flooring in your garage, this comprehensive guide will walk you through the step-by-step process, from preparation to application, ensuring a successful and professional-looking result.
I. Preparing the Garage Floor:
Before applying epoxy flooring, it is crucial to prepare the garage floor properly. This involves thorough cleaning and repairing any existing damage. Follow these steps for optimal results:
1. Clearing and Cleaning:
Start by removing all items from your garage, including vehicles, tools, and other belongings. Sweep or vacuum the entire floor to eliminate dust, debris, and loose materials. Use a degreaser or suitable cleaner to remove any oil stains or stubborn dirt.
FAQ: Can I apply epoxy over an existing coating?
Answer: Yes, you can apply epoxy flooring over an existing coating as long as it is intact, clean, and adheres well to the concrete surface. However, it is recommended to remove any loose or peeling coating before proceeding.
2. Repairing Damages:
Inspect the floor for cracks or chips. Fill any visible holes using a concrete patching compound or epoxy filler. Smooth out the repaired areas with a trowel or putty knife and let them cure completely according to the manufacturer’s instructions.
FAQ: What if my garage floor has extensive cracks?
Answer: If your garage floor has significant cracks or unevenness, it is advisable to consult a professional contractor who specializes in concrete repairs before applying epoxy flooring. They can assess the condition of your floor and provide appropriate solutions.
II. Etching the Concrete Surface:
Etching is a crucial step that ensures proper adhesion between the epoxy coating and the concrete floor. It involves using an etching solution to create a rough texture, allowing the epoxy to penetrate and bond effectively.
1. Protective Measures:
Before etching, ensure you wear appropriate safety gear, including gloves, goggles, and a respirator, as the etching solution can be hazardous. Open windows or provide adequate ventilation in your garage to minimize fumes.
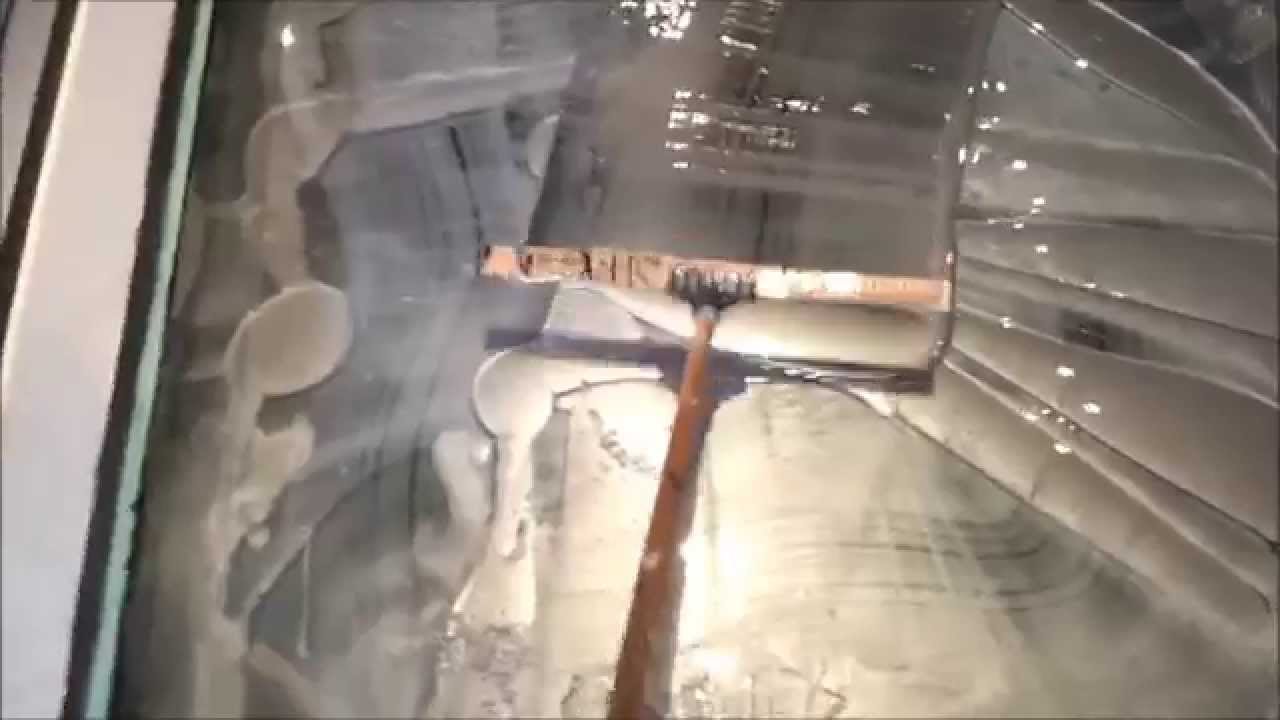
2. Mixing and Applying the Etching Solution:
Follow the manufacturer’s instructions to mix the etching solution with water in a suitable container. Pour the mixture onto the floor and distribute it evenly using a mop or scrub brush. Allow the solution to sit for the recommended time (usually 15-20 minutes) to allow proper chemical reaction.
3. Rinsing and Drying:
Thoroughly rinse the floor with clean water after the specified dwell time has elapsed. Use a squeegee or wet vacuum to remove excess water. Allow the floor to dry completely for at least 24 hours before proceeding.
FAQ: Can I skip the etching process?
Answer: While it is possible to apply epoxy without etching, it is highly discouraged as it significantly affects adhesion. Etching ensures better bonding between the epoxy coating and the concrete surface, increasing its longevity and durability.
III. Applying Primer:
Priming is an essential step that enhances adhesion and promotes uniform color distribution of your epoxy flooring system. Follow these guidelines for applying primer:
1. Choosing the Right Primer:
Select a high-quality epoxy primer suitable for your specific flooring system. Consider factors such as moisture resistance, Chemical resistance, and compatibility with the epoxy coating you plan to use. Consult the manufacturer’s recommendations for the best primer option.
2. Mixing and Applying the Primer:
Follow the manufacturer’s instructions to mix the primer components thoroughly. Use a roller or brush to apply the primer evenly onto the prepared concrete surface. Work in small sections to ensure full coverage and avoid streaks or missed spots. Allow the primer to dry according to the manufacturer’s instructions.
3. Sanding (Optional):
If desired, you can lightly sand the primed surface using a fine-grit sandpaper. This step helps create a smoother finish and improves adhesion for subsequent layers of epoxy coating.
FAQ: Can I skip priming before applying epoxy?
Answer: While it is possible to apply epoxy directly onto a clean and etched concrete surface, priming is highly recommended. Priming enhances adhesion, improves color distribution, and ensures a longer-lasting finish for your epoxy flooring system.
IV. Applying Epoxy Coating:
Now that your concrete floor is properly prepared, it’s time to apply the epoxy coating. Follow these steps for a successful application:
1. Mixing Epoxy Components:
Carefully follow the manufacturer’s instructions to mix the epoxy resin and hardener components together. Use a stir stick or drill with a mixing attachment to achieve a thorough blend. Avoid introducing air bubbles into the mixture during this process.
2. Applying Epoxy Coating:
Pour the mixed epoxy onto the primed concrete surface in small sections, working from one side of the garage to the other. Use a roller or brush to spread the epoxy evenly, ensuring full coverage. Consider using an epoxy squeegee for larger areas to achieve a smooth and level finish. Work quickly but carefully to avoid drips or uneven application.
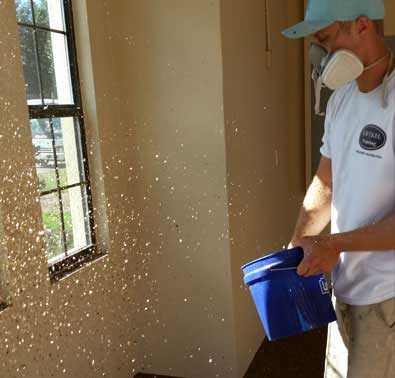
3. Adding Decorative Elements (Optional):
If desired, you can incorporate decorative elements such as colored flakes or metallic pigments into the wet epoxy coating. Sprinkle these materials onto the surface while the epoxy is still tacky. Follow up with a clear topcoat to seal and protect the decorative elements.
4. Allowing Cure Time:
After application, allow the epoxy coating to cure according to the manufacturer’s instructions. This typically involves keeping foot traffic and heavy objects off the floor for at least 24-48 hours. Avoid subjecting the newly coated surface to excessive moisture or temperature changes during this curing period.
FAQ: How many coats of epoxy do I need?
Answer: The number of epoxy coats required depends on your specific flooring system and desired results. In most cases, applying two coats of epoxy is recommended for optimal durability and coverage. However, consult the manufacturer’s instructions for your chosen epoxy product to determine the recommended number of coats.