Fixing Bottom Plate To Concrete Floor

Related Images about Fixing Bottom Plate To Concrete Floor
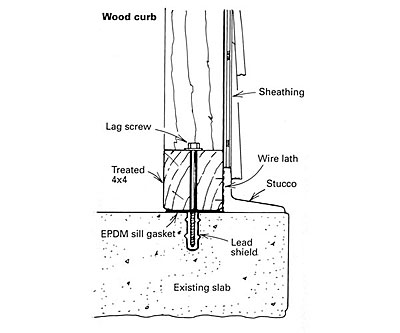
Foundations: original details BRANZ Renovate

Polished concrete flooring is a lovely design alternative for anyone seeking a distinct high gloss look to the floors of theirs. Decorative concrete floors is under the feet of yours nowadays wherever you go. With time, it could seem obvious that the shine or perhaps glitter on the concrete floors polishing is actually lowering. Concrete floors are far sturdier along with maintenance free.
Foundations: original details BRANZ Renovate

Today's concrete for floors comes in a wide range of unique colors, and it is possible to include in a number of other components and different stone to produce a polished concrete floor a point of attractiveness. Concrete flooring has great appeal for people keen on eco-friendly construction.
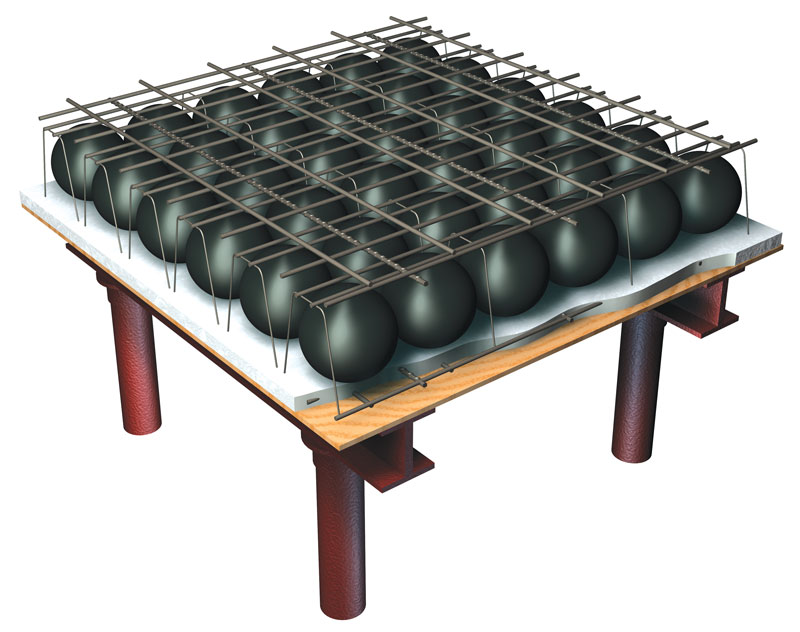
STRUCTURE magazine Fire Resistance of Flat Plate Voided Concrete Floor Systems
Hard concrete flooring has the potential to intensify sounds, however, this weakness may be rectified without difficulty by the inclusion of some judiciously placed rugs, runners or mats. In terms that are basic , floors which are polished generate use of concrete polishing that is a mechanically ground substance that is then polished to attain a certain appearance.
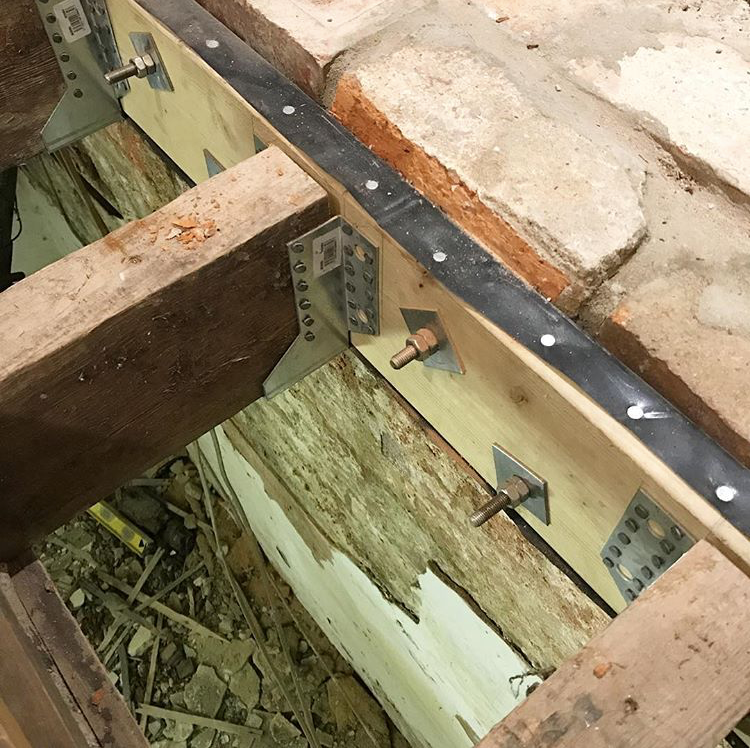
Kezzabeth.co.uk UK Home Renovation, Interiors and DIY Blog
Floors: original details BRANZ Renovate

Securing To Concrete Floor – Carpet Vidalondon

Attach Wood Plate To Concrete Floor – Carpet Vidalondon

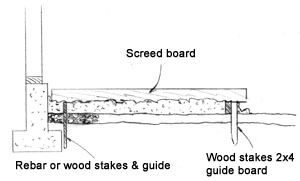
Pour a Concrete Floor – Extreme How To
Fasten bottom plate to floor or foundation? – DoItYourself.com Community Forums

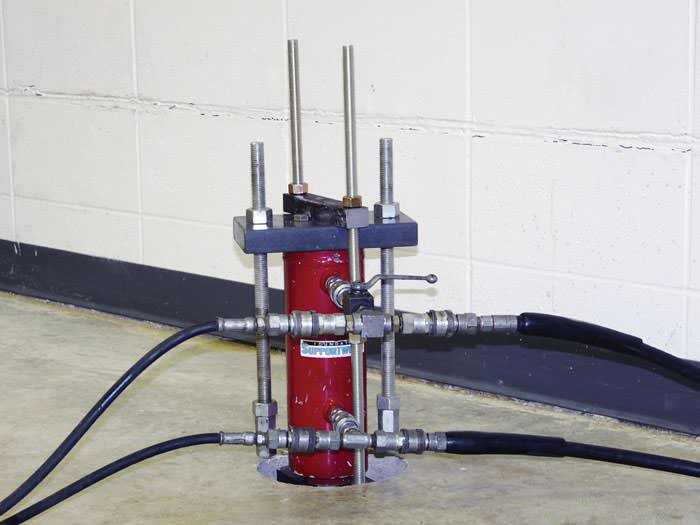
Floor Crack Repair San Francisco, San Jose, Sacramento
Building a wall on an existing slab – Fine Homebuilding
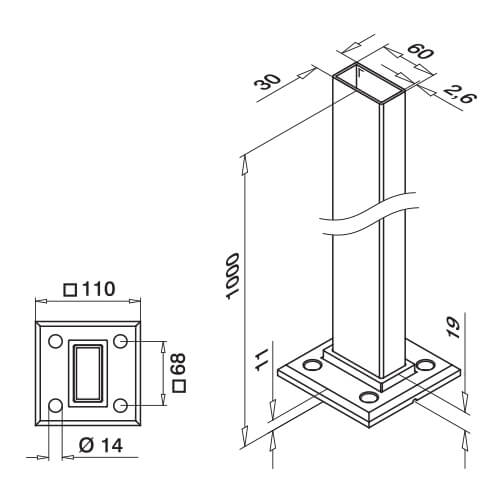
60×30 Baluster Post With Base S3i Group
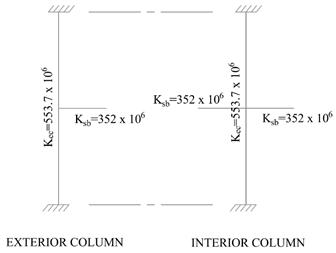
Two-Way Flat Plate Concrete Floor System Design
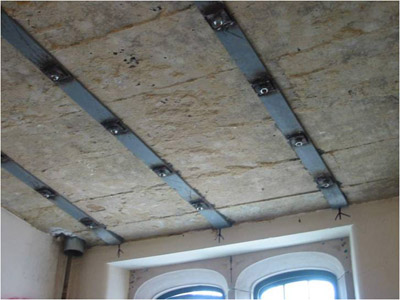
Renovations APPA
Related Posts:
- Interior Concrete Floor Paint Ideas
- Concrete Floors In Homes Cost
- Level Concrete Floor With Plywood
- Concrete Floor Construction For Underfloor Heating
- Stained Concrete Floors In Basement
- Polished Concrete Floor Crack Repair
- Concrete Floor With Insulation
- Acid Stained Concrete Floors Pictures
- Installing Underfloor Heating On Existing Concrete Floor
- How Much Is Concrete Flooring
Fixing Bottom Plate to Concrete Floor: A Comprehensive Guide
Introduction:
When it comes to constructing or renovating a building, one crucial step is fixing the bottom plate to the concrete floor. The bottom plate serves as the base for the entire structure, providing stability and support. Ensuring a secure and properly fixed bottom plate is essential to prevent any structural issues in the future. In this comprehensive guide, we will delve into the step-by-step process of fixing the bottom plate to a concrete floor, along with frequently asked questions and detailed answers.
1. Preparing the Concrete Floor:
Before fixing the bottom plate, it is crucial to prepare the concrete floor adequately. Begin by clearing any debris, dust, or loose particles from the surface. Thoroughly clean the area using a broom or vacuum cleaner. Next, inspect the concrete floor for cracks or unevenness. If any cracks are present, fill them with an appropriate concrete filler and allow it to dry completely. Use a leveling compound to rectify any unevenness in the surface.
FAQ: How long should I allow the concrete filler to dry before fixing the bottom plate?
Answer: The drying time of the concrete filler can vary depending on various factors such as temperature and humidity. Typically, it is recommended to wait at least 24 hours before proceeding with fixing the bottom plate.
2. Marking and Positioning:
Once the concrete floor is prepared, mark and determine the exact position where you intend to fix the bottom plate. Measure and mark this position along both sides of the wall using a tape measure and pencil. Additionally, ensure that all necessary anchor points are marked accurately.
FAQ: How far apart should I place anchor points when fixing a bottom plate?
Answer: The spacing between anchor points depends on several factors such as local building codes and load-bearing requirements. Typically, anchor points are placed at intervals of 16 inches (40 cm) on center.
3. Drilling Anchor Holes:
After marking the anchor points, it is time to drill holes into the concrete floor. Use a hammer drill with a masonry bit that matches the size of your anchor bolts. Start by positioning the drill at a 90-degree angle to the surface and apply steady pressure while drilling. Ensure that the holes are deep enough to accommodate the entire length of the anchor bolts.
FAQ: How do I know if I have drilled deep enough for the anchor bolts?
Answer: The depth of the anchor bolt holes should be approximately 1/4 inch (6 mm) deeper than the length of the anchor bolts. To check if you have drilled deep enough, insert an anchor bolt into the hole and ensure that it sits flush with the surface or slightly below.
4. Inserting Anchor Bolts:
Once all the anchor holes are drilled, clean them thoroughly to remove any debris or dust. Then, insert anchor bolts into each hole by hand until they are snugly fitted. Ensure that the threaded end of each bolt is protruding above the surface.
FAQ: Can I use adhesive instead of anchor bolts to fix the bottom plate?
Answer: While adhesive can be used in certain situations, using anchor bolts is generally recommended for a more secure and reliable fixing method. Adhesive alone may not provide sufficient strength and stability for supporting walls or structures.
5. Placing Bottom Plate:
With the anchor bolts in place, position your bottom plate on top of them. Ensure that it aligns perfectly with your marked position and wall layout. Press down firmly on the Bottom plate to secure it onto the anchor bolts. Use a level to ensure that the bottom plate is straight and level.
6. Securing Bottom Plate:
Once the bottom plate is in position, use a wrench to tighten the nuts on the anchor bolts. Make sure they are securely fastened to provide stability for the wall or structure.
FAQ: How many anchor bolts should I use for fixing the bottom plate?
Answer: The number of anchor bolts required depends on the length and load-bearing requirements of the wall or structure. As a general guideline, it is recommended to use at least one anchor bolt every 4 feet (1.2 meters) along the bottom plate.
7. Checking Alignment:
After securing the bottom plate, double-check its alignment using a level. Make any necessary adjustments to ensure that it is straight and level.
8. Allowing for Curing:
Once the bottom plate is fixed, allow it to cure according to the manufacturer’s instructions before proceeding with further construction or installation.
FAQ: How long does it take for the bottom plate to cure before continuing with construction?
Answer: The curing time can vary depending on factors such as temperature and humidity. It is best to consult the manufacturer’s instructions for specific curing times, but typically, it can take anywhere from 24 to 72 hours for the bottom plate to fully cure.
By following these steps and guidelines, you can successfully fix a bottom plate onto a concrete floor using anchor bolts. It is important to ensure that all safety precautions are taken and local building codes are followed during this process.