End Grain Wood Flooring DIY

Related Images about End Grain Wood Flooring DIY
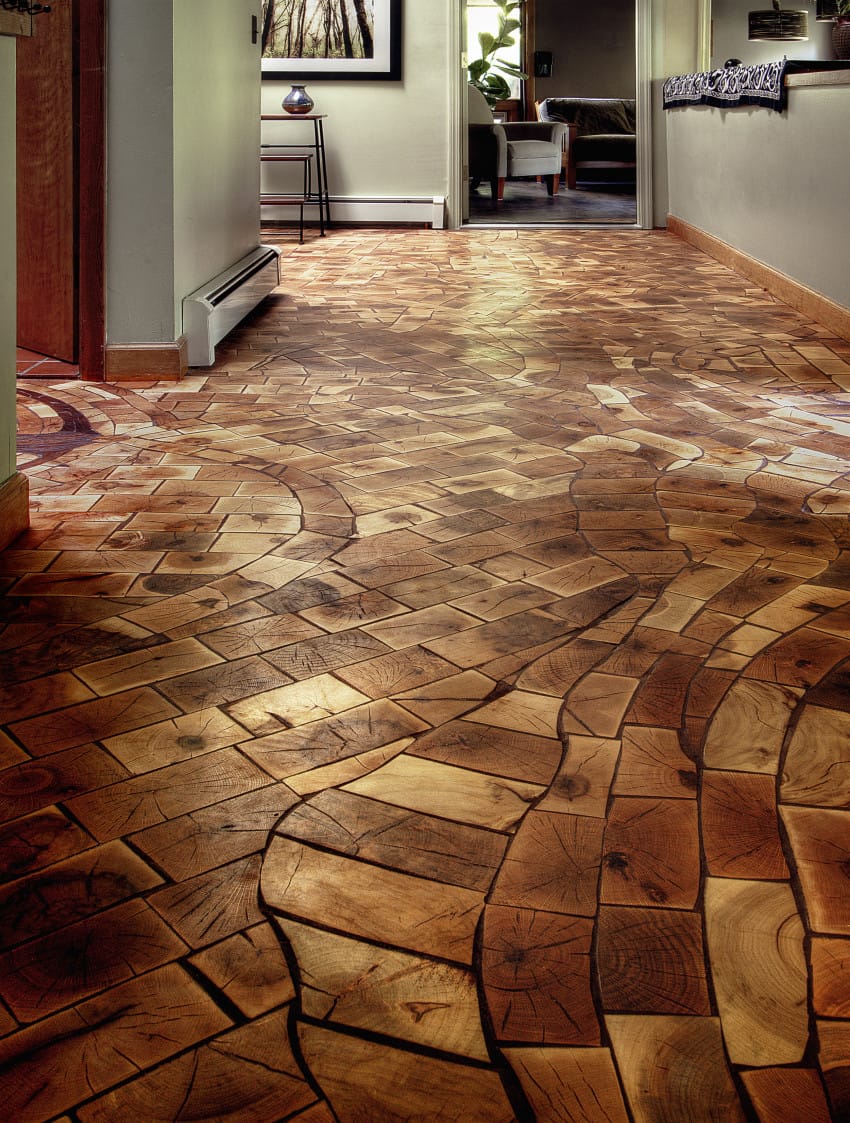
The Ends Of Your Timber Can Be Used To Create Incredible End Grain Floors – Useful Tips For Home
You are able to put in built wood flooring that is equally as gorgeous and lasts just so long as a great wood floor without the high cost as well as the high maintenance that difficult wood flooring can require. Today's laminate floor surfaces are made working with a photographic picture of tile, marble, or wood which is bonded to fiberboard, backed with melamine plastic as well as coated with light weight aluminum oxide.
Wood Floor of the Year 2014: Taking Center Stage – Hardwood Floors Magazine Diy hardwood

Prospective buyers look at numerous things which could affect their choice and a new engineered hardwood floor may be merely the point to seal the offer. Consumers also have to be conscientious about moving the area rugs of theirs and furniture periodically to avoid discolorations. Compare that to most hardwood trees and also you are going to see the gap. As the boards change to the brand new environment, they are going to expand or even contract accordingly.
Before & After: Cartolina’s End Grain Block Flooring – Design*Sponge

Almost any oak wood flooring can easily perk up the dullest searching area in addition to produce a certain atmosphere of luxury to your home. Generally there can be 100 nails or over in an older stud, each one of which should be carefully placed and removed. Wood flooring is a sustainable material that reduces the requirements on our ecosystem during its life-cycle.
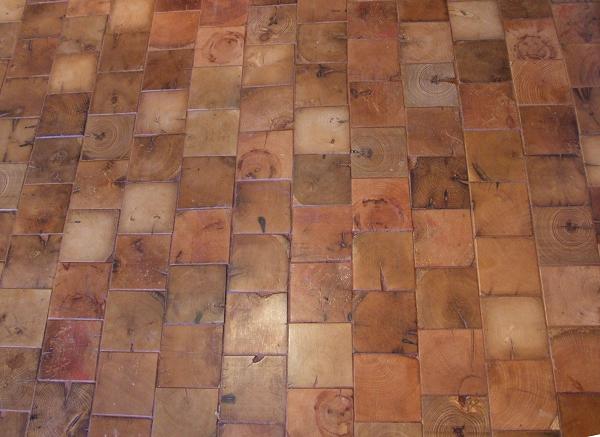
End Grain Wood Flooring Installation End grain flooring, Country house decor, Wood block flooring

End Grain Cobble Block Wood Tile Flooring Hometalk
Pin on home decor

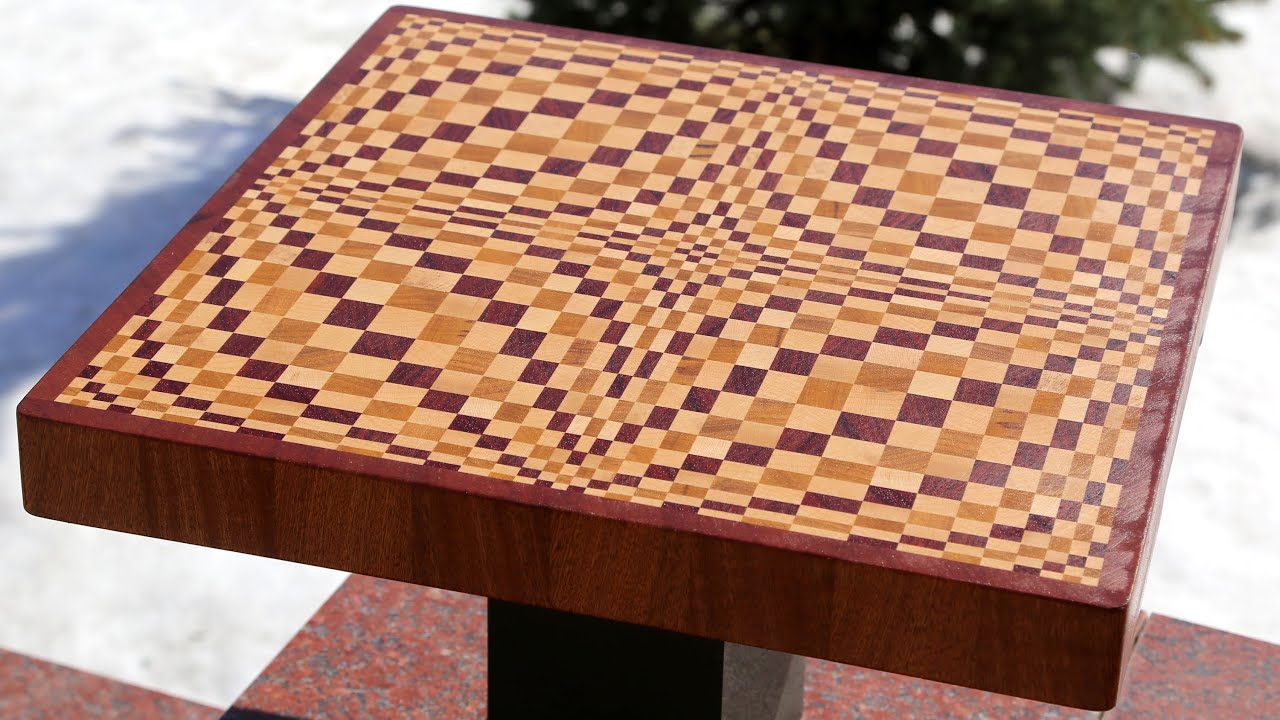
Making a "Wave" 3D end grain cutting board – YouTube
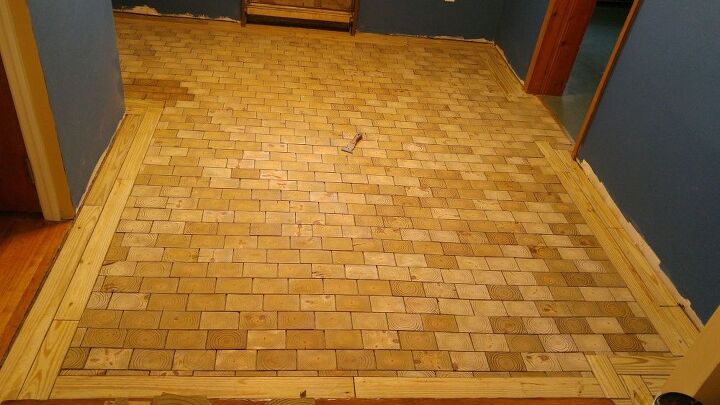
I Made an End Grain Wood Floor From Scratch and Saved Myself $4000! Hometalk
Log End Flooring Earthbag Building Blog

Installing End Grain Wood Flooring : Installation Of New 3 4 Oak Hardwood Flooring At My House
End grain flooring? : woodworking
Hubby n I made these floors..out of plywood n a torch! floor Pinterest Flooring, Home and

Built it Yourself: 12 Cord Wood Flooring Ideas – Top Inspirations

Kids Install End Grain Floor With One of Industry’s Best – Wood Floor Business Magazine

Related Posts:
- Wood Floor Modern Kitchen
- Wood Floor Garage Plans
- Real Wood Flooring In Kitchen
- Wood Floor Cork Underlayment
- Streak Free Wood Floor Cleaning
- Solid Wood Flooring White Washed Oak
- Engineered Wood Flooring Durability
- Wood Flooring Types Hardness
- Engineered Wood Flooring Formaldehyde Emission
- Wood Floors For Beach House
End Grain Wood Flooring DIY
End grain wood flooring is a timeless and classic look that adds character to any space. This type of flooring is made up of blocks of wood arranged in a checkerboard pattern, giving it an eye-catching appearance. While end grain wood flooring can often be expensive to install professionally, it’s actually quite easy to do the project yourself with some basic tools and supplies. In this article, we’ll walk you through the steps of installing end grain wood flooring in your home or office, including tips for prepping the area and laying down the pieces.
Prepping the Area for End Grain Wood Flooring
The first step in any DIY project is to make sure you have all the necessary materials and tools on hand. For end grain wood flooring, you’ll need:
– Hardwood blocks of varying sizes
– A circular saw
– Hammer
– Nails
– Sandpaper
– Polyurethane finish
Once you’ve gathered all the necessary materials, you’ll want to make sure your subfloor is prepared for installation. Start by sweeping away any dirt or debris from the area and then check to make sure there are no nails sticking out from the subfloor. If there are, use a hammer to flatten them down. Finally, vacuum up any remaining dust or dirt so that you have a smooth surface to work with.
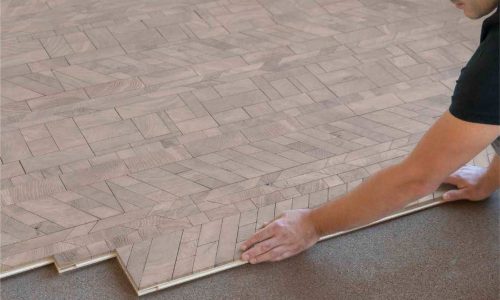
Laying Down End Grain Wood Flooring Blocks
Now that your subfloor is ready to go, it’s time to start laying down the blocks of hardwood. Start by measuring out your first row and then mark off where each block will go using a pencil or chalk line. You can use a combination of small and large blocks in your design – just make sure they are all even with one another when laid out on the marked lines. Once everything is in place, use a circular saw to cut each block so that they fit perfectly within the marked lines.
Next, begin nailing down each block one at a time using small nails that won’t be visible once the project is finished. Use a hammer to tap each nail into place until it is flush with the rest of the blocks. Continue this process until you have completed coverage of your entire subfloor area.
Sanding and Finishing Your End Grain Wood Flooring
After all your blocks are installed, it’s time to give them a good sanding so that they have a smooth finish before applying any polyurethane finish. Use sandpaper with grits ranging from 80-220 depending on how smooth you want your flooring to look after it’s finished. Start with 80 grit and move up as needed until you get the desired result – but be careful not to overdo it as too much sanding can damage the wood! Finally, apply two coats of polyurethane finish according to manufacturer instructions for added protection against scratches and wear-and-tear over time.
FAQs About End Grain Wood Flooring DIY Projects
Q: How long does an end grain wood floor installation take?
A: The amount of time needed for an end grain wood floor installation will vary depending on how large your space is and how intricate your design is. On average, however, most DIY projects should take around two days from start to finish.
Q: How much does an end grain wood floor installation cost?
A: The cost of an end grain wood floor installation will depend on the type of wood you choose and the size of your space. Generally speaking, however, most DIY projects should cost around $500 – $1,000 in materials.
What are the benefits of end grain wood flooring?
1. Durability: End grain wood flooring is extremely durable and can last for decades. The end grain orientation makes it resistant to wear and tear and moisture.2. Easy maintenance: End grain wood flooring is easy to clean and maintain. The end grain orientation makes it easier to sweep and mop without leaving scratches or dents.
3. Character: End grain wood flooring provides a unique aesthetic with its natural pattern that can be used as a focal point in any room. It also adds character and warmth to any space, making it a great choice for décor.
4. Eco-friendly: End grain wood flooring is made from sustainable sources, making it an environmentally friendly option that won’t deplete the planet’s resources.
5. Cost-effective: End grain wood flooring is relatively inexpensive compared to other types of hardwood floors, making it a great choice for budget-conscious homeowners.
What are the disadvantages of end grain wood flooring?
1. Expensive: End grain wood flooring is more expensive than other types of wood flooring due to the time-intensive manufacturing process.2. Difficult Installation: End grain wood flooring can be difficult to install due to its irregular shape and structure. This type of flooring requires special tools and installation techniques that require a skilled professional.
3. Prone to Damage: End grain wood flooring is more prone to dents, scratches, and damage compared to other types of wood flooring. It is not as hard or durable as other types of wood floors, so it requires more care and maintenance to keep it looking good.
4. Susceptible to Water Damage: End grain wood flooring is more susceptible than other types of wood flooring to water damage, such as warping, buckling, and discoloration. This type of flooring should be sealed for protection against moisture damage and spills.