Create Your Own Bathroom Floor Plan

Related Images about Create Your Own Bathroom Floor Plan
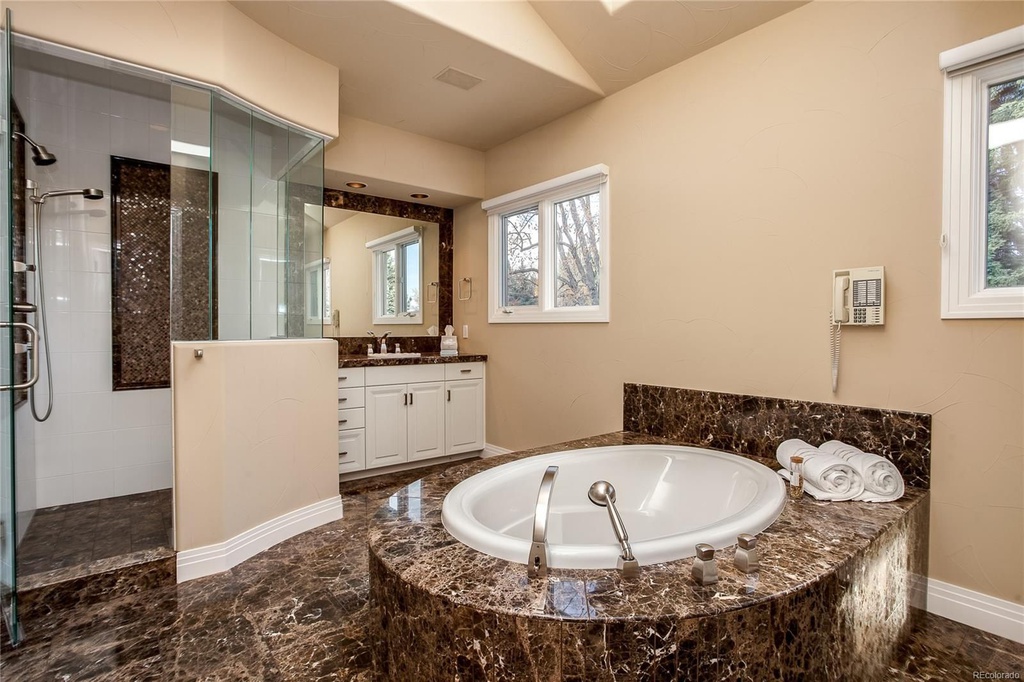
Bathroom Floor Plan – Style Within

This is an excellent choice that has been used since time immemorial by residence owners across the world. Bathroom vinyl tiles are manufactured in different shades & textures. You are able to also try things out with colored grout. These tiles could be arranged to develop patterns & themes. You can find prints of well-liked paintings or perhaps scenarist or perhaps plain geometric patterns.
Bathroom Design Ideas 2018 Pictures and Remodel Plans
The theory of a high-class wood floor in the bathroom may seem good, however, it's fraught with all sorts of problems. This's easy to understand as it only has the feet of yours to attend to, as opposed to sinks, toilets and hot shower enclosures that have essential specifications affecting their performance and use. You can find tiles with patterns created especially to form very good borders.
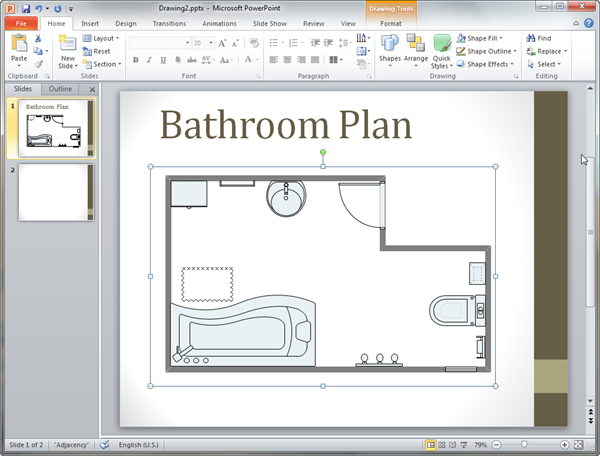
Bathroom Plan Templates for PowerPoint
to be able to lengthen the life of the floor of yours it must be fitted by a pro who is experienced in using the kind of floor you're using. These tiles are made of various materials as glass, metal, marble, pebbles etc. Pick tiles which blend well with the ambiance in the bathroom of yours. renovating or Designing a bathroom is a lot of work. You can likewise pick tiles with pages on them.
All things related to bathroom ideas such as tips and tricks for organizing bathroom, bathroom

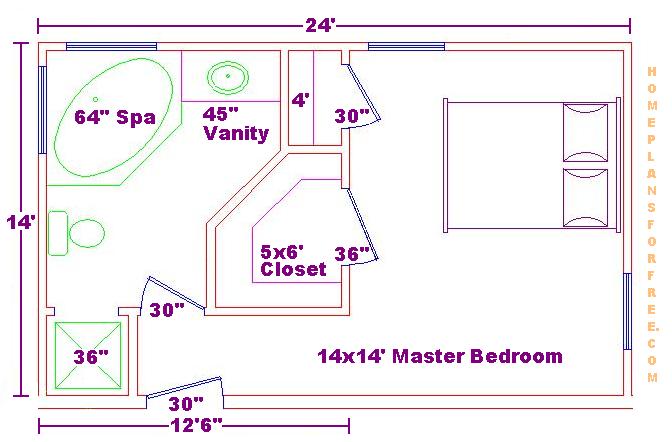
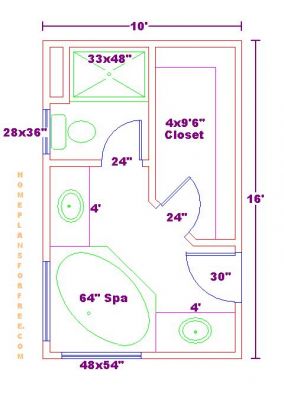
Free Bathroom Plan Design Ideas – Master Bathroom Plans/Master Bathroom 10×12 Floor Plan With

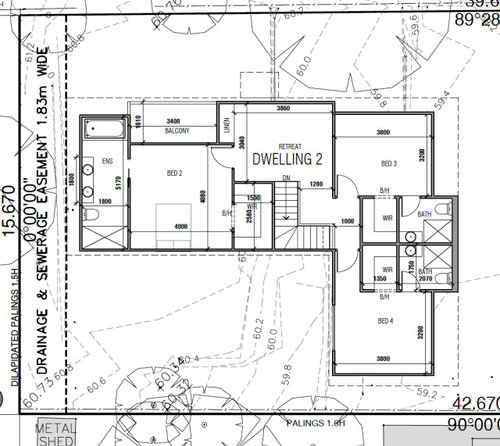
Help with bathroom/floor plan layout. Houzz AU
Free Bathroom Plan Design Ideas – Last additions/Small Master Bathroom Plans Picture

Help! Bathroom Floorplan Layout Ideas

1000+ images about plans on Pinterest Bathroom floor plans, Floor plans and Master bathrooms

Foundation Dezin & Decor: Bathroom plans & views.
Visualize Remodeling Floor Plansmillennial Living:Pplump
Classic with a Twist: DIY: Create your Own Art Gallery

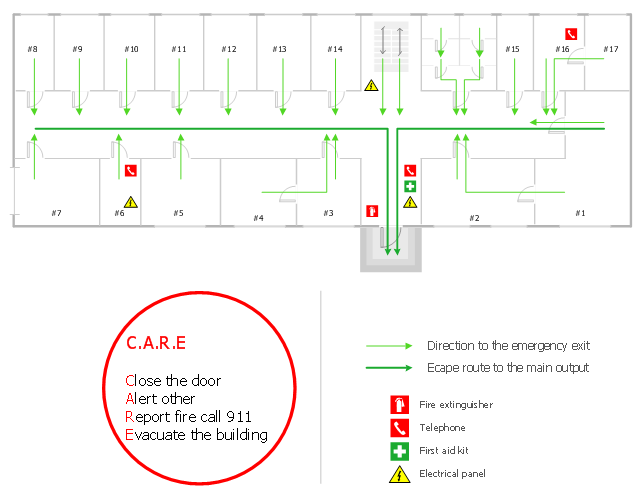
Evacuation plan Restaurant Floor Plans Software. Design your restaurant and Interior Design
Restaurant Floor Plan Maker Free Online App & Download

Related Posts:
- Bathroom Floor Tiles Price
- Cement Tile For Bathroom Floor
- Bathroom Floor Sky Painting
- Caught Me On The Bathroom Floor
- Heated Tile Floor Cost Per Square Foot
- Dirty Bathroom Floor
- Replace Bathroom Floor And Subfloor
- How To Make Bathroom Floor Waterproof
- Easy Bathroom Flooring Options
- Cheap Bathroom Floor Cabinets
Create Your Own Bathroom Floor Plan: A Comprehensive Guide
Creating your own bathroom floor plan is an exciting process that allows you to transform your bathroom into the exact space that you have always wanted. While it may seem intimidating at first, with the right plan and some guidance, you can create a beautiful space that you will love for years to come. In this comprehensive guide, we’ll explore all aspects of creating a bathroom floor plan, from start to finish.
Step 1: Measure the Room
The first step in creating your own bathroom floor plan is to measure the room. This will help you get an idea of the size and shape of your bathroom, as well as determine how much furniture and fixtures you can fit into it. It’s important to be accurate when measuring, as any mistakes now could cause problems later on. To measure accurately, use a tape measure and measure each wall from corner to corner. Also, measure any existing fixtures such as tubs, sinks, toilets and showers.
Step 2: Outline Your Layout
Once you have measured the room, it’s time to start outlining your layout. You can do this by drawing a simple diagram on graph paper or by using an online template. When outlining your layout, be sure to include any existing fixtures or furniture. Also consider where windows and doors are located and how they will affect the layout of the room. Once you have finished outlining your layout, you can move onto the next step.
Step 3: Choose Furniture and Fixtures
Now that you have outlined your layout, it’s time to choose furniture and fixtures for your bathroom. Consider what type of furniture you want – such as vanities, cabinets and shelves – as well as what type of fixtures you want – such as showers, tubs or toilets. Make sure to note down the measurements of each item so that you can make sure they will fit in your bathroom design when you move onto the next step.
Step 4: Calculate Placements
Once you have chosen all of your furniture and fixtures, it’s time to calculate where exactly they should be placed in your bathroom design. This is done by measuring out the distances between pieces of furniture and fixtures on your diagram or template. For example, if you are placing a vanity next to a toilet then measure out how far apart they should be and mark it on your diagram or template. This step helps ensure that everything fits together correctly before moving onto the actual installation phase of creating a bathroom floor plan.
Step 5: Install Furniture And Fixtures
The final step in creating a bathroom floor plan is installing all of your furniture and fixtures. This is usually done with the help of professionals who are trained in proper installation techniques for bathrooms. If possible, try to hire experienced professionals who will ensure that everything is installed properly so that there are no leaks or other issues down the line.
FAQs
Q1: How Do I Measure My Bathroom?
A1: To accurately measure a bathroom, use a tape measure and measure each wall from corner to corner. Also measure any existing fixtures such as tubs, sinks, toilets and showers so that they can be included in your floor plan.
Q2: How Do I Outline My Layout?
A2: Outlining your bathroom layout can be done by drawing a simple diagram on graph paper or by using an online template. When outlining your layout, be sure to include any existing furniture and fixtures and where windows and doors are located.
How do I design a bathroom layout?
1. Determine the overall size of the bathroom. Measure the length and width of the room.2. Select the location for the main elements of the bathroom. Place the sink, toilet, bathtub, and shower in their ideal locations based on your needs and preferences.
3. Choose the type of flooring that best suits your style. Popular options include ceramic tile, luxury vinyl tile, and wood flooring.
4. Install the fixtures and finishes that you’ve selected for your bathroom. This includes items such as faucets, lighting fixtures, mirrors, vanity cabinets, and countertops.
5. Design a storage plan for your bathroom if needed. Consider adding built-in shelving or cabinetry to maximize storage space in your bathroom layout.
6. Hang artwork or other decorative accents to personalize the space and complete your design.