Cork Flooring How To Install
Related Images about Cork Flooring How To Install
Pin on Ids

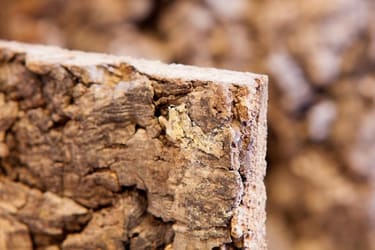
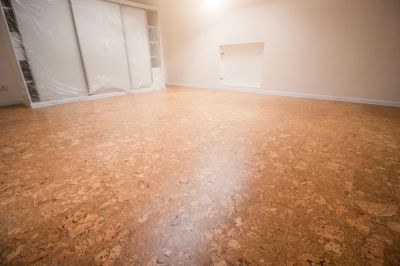
The flooring material of its is supplied by cork oak bark as well as its manufacturing procedures are actually powered by wind. This basically makes natural cork flooring a great solution for the kitchen, the place you invest a considerable amount of time standing. The cork oak tree grows mainly in Mediterranean areas and can live up to 200 years.
How to Install Cork Flooring – (Tips and Guidelines For Your DIY Project)

Overall, the cellular structure of cork is very heavy. Cork floors are still extremely popular, like most flooring choices, they both have pros and cons associated with them. Cork is a natural, eco-friendly flooring option for those who would like a greener home or who are dealing with allergies.
The Pros and Cons of Cork Flooring that You Should Know – HomesFeed
To find out if cork flooring is perfect for you, you might want to read customer reviews and testimonials on the web to check out if it would be ideal for your house. This particular flooring answer is also really easy to clean and maintain. These cells actually help to keep the atmosphere basic between the top and bottom and stop rapid temperature differences as hardwood or concert.
How to Install Cork Flooring DoItYourself.com
Cork Flooring Details and Tips

Flooring DoItYourself.com
Cork Tiles – Shauns Floors

Cork Flooring Installation & Repair Services in South Carolina
How to Install Natural Cork Flooring how-tos DIY
Whitewashed Andorra White Oak Raised Grain-click – Eco-Friendly Flooring

Best Floor Canada SPC Vinyl Flooring – TURTLE BAY – Hardwood Flooring in Toronto – Laminate
![]()
Is Nail down Installation The Best? Unique Wood Floor

Windridge Hickory by Mohawk: Hardwood Engineered

Laminate Floors: Mohawk Laminate Flooring – Rare Vintage – Fawn Chestnut

Related Posts:
- Cork Floor Paste Wax
- Cutting Cork Flooring Planks
- Cork Flooring Cons and Pros
- Basement Flooring Ideas Cork
- Cork Floor Cost Comparison
- Can You Stain Cork Floors
- Cork Flooring Per Square Foot
- Can Cork Flooring Be Installed Over Ceramic Tile
- Refinish Cork Floor Tiles
- Cork Floor Tiles Reviews
Cork Flooring: How To Install
Cork flooring has been gaining traction as a popular option for homeowners looking to update their interiors. This eco-friendly, durable material offers plenty of benefits and a unique look that can add a touch of luxury and sophistication to any room. However, before you can reap the rewards of cork flooring, you need to know how to install it properly. In this article, we will cover the basics of cork flooring installation, including the tools you will need, the steps involved, and some tips to make sure you get the best results.
Preparing Your Space for Installation
Before you begin your cork flooring installation, you need to make sure that your space is ready. Start by cleaning the floor thoroughly and removing any old carpeting or other flooring materials. If your subfloor is concrete, you will also need to check for signs of moisture before proceeding with installation. If there is any excessive moisture present, you should use a dehumidifier or ventilator to reduce the amount of moisture in the air before installing your cork flooring.
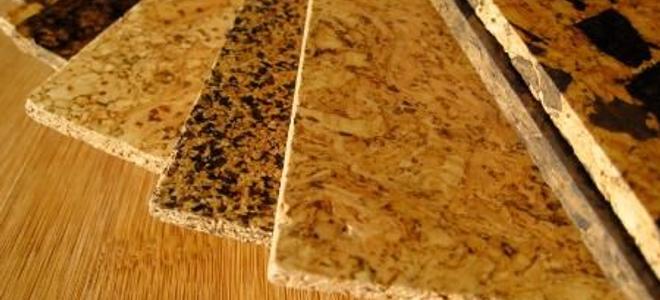
Choosing the Right Materials
Once your space is ready for installation, it’s time to choose the right materials for your project. You will need to purchase cork tiles or planks that are specifically designed for flooring applications. Depending on your budget and needs, there are plenty of options available ranging from basic unfinished cork tiles to pre-finished planks in various styles and colors. Make sure you select materials that are appropriate for the type of surface you are installing on and always check the manufacturer’s instructions before purchasing anything.
Gathering Your Tools
In addition to choosing the right materials, it’s important that you have all of the necessary tools on hand before beginning your installation project. The most essential tool is a good quality adhesive that is designed specifically for cork flooring. You may also need additional items such as a rubber mallet, a utility knife, trowels, spacers, a mop or sponge mop, and protective gloves or goggles depending on your situation.
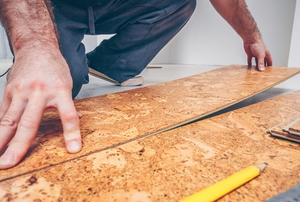
Beginning Your Installation
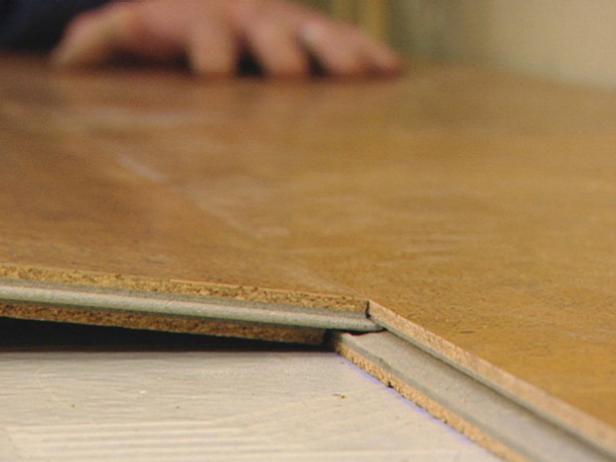
With all of your materials and tools gathered together, it’s time to begin your cork flooring installation project! Start by creating an outline for your layout using chalk lines so that you know where each plank or tile needs to go. Once this is done, begin installing from the center point outward using adhesive on each plank or tile before setting it into place. Use spacers between each plank or tile to ensure uniformity and even spacing throughout your entire installation process. Once all of your pieces are in place, allow them to sit overnight so that they can adhere properly before continuing with any further steps.
Finishing Touches
The next step in completing your cork flooring project is applying any finishing touches such as trim strips around doorways or other edges where necessary. You may also want to seal your tile or plank joints with a sealant in order to prevent water damage over time. After this step is complete, use a damp mop or sponge mop to clean up any excess adhesive residue from your new floors and allow them time to dry fully before returning furniture back into place .