Construction Of Concrete Floor
Related Images about Construction Of Concrete Floor
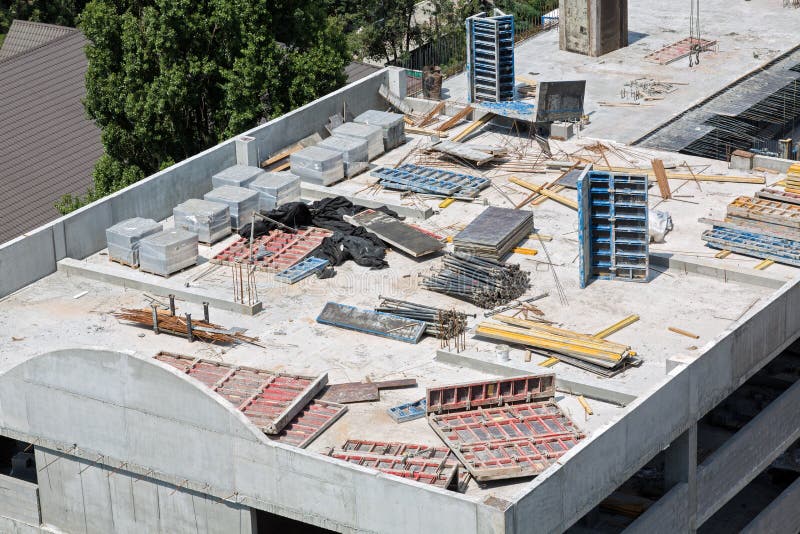
construction of a concrete floor
The polished floors are one of the best methods to preserve a suitable floors while inside keeping with' green' observance because concrete flooring doesn't call for inclusion of other raw materials or maybe substances, which would usually put a strain on the planet. Conversely, concrete pulls the heat coming from the sun in the winter months, thus your flooring remains warm.
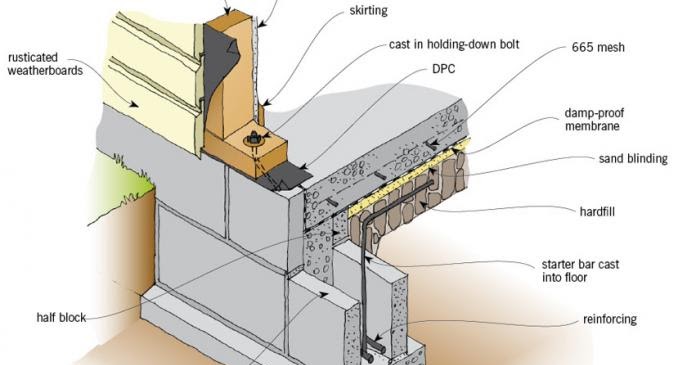
Concrete Floor Problems Building Science Corporation Construction details Pinterest

Polished concrete flooring is an excellent approach to preserve resources. Concrete floor takes some time to loosen up, but is incredibly economical at holding that heat in, which means the home of yours will remain hot on winter nights. Maintaining your concrete floor coating is very simple. Polished concrete floors can be really easy to keep and take care of.
Some useful construction tips to level a concrete floor – Construction Cost
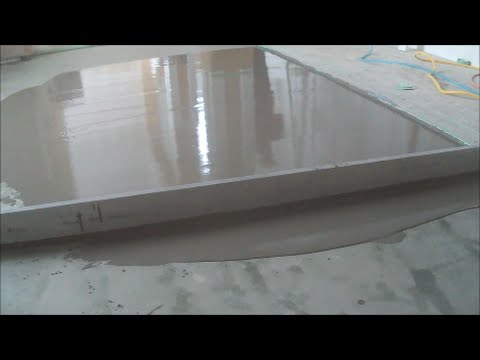
There are various areas where the concrete polishing is actually being used and many folks tend to favor the polished concrete floor due to all of the advantages which accrue to the proprietors of such floors. For that reason it will come as no surprise when you walk into a home which has concrete floor polishing which there are no cracks, leaks or damages on the outside.
Welcome Architects Concrete Floor Contractors Association of Canada

CONCRETE SIDEWALKS PHOTOS Gaddis & Sons, Inc.

Our Services – Part Build

The Fastest and Easiest Process of Building Curved Concrete Spiral Staircase – Top Inspirations

How To Install A Concrete Floor. Due to the fact that concrete floors… by Singh Concerete
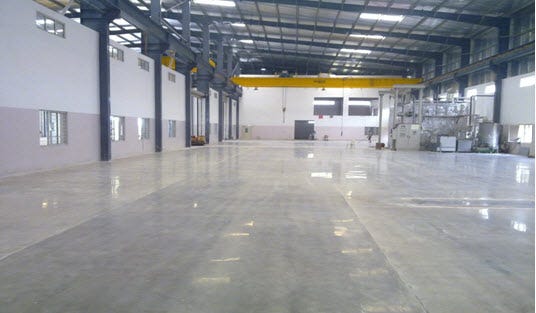
Concrete Floor System, Concrete Floors, Concrete Flooring India

Concrete Floors & Finishing

Job Log: Adding a Walkout Basement JLC Online Basement, Sitework, Coring and Cutting

Inspection Sandberg

Curbless limestone shower – Céramiques Hugo Sanchez

Contemporary Swiss Chalet by k_m Architektur Modern House Designs

Related Posts:
- Interior Concrete Floor Paint Ideas
- Concrete Floors In Homes Cost
- Level Concrete Floor With Plywood
- Concrete Floor Construction For Underfloor Heating
- Stained Concrete Floors In Basement
- Polished Concrete Floor Crack Repair
- Concrete Floor With Insulation
- Acid Stained Concrete Floors Pictures
- Installing Underfloor Heating On Existing Concrete Floor
- How Much Is Concrete Flooring
Construction of Concrete Floor: A Step-by-Step Guide
Concrete is a popular material for flooring due to its durability and versatility. Constructing a concrete floor involves several steps, from preparing the subfloor to adding a sealant. This step-by-step guide will help you create a concrete floor that will last for years to come.
Preparation
Before beginning any construction project, it is important to prepare the area. This includes clearing out any debris and inspecting the subfloor for damage or other issues. If there are any cracks or moisture, it must be addressed before starting the construction process. Once this is done, it is time to begin building the concrete floor.
Formwork
Formwork is a temporary structure that is used to support the concrete during installation. It can be made of plywood, steel, or aluminum and should be secured firmly in place. The formwork will also provide support when applying the concrete and must be level and sturdy enough to handle the load of the concrete.
Mixing Concrete
The next step in constructing a concrete floor is mixing the concrete. Depending on the size of the project, this can be done by hand or with an electric mixer. When mixing by hand, it is important to use the right ratio of cement, sand, and water in order to achieve optimal strength and performance. For larger projects, an electric mixer can help ensure that all ingredients are thoroughly mixed together.
Pouring Concrete
Once the concrete is mixed, it can be poured into the formwork. As with mixing, pouring can be done by hand or with an electric mixer depending on the size of the project. It is important to ensure that all corners are filled and that there are no air pockets in order to achieve an even surface. After pouring, it is important to smooth out any bumps or ridges with a trowel in order for them to properly set up during curing.
Curing
Once all of the concrete has been poured and smoothed out, it needs to cure before it can be used. This typically takes at least 24 hours but may take longer depending on temperature and humidity levels in the area where it is being installed. During this time, it is important not to walk on or disturb the concrete in any way in order for it to properly cure as intended.
Finishing Touches
Once curing has completed, you can begin adding finishing touches such as edging and sealants. Edging provides a decorative touch while also helping protect against water damage and staining from spills and foot traffic. A sealant should also be applied in order to give extra protection against moisture damage and staining from liquids and dirt buildup over time.
FAQs about Construction of Concrete Floor 1) How long does it take to construct a concrete floor?
The time needed for construction depends on many factors including size of project, type of formwork used, temperature and humidity levels in the area where it is being installed, etc., but typically takes at least 24 Hours to complete.
2) What materials are needed to construct a concrete floor?
Materials needed for the construction of a concrete floor include formwork, cement, sand, water, an electric mixer (if needed), and edging and sealants for finishing touches.
What is the process of constructing a concrete floor?
1. Prepare the Subgrade: The first step in constructing a concrete floor is to prepare the subgrade, which is the surface below the concrete slab. The subgrade should be leveled, free of debris and compaction, and well-drained.2. Establish Slab Layout: After preparing the subgrade, the layout of the slab should be established with string lines and stakes. This will help ensure that the slab is level and square when finished.
3. Install Rebar Grid: Next, a rebar grid should be installed to reinforce the slab and increase its strength. This grid should be tied together with wire ties and placed in a pattern that follows the layout of the slab.
4. Place Wire Mesh: After installing the rebar grid, a wire mesh should be placed on top of it for additional reinforcement.
5. Pour Concrete Slab: Finally, concrete can be poured onto the slab using a concrete pump or wheelbarrow. The concrete should be poured evenly and spread out with a trowel or screed board until all areas are filled in and level.
6. Cure Concrete Slab: After pouring the slab, it should be left to cure for at least 24 hours before any activity is done on it. During this time, it is important to keep it moist by covering it with plastic sheeting or damp burlap sacks to prevent cracking due to rapid drying out or shrinkage.
7. Finishing Touches: Once curing has been completed, finishing touches such as edging and sealants can be added to the concrete floor. Edging provides a decorative touch while also helping protect against water damage and staining from spills and foot traffic. A sealant should also be applied in order to give extra protection against moisture damage and staining from liquids and dirt buildup over time.