Ceramic Wood Tile Kitchen Floor

Related Images about Ceramic Wood Tile Kitchen Floor
Pattern Floor Wood Look Living Room Wooden Vitrified Tile Porcelain Thin Tile – Buy Porcelain
Naturally, it has to be durable therefore it is able to stand the rigors of daily use and tear, as well as being easily cleaned. The value of kitchen area flooring is usually ignored in relation to boosting the look and also the real estate worth of the home of yours. Kitchen flooring is sometimes something we take for granted.
Amazing Distressed Wood Looking Tile

It’s not just because of design and also the decor of the home of yours that you’ve to consider using kitchen area floor tiles for the floor of yours but in addition you’re looking at durability and toughness in the sense that your floor can take the spills as well as splashes which could happen frequently in a hectic kitchen.
The Pros & Cons Of Ceramic Flooring For Your Kitchen

The sort of stone you decide on will impact the size, shape and cost of the stones. If the preference of yours is toward the less-familiar options, there is cork, wood, and stone. There’s a chance you’re wondering about the kind of flooring to put in place for your kitchen, to create the house you have always dreamt of. It’s very durable as well as easy to maintain along with clean.
Image result for pebble tile as transition between tile and wood Wood tile floors, Wood tile

Let’s see three dreamy kitchen floor ideas for every budget. Tiles, vinyl plank flooring and

Ceramic Kitchen Floor Tile – Help Ceramic Tile Cracks On My Kitchen Floor / There are a lot of

The low-cost kitchen make-over repainting the wood floor white after we tear-out the tiles.

Gray Wood Tile Floor No3lcd6n8grey Flexible Grout Grey Shower Ideas Grey wood tile, Gray wood

Is there any floor more important than your kitchen floor? – Floor Sellers
white-tile-kitchen-floor

Blog – Wooden Tiles – A Piece of Esthetic Excellence

30 Practical And Cool-Looking Kitchen Flooring Ideas – DigsDigs
Tile and wood floors Brewster Cape Cod :: Appropriate Home Design

Related Posts:
- What Is The Most Desirable Kitchen Floor Plan
- How To Lay Out A Kitchen Floor Plan
- Best Hardwood Floor Finish For Kitchen
- Wickes Kitchen Floor Tiles
- Kitchen Floor Replacement Options
- 20 X 10 Kitchen Floor Plans
- Kitchen Floor Plans By Size
- Kitchen Floor Storage Cabinets
- Kitchen Cabinets Flooring And Countertops
- Bamboo Kitchen Flooring Ideas
Ceramic Wood Tile Kitchen Floor: The Perfect Blend of Durability and Style
Introduction:
When it comes to kitchen flooring, homeowners are often faced with the difficult decision of choosing between aesthetics and practicality. However, with ceramic wood tile kitchen floors, you no longer have to compromise on either aspect. This innovative flooring option combines the timeless beauty of wood with the durability and low maintenance requirements of ceramic tiles. In this article, we will delve into the various aspects of ceramic wood tile kitchen floors, exploring their benefits, installation process, maintenance tips, and frequently asked questions.
Benefits of Ceramic Wood Tile Kitchen Floors:
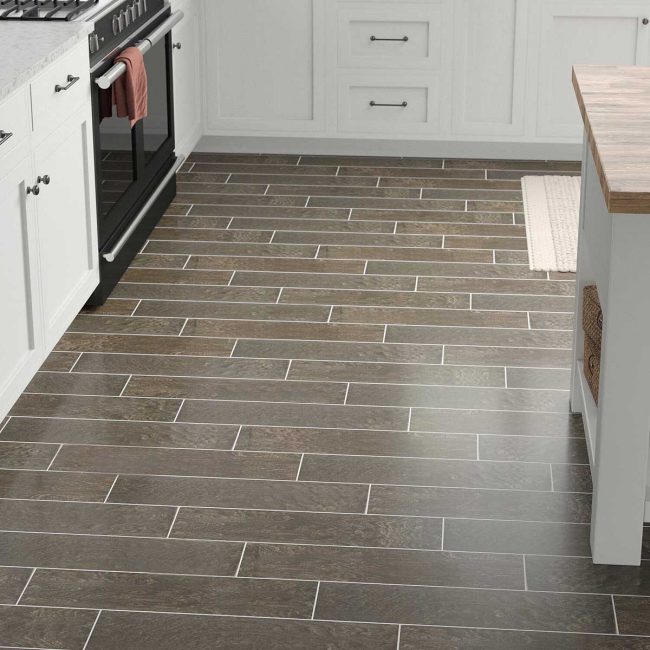
1. Durability: One of the key advantages of ceramic wood tile kitchen floors is their exceptional durability. Unlike traditional hardwood floors that are susceptible to scratches, dents, and moisture damage, ceramic tiles offer superior resistance to wear and tear. They can withstand heavy foot traffic, making them ideal for busy kitchens.
2. Water Resistance: Kitchens are prone to spills and splashes, which can cause significant damage to certain types of flooring materials. Ceramic wood tiles are inherently water-resistant, making them an excellent choice for kitchens where accidents are likely to occur. Whether it’s a spilled glass of juice or a splash from the sink, these tiles can handle it all without warping or staining.
3. Low Maintenance: Ceramic wood tile kitchen floors are incredibly low maintenance compared to natural wood floors. They do not require periodic sanding, staining, or sealing like hardwood floors do. Regular sweeping and occasional mopping with a mild detergent solution are sufficient to keep them looking pristine.
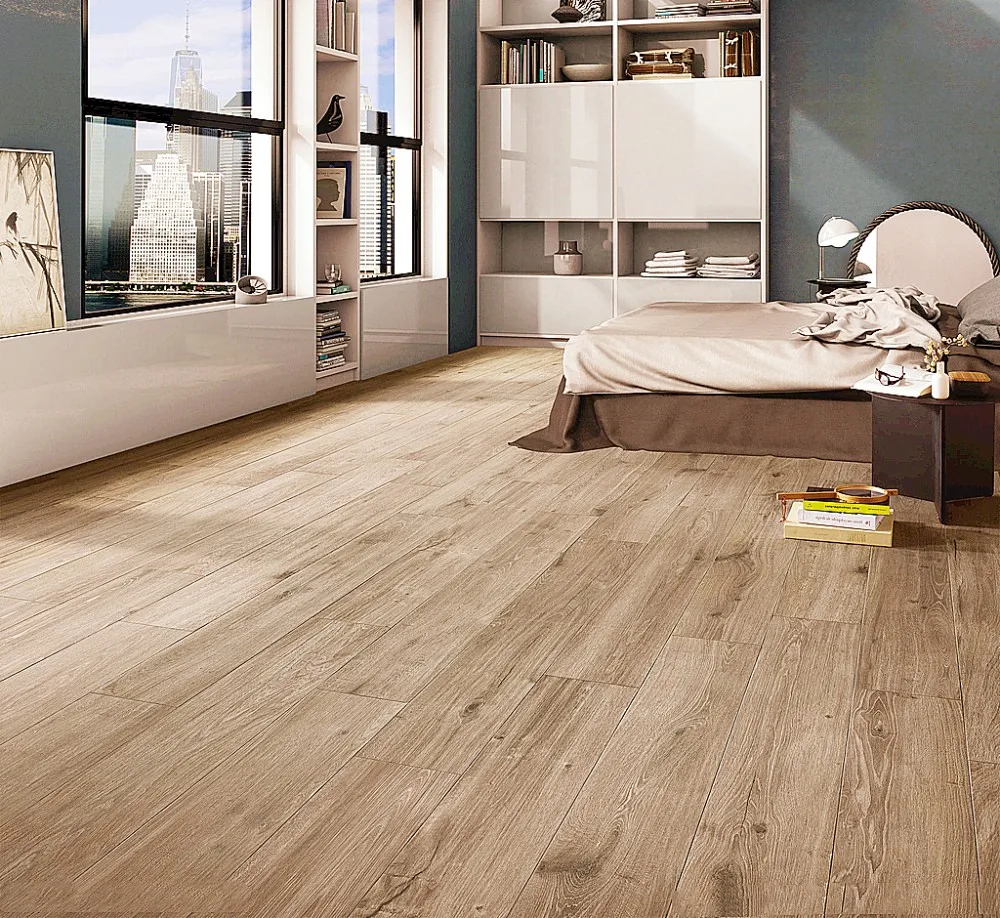
4. Design Versatility: With ceramic wood tile kitchen floors, you can enjoy the warmth and elegance of hardwood while having access to a wide range of design options. These tiles come in various colors, patterns, and textures that mimic the look and feel of different wood species. From classic oak to exotic teak, there is a ceramic wood tile to suit every kitchen style and personal preference.
Installation of Ceramic Wood Tile Kitchen Floors:
Installing ceramic wood tile in your kitchen requires careful planning and execution. Here is a step-by-step guide to help you navigate the installation process:
1. Prepare the Subfloor: Before installing ceramic wood tiles, it is crucial to ensure that the subfloor is clean, level, and free from any cracks or imperfections. If necessary, repair or replace damaged areas to create a smooth surface for tile installation.
2. Measure and Plan: Measure your kitchen space accurately to determine the number of tiles you will need. It is advisable to purchase an extra 5-10% of tiles to account for any breakage or future replacements.
3. Lay Out the Tiles: Start by dry-laying the tiles without adhesive to determine the best layout pattern and make any necessary adjustments. This step helps you visualize the final result and ensures a seamless installation.
4. Apply Adhesive: Once you have finalized the layout, begin applying thin-set mortar or adhesive using a notched trowel. Work in small sections to prevent the mortar from drying out before you can lay the tiles.
5. Install the Tiles: Carefully place each tile onto the adhesive, pressing it firmly to ensure proper adhesion. Use tile spacers to maintain consistent grout lines between each tile. Repeat this process until all tiles are installed.
6. Allow Drying Time: After completing the installation, allow sufficient time for the adhesive to dry before moving on to grouting. Refer to the manufacturer’s instructions For the recommended drying time, as it may vary depending on the type of adhesive used.
7. Grout the Tiles: Once the adhesive is fully dry, mix the grout according to the manufacturer’s instructions. Apply the grout using a grout float, pressing it into the spaces between the tiles at a diagonal angle. Remove any excess grout with a damp sponge, and let it cure for the recommended time.
8. Seal the Grout: To protect the grout from stains and moisture, apply a grout sealer once it has fully cured. Follow the manufacturer’s instructions for application and drying time.
9. Clean and Maintain: After sealing the grout, clean any remaining residue or haze from the tiles using a mild detergent solution and a soft cloth or mop. Regularly sweep and mop your ceramic wood tile kitchen floor to keep it looking its best.
By following these steps, you can successfully install ceramic wood tile in your kitchen and enjoy its many benefits for years to come. Remember to take proper care of your floor to maintain its beauty and durability over time. – Prepare the subfloor by ensuring it is clean, level, and free from any cracks or imperfections
– Measure your kitchen space accurately and purchase an extra 5-10% of tiles for breakage or future replacements
– Dry-lay the tiles without adhesive to determine the best layout pattern and make adjustments if needed
– Apply thin-set mortar or adhesive using a notched trowel in small sections
– Carefully place each tile onto the adhesive, pressing firmly for proper adhesion and use tile spacers for consistent grout lines
– Allow sufficient time for the adhesive to dry before moving on to grouting
– Mix the grout according to manufacturer’s instructions and apply using a grout float at a diagonal angle
– Remove excess grout with a damp sponge and let it cure for recommended time
– Apply a grout sealer once fully cured to protect against stains and moisture
– Clean any remaining residue or haze with a mild detergent solution and regular maintenance of sweeping and mopping.