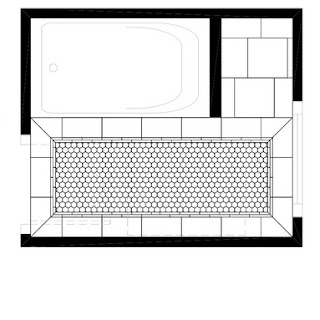
Bathroom Floor Tile Layout 12×24

Related Images about Bathroom Floor Tile Layout 12×24
Bathroom floor tiles, Bathroom remodel master, Simple bathroom designs

Once you get past looks, durability, other commonalities and cost, you need to think about one thing that no other area of your home has (except the basement) – drinking water. The budget range also varies. They also deliver great grip and stop one from slipping. One other good plan is usually to arbitrarily intersperse brightly colored tiles on a white colored tiled floor.
SKYBRIDGE 12X24 BROWN FLOOR TILE, INSTALLED BRICK JOINT Tile floor, Brown tile floor, Floor

Has your bath room flooring seen better days? Mosaic tiles are manufactured by using glass, used tiles, pebbles etc and after that add color and texture to the bathroom. You will find many contemporary choices – including laminate floors and engineered wood flooring surfaces – that allow you to enjoy the appearance of classic materials without all of the issues.
12 x 24 tile two color herringbone pattern – Google Search 12×24 tile, Herringbone tile, 12×24

Laminate floors for the bathroom are amazingly a better option over carpets & solid hardwood-made floors. Right now there are 3 issues that your bathroom flooring faces which the flooring in other areas of the home of yours doesn’t have to brace up for – clean water, weather extremes as well as humidity. Typically different types of floor tiles are combined in a single mesh to provide you with a diverse mosaic tile.
12×24 tile shower with river rock pan. Trident Tile and Stone Design Studio Shower tile, 12×24

DIY tips for small bathroom floor tile layout. How to draw square layout lines, make adjustments

Bathroom tile layout (with pics) – DoItYourself.com Community Forums

Master tile 12×24 70/30 Floor tile patterns layout, 12×24 tile, Tile patterns

Small Bathroom Design Ideas – Rambling Renovators
Offset Pattern for 12×24 Tile Floors 12×24 tile floor, 12×24 tile, Tile floor

How To Layout Bathroom Tile in 7 Easy Steps – St. Thomas Interior Designer
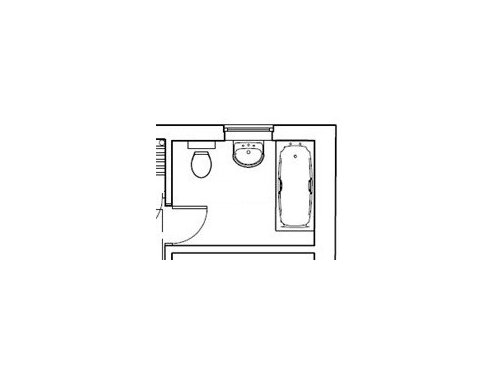
Bathroom layout / tiles Houzz UK
Tile Layout Design Dilemmas ImprovementCenter.com

Southern Style Bathroom Design Plan HLL Interiors

QUESTION OF THE WEEK: “WHAT ABOUT TILE INSTALLATION?” — Mary Anne Smiley Interiors LLC

Related Posts:
- Bathroom Floor Tiles Price
- Cement Tile For Bathroom Floor
- Bathroom Floor Sky Painting
- Caught Me On The Bathroom Floor
- Heated Tile Floor Cost Per Square Foot
- Dirty Bathroom Floor
- Replace Bathroom Floor And Subfloor
- How To Make Bathroom Floor Waterproof
- Easy Bathroom Flooring Options
- Cheap Bathroom Floor Cabinets
When it comes to designing a bathroom, one of the most important elements to consider is the floor tile layout. The layout of your bathroom floor tiles can have a significant impact on the overall look and feel of the space. One popular tile size that is commonly used in bathrooms is the 12×24 inch tile. In this article, we will explore various ways to lay out 12×24 inch tiles in your bathroom floor, as well as provide some tips and tricks for achieving a professional-looking finish.
Choosing the Right Tile Pattern
The first step in creating a stunning bathroom floor with 12×24 inch tiles is to choose the right tile pattern. There are several popular patterns that work well with this size tile, including straight lay, herringbone, and diagonal. Each pattern offers a unique look and can help to enhance the overall design of your bathroom.
– Straight Lay: The straight lay pattern is one of the most common and straightforward ways to lay 12×24 inch tiles. Simply align each tile in a straight line, either horizontally or vertically, depending on your preference. This pattern works well in both small and large bathrooms and creates a clean, modern look.
FAQs:
Q: Is the straight lay pattern suitable for small bathrooms?
A: Yes, the straight lay pattern can work well in small bathrooms as it helps to create an illusion of space by elongating the room.
– Herringbone: The herringbone pattern involves laying the tiles at a 45-degree angle to create a zigzag effect. This pattern adds visual interest and dimension to your bathroom floor and works particularly well with larger tiles like 12×24 inches.
FAQs:
Q: Is herringbone pattern difficult to install?
A: While the herringbone pattern may require more precision during installation, it can be achieved with careful planning and attention to detail.
– Diagonal: The diagonal pattern involves laying the tiles on a diagonal angle rather than straight or parallel to the walls. This pattern can help to make a small bathroom feel larger by drawing the eye across the room.
FAQs:
Q: Does diagonal pattern waste more tiles?
A: The diagonal pattern may result in more waste due to cutting tiles at an angle, but the unique look it creates can be worth the extra effort.
Tips for Achieving a Professional Finish
Regardless of which tile pattern you choose for your bathroom floor, there are several tips that can help you achieve a professional finish. These include:
1. Proper Planning: Before starting any tile installation project, it is essential to carefully plan out your layout to ensure that everything fits correctly and looks cohesive. Consider using tile spacers to maintain even grout lines and spacing between tiles.
2. Quality Materials: Invest in high-quality materials, including adhesive, grout, and sealant, to ensure that your bathroom floor stands up to daily wear and tear. Choose products that are specifically designed for use with large format tiles like 12×24 inches.
3. Cutting Tiles: When cutting tiles for corners or edges, be sure to measure twice and cut once to avoid costly mistakes. Use a wet saw or tile cutter for precise cuts and wear appropriate safety gear such as goggles and gloves.
4. Grout Color: Selecting the right grout color can make a big difference in the final look of your bathroom floor. Consider using a contrasting grout color to highlight the individual tiles or opt for a matching color for a seamless finish.
5. Sealing : After the grout has fully cured, be sure to seal your tiles to protect them from moisture and stains. Follow the manufacturer’s instructions for the specific type of sealer you are using, and reapply as necessary to maintain the integrity of your bathroom floor.
By following these tips and choosing a tile pattern that suits your personal style and bathroom size, you can achieve a professional finish that will enhance the overall aesthetic of your space. Whether you opt for a classic straight lay, eye-catching herringbone, or unique diagonal pattern, your bathroom floor is sure to make a statement and stand the test of time. 6. Maintenance: Regular cleaning and maintenance of your bathroom floor tiles are essential to keep them looking their best. Use a mild detergent and water solution to clean the tiles regularly, and avoid using harsh chemicals that can damage the finish. Additionally, consider resealing your tiles periodically to maintain their appearance and protect them from wear and tear.
7. Professional Installation: If you are unsure about installing large format tiles or intricate patterns yourself, consider hiring a professional tile installer. They have the expertise and tools necessary to ensure a seamless and professional finish, saving you time and potential mistakes.
8. Consider Lighting: The lighting in your bathroom can have a significant impact on how your tile pattern looks. Consider natural lighting sources as well as artificial lighting when choosing your tile pattern to ensure that it complements the overall design of your space.
By incorporating these tips into your bathroom tile installation project, you can achieve a professional finish that enhances the aesthetic appeal and functionality of your space. Whether you choose a classic layout or a more intricate pattern, your bathroom floor will become a focal point that adds value and style to your home.